
Easy Free Crochet Baby Socks Pattern Full of Sweetness
Treasure every tiny moment with this Free Crochet Baby Socks Pattern and enjoy making lovely socks for babies with care and love.
Tiny handmade socks can make every baby look even more adorable. Free Crochet Baby Socks Pattern is a lovely project that helps you create soft and cozy socks for little feet. It is simple to follow and gives you a beautiful result that parents and babies will both enjoy. These tiny socks look sweet, feel gentle, and bring a warm handmade touch to every outfit. These baby socks are made to keep little feet warm while also looking cute. Their soft shape fits tiny feet comfortably, and the finished design looks neat and charming. You can make them in bright colors, soft pastel shades, or your favorite yarn colors to match different baby clothes. Handmade, soft, and comfortable are the best words to describe this lovely project.
Free Crochet Baby Socks Pattern for Crib Side Cuteness

This pattern is a wonderful choice for beginners because it uses easy stitches and grows quickly. You can finish a pair in a short time, making it a fun project for a relaxing afternoon. These socks are also perfect for baby showers, welcome home gifts, birthday presents, memory boxes, and special family keepsakes. Every pair is made with care, making it even more meaningful.
They are easy to carry while traveling, simple to store, and wonderful to give as thoughtful gifts. Their tiny size also makes them a great way to use leftover yarn without wasting any material. Cute, practical, and gift worthy make these socks a favorite project for many crochet lovers.
If you enjoy making beautiful baby items, this pattern is a great place to begin. Every stitch creates something warm, useful, and full of love. These tiny socks will bring smiles to parents, comfort to babies, and joy to everyone who enjoys creating beautiful handmade treasures.
Crochet Baby Socks Pattern
Materials Required
- Yarn:
- Baby yarn or cotton blend: For this project, choose a blend containing around 55-60% cotton. Cotton prevents pilling and provides a soft texture suitable for delicate baby skin.
- Optionally, two complementary colors (e.g., gray and navy blue).
- Crochet Hook:
- 2.5 mm hook: This is ideal for lightweight yarn.
- Adjust the hook size if using thicker or finer yarn.
- Other Supplies:
- Tapestry Needle: For weaving in ends and seam finishing.
- Scissors: For trimming yarn neatly.
Gauge
For sizing reference:
- With a 2.5 mm hook, the gauge is approximately 16 double crochets (dc) per round in the sock's central part.
- Adjust your tension by loosening or tightening stitches.
Finished Size
- Approximate Measurements:
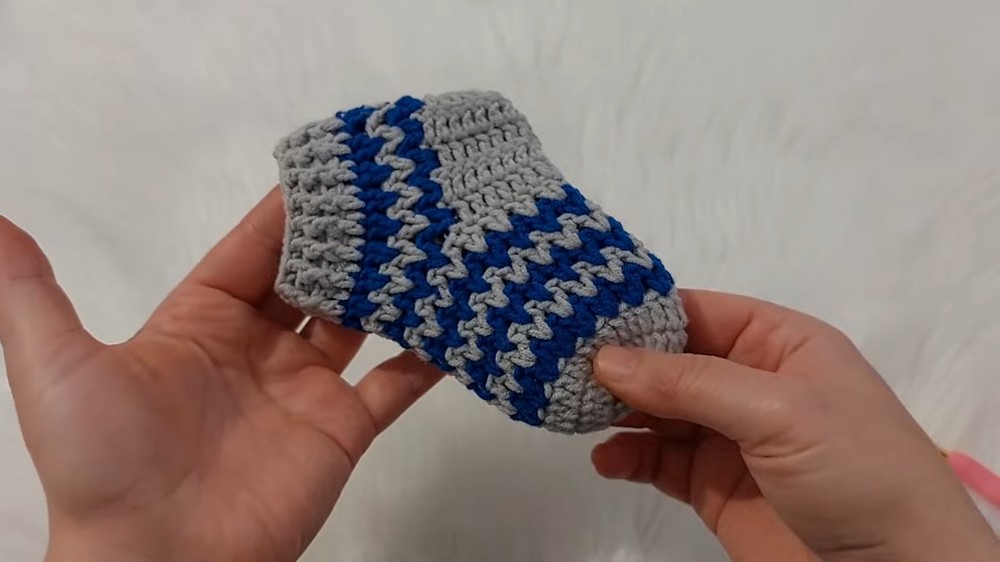
- Sole length: 12 cm, perfect for 0-6 months (can fit up to 9 months).
- Height (ankle to toe): 7.5 cm.
Customization Ideas
- Sizing Adjustment:
- For larger socks: Begin with 18 double crochets instead of 16, and add more rows for the sole, instep, or cuff.
- For smaller socks: Decrease the initial stitches (e.g., start with 14 double crochets) and reduce row counts.
- Color Options:
- Alternate bright colors for a playful look or use pastel colors for a softer appearance.
- Add Embellishments:
- Use small bows or buttons as decorations on the cuff.
Pattern Instructions
PART 1: Toe and Sole
- Round 1: Magic Ring Foundation
- Begin with a magic ring.
- Chain 2 (counts as the first double crochet).
- Work 16 double crochets (dc) into the ring.
- Tighten the ring to close and join the round with a slip stitch (sl st) into the top of the first dc (not into the chain 2).
- Round 2: Increasing the Sole
- Chain 2. Work 1 dc into the same stitch.
- Create increases by working 2 dc into each stitch from the previous round.
- At the end, you should have a total of 32 dc.
- Join with a slip stitch into the top of the first dc to close the round.
- Round 3: Base Foundation
- Chain 2. Work 1 dc in each stitch from the previous round without increasing.
- Continue until the end of the round.
- You will still have 32 dc. Join with a slip stitch as before.
PART 2: Instep Decoration
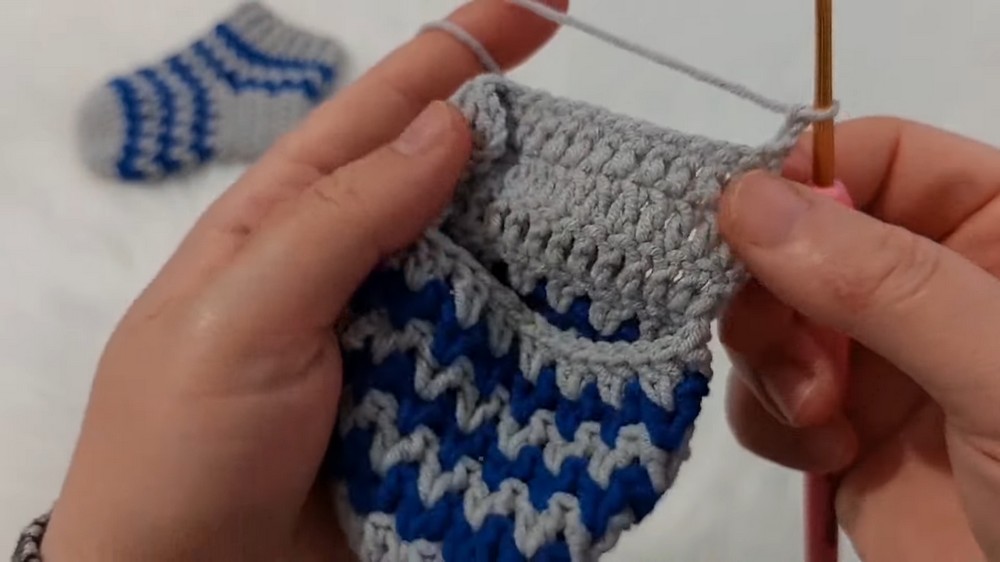
- Round 4: Adding a New Color
- Attach the second yarn (e.g., navy blue) to the first stitch of the previous round.
- Chain 3 (acts as the first dc).
- Work 2 dc into the same stitch.
- Skip One Stitch
- Without chaining, skip one stitch and work 2 dc into the next stitch.
- Repeat the Pattern
- Continue this pattern (skip one stitch, 2 dc into next stitch) around the round.
- You will have 16 groups of 2 dc.
- Round 5: Returning to the First Color
- Attach the first yarn (e.g., gray).
- Chain 3. Work 2 dc into the space between the first pair of dc from the previous color round.
- Repeat this process for all spaces, maintaining 16 groups of 2 dc.


- Continue Alternating Colors
- Alternate rounds between gray and navy blue (or your chosen colors), maintaining 32 stitches per round.
- Repeat until you have completed 6 rows of color decoration.
PART 3: Heel Section
- Creating the Heel Base
- Switch to the base color (e.g., gray).
- Chain 2 and begin working 18 dc evenly across the heel section (ignoring the spaces beyond 18 dc near the toe).
- Work 3 Rows of Heel Foundation
- For rows 2 and 3, maintain the 18 dc, pulling stitches slightly to maintain alignment.
- Shaping the Heel (Rows 4 & 5):
- Chain 2. Work 7 dc, then decrease:
- For the decrease, work 2 dc together, creating one stitch from two.
- Repeat this for 3 decreases across the row.
- Finish with 7 remaining dc.
- Chain 2. Work 7 dc, then decrease:
- Closing the Heel Seam
- Fold the heel section lengthwise.
- Use a tapestry needle or crochet hook to sew both sides of the heel using a slip stitch seam. Do not pull too tightly to maintain shape.

PART 4: Cuff Section
- Adding the Cuff
- Switch back to the secondary yarn (e.g., navy blue).
- Insert your hook into the top edge of the sock where the instep meets the heel.
- Chain 3 and work 2 dc into each space along the edge.
- Work Ribbing (Stretch Texture)
- For the next row, alternate front post dc (fpdc) and back post dc (bpdc) stitches:
- Work 1 dc from the front (fpdc) and 1 dc from the back (bpdc).
- Continue alternating for the remainder of the round.
- For the next row, alternate front post dc (fpdc) and back post dc (bpdc) stitches:
- Repeat Ribbing Rows
- Add 2-3 more rows of ribbing, depending on desired cuff length.


PART 5: Finishing
- Final Touch
- Once the last cuff row is complete, fasten off the yarn securely.
- Weave in all loose ends with a tapestry needle, ensuring the interior is smooth for baby comfort.
- Block the Socks
- For a professional finish, gently block the socks by dampening with water and shaping them appropriately. Allow them to fully dry.
Tips for Success
- Color Balance: Ensure complementary colors to enhance the aesthetic of alternating rows.
- Tension Control: Maintain consistent tension for an even finish and a comfortable fit for the baby.
- Size Adjustments: For larger socks, increase the sole foundation stitches and add more heel rows (e.g., start with 18 dc instead of 16).
- Comfort: Choose soft, washable yarns for easy maintenance and comfort. Smooth out interior seams and ends to avoid irritation for the baby.

Conclusion
These baby bootie socks are an adorable, functional accessory that you can customize for various ages. With alternating colors, textured cuffs, and adjustable sizing, they are perfect for gifting or personal use. The detailed instructions ensure that even beginners can complete this project with ease.