
Easy Free Crochet Daisy Keychain Pattern for Beginners
Bright floral charm enhances any set of keys through a delightful crochet daisy keychain pattern, perfect for quick and enjoyable handiwork.
Some people believe a small keychain is just a tiny item without much value. Still, the crochet daisy keychain pattern proves that even a small accessory can brighten your daily life. This delightful keychain adds a splash of color and charm to your keys or bag, making them easier to spot. It feels light and gentle in your hand, making it comfortable to carry everywhere. One of its best features is how quickly it helps you find keys inside a crowded purse or backpack, saving you time and frustration.
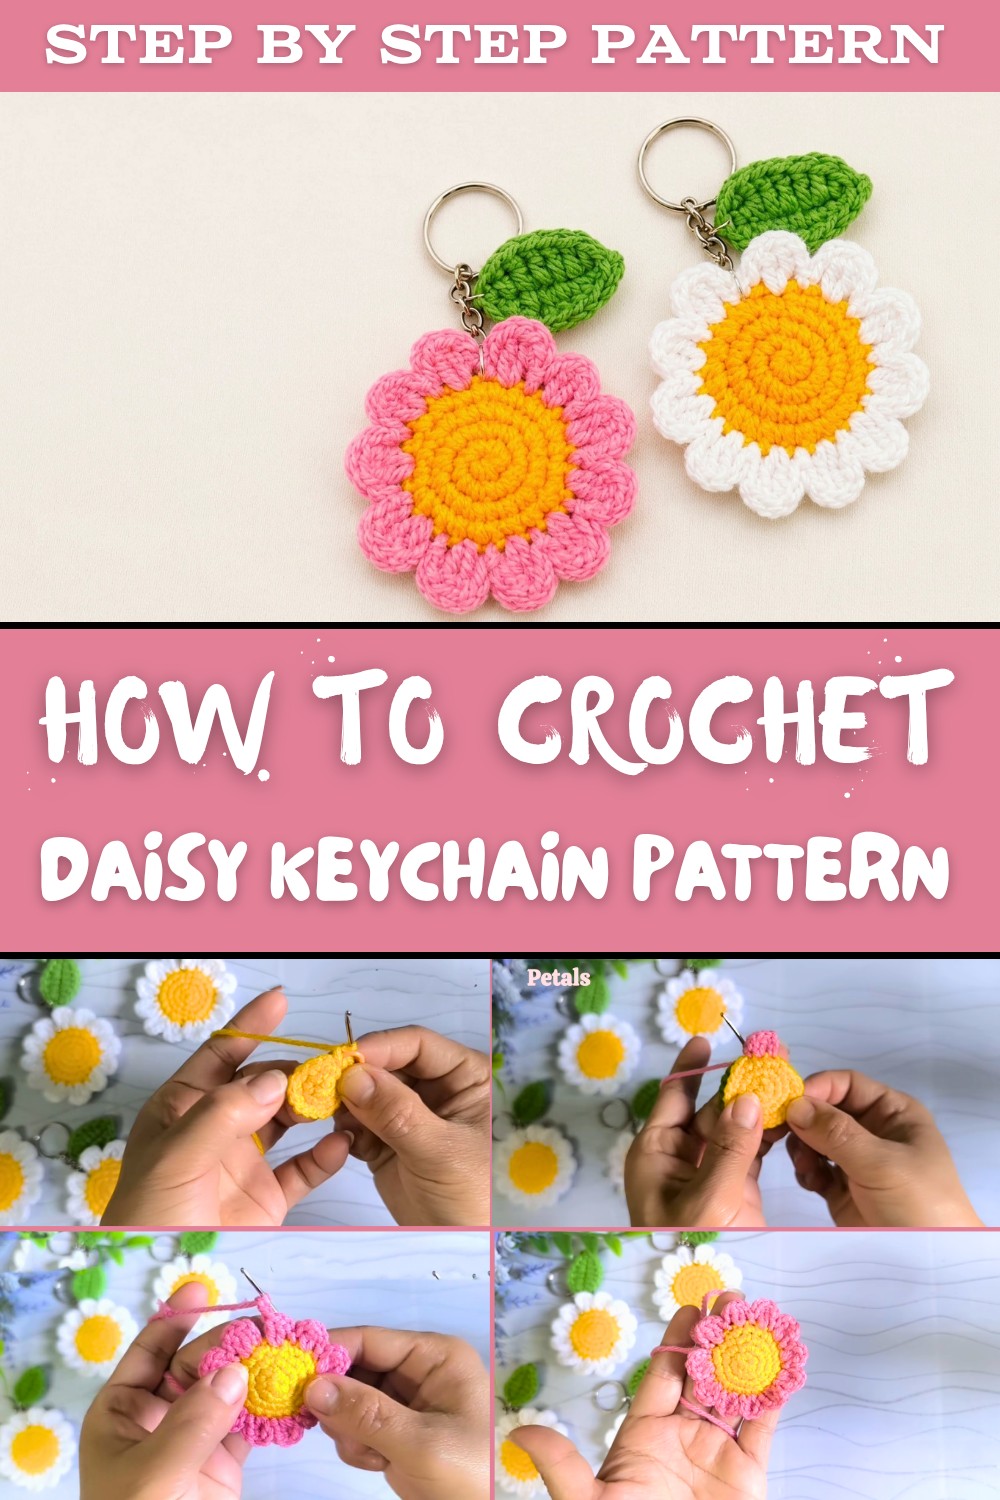
Free Crochet Daisy Keychain Pattern for Adorable Accessories
Beyond being useful, this daisy keychain lets you show off a bit of personality. Use it to add fun to a backpack zipper or as a sweet touch on your handbag. The floral design feels cheerful and inviting, catching the eye and lifting your mood. The pattern comes with simple, clear steps, making it ideal for beginners. You can make this pretty piece easily without confusion or stress.
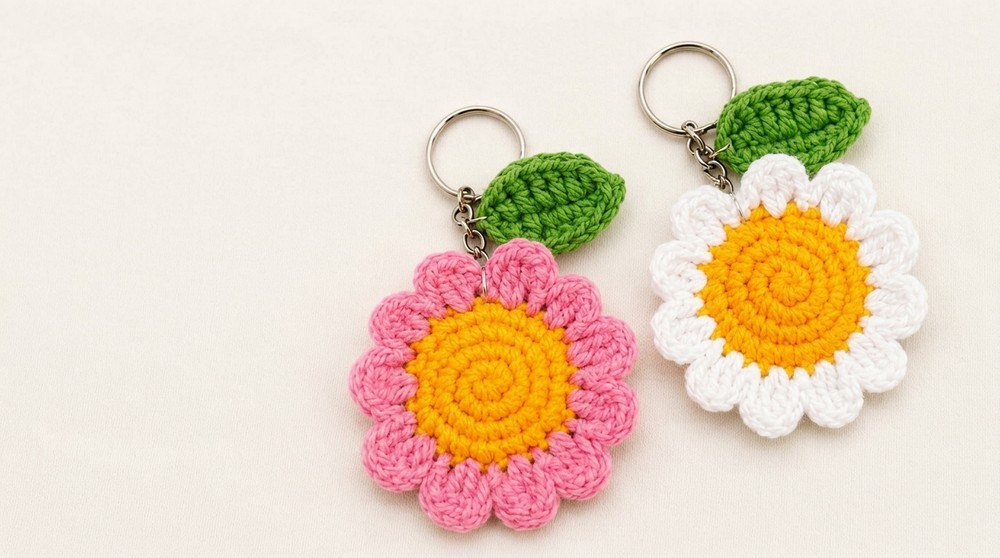
Choosing yarn colors to match your favorite looks or moods adds a special, personal touch. Whether you prefer bright shades or gentle pastels, the keychain can reflect your unique style. Giving a daisy keychain as a gift also makes a thoughtful, charming present that friends and family will appreciate. Altogether, the crochet daisy keychain pattern turns a small accessory into a practical and stylish item anyone can enjoy every day.
Round Tulip Keychain Crochet Pattern
Create a delightful round tulip flower keychain using this beginner-friendly crochet pattern featuring colorful petals, cozy leaves, and easy assembly. This pattern uses three colors and simple stitches to yield a charming small floral accessory perfect for gifts or personal use.
What to Know Before Starting
- Use 3 colors of 100% acrylic 3-ply yarn or any similar yarn you prefer (instructions use white, yellow, and green; substitute any colors you like for petals).
- Recommended hook size: 2 mm crochet hook (You may also use 2.5 mm depending on yarn thickness and tension).
- Prepare scissors, a stitch marker, a tapestry needle for weaving in ends.
- Have key rings and jump rings handy for attaching your flower to accessories.
- Keep stuffing material ready such as fiberfill or leftover yarn scraps to fill your flower petals.
- This pattern involves basic stitches and simple increases, suitable for those with some beginner knowledge.
- Stitch markers are important to keep track of round beginnings during working in the round.
Pattern Insights & Special Notes
- Work begins with a magic ring to create a tight, closed center for the flower's middle.
- Crochet is mainly worked in the round with single crochet (sc) stitches, increasing regularly to form a flat circular base.
- Petals are created by working double crochet groups with chains in between.
- The leaf shape uses a combination of single crochet, half double crochet, and double crochet stitches.
- Assembly requires careful stitching to join flower parts, add stuffing, and attach to a key ring with jump rings.
- The project recycles yarn scraps for stuffing demonstrating an eco-conscious approach.
Summary of the Construction Process
- Start by crocheting a 6-stitch magic ring for the flower center with yellow yarn.
- Increase stitches in rounds to form the flower base (up to 24 stitches).
- Crochet multiple petals around the flower by working chains and double crochets into specific stitches.
- Stuff petals lightly after crocheting all petals.
- Work separate green leaves with a mini crochet base of eight chains, shaping with various crochet stitches.
- Attach assembled flower and leaves to key rings using jump rings for a finished keychain accessory.

Skill Level
- Suitable for beginner to intermediate crocheters familiar with basic stitches like single crochet, double crochet, increasing, and working in the round.
- The pattern includes some shaping and finishing techniques that will enhance your skills.
Finished Measurements
- Flower diameter approximately 3 inches (7.5 cm) depending on gauge.
- Leaf length approximately 3-4 inches (7.5-10 cm).
- Keychain overall length varies based on ring and assembly.
Materials Required
- 100% acrylic yarn (3 colors):
- Yellow (flower center)
- Petal color of your choice (e.g., white or pink)
- Green (leaf and stem)
- Crochet hook size 2 mm (US B or C) or 2.5 mm as preferred
- Stitch marker
- Scissors
- Yarn needle for weaving ends
- Fiberfill or yarn scraps for stuffing
- Key rings and jump rings (small metal rings) for keychain attachment
Stitch Gauge & Patterns
- Magic ring foundation: 6 single crochet stitches to start.
- Increasing round stitches: Multiply by 6 stitches every round (6, 12, 18, 24).
- Petal formation uses doubled double crochet stitches separated by chain-2 spaces.
- Leaf stitches alternate single crochet, half double crochet, and double crochet to create shape.
List of Abbreviations
- ch = chain
- sc = single crochet
- hdc = half double crochet
- dc = double crochet
- sl st = slip stitch
- st(s) = stitch(es)
- inc = increase (2 sc in same stitch)
- magic ring = adjustable ring to start rounds
Unique Techniques & Stitch Details
- Magic Ring: A technique to start circular crochet with an adjustable loop so the center can be pulled tight to avoid holes.
- Increasing: Worked by crocheting two single crochets into the same stitch to expand round circumference evenly.
- Petal Construction: Grouping double crochets separated by chain spaces creates petal "arms" that give a raised flower shape.
- Leaf Shaping: Sequential sc, hdc, dc stitches with increases help shape a natural leaf curve.
- Joining with Jump Rings: Small metal rings connect crocheted parts to keychain hardware securely.
Complete Crochet Directions
Part 1: Flower Center Base (Magic Ring Foundation)
Round 1:
- Create a magic ring.
- Work 6 single crochet (6 sc) stitches inside the ring.
- Pull ring tight to close center hole.
- SL ST to first sc to join round.

Beginner tip: A magic ring lets you start with a tight center instead of a hole. Use your fingers to wrap yarn and hold ring while stitching.
Part 2: Increasing Rounds to Expand Base
Round 2:
- Place stitch marker on first stitch of round.
- Inc (2 sc in first stitch), sc in next stitch; repeat around, total 12 sc.
- SL ST to join.
Round 3:
- Sc in first stitch, inc in next stitch; repeat around for 18 sc.
- SL ST to join.
Round 4:
- Sc in first two stitches, inc in next stitch; repeat for 24 sc.
- SL ST to join.
- Cut yarn leaving a tail for assembly.
Explanation: Increasing stitches in each round evenly grows your flower base. The pattern spaces out increases to keep round shape flat.
Part 3: Petal Construction (Working on Flower Base)
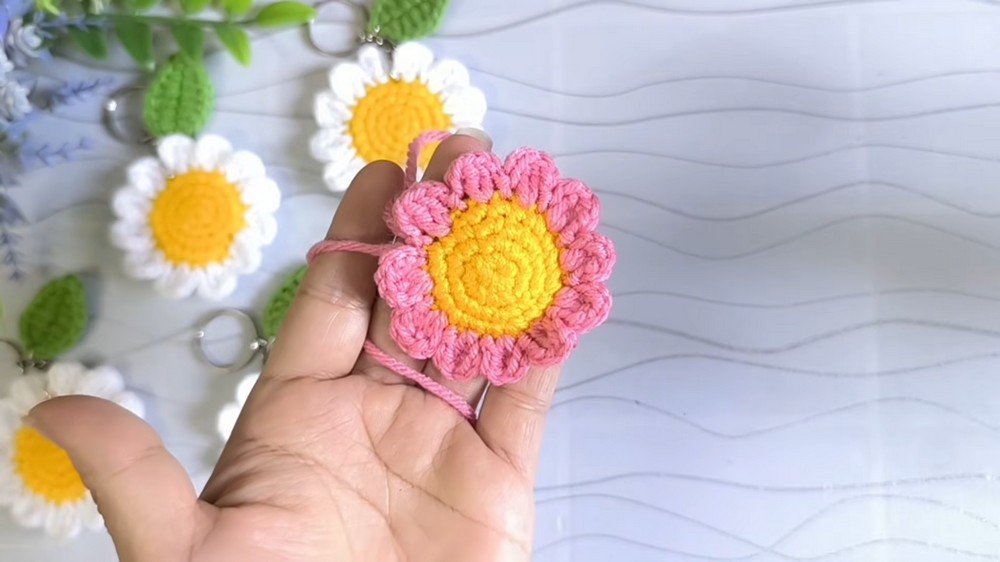
Petal Pattern (Make 11 petals):
- Attach petal yarn color to any stitch on flower base.
- Chain 2,
- Work 2 dc into the next stitch (working through both front "yellow" and back "green" sides if using two yarn strands),
- Chain 2,
- Slip stitch into following stitch to anchor petal.
- Repeat these steps for each petal around flower until you have 11 petals.
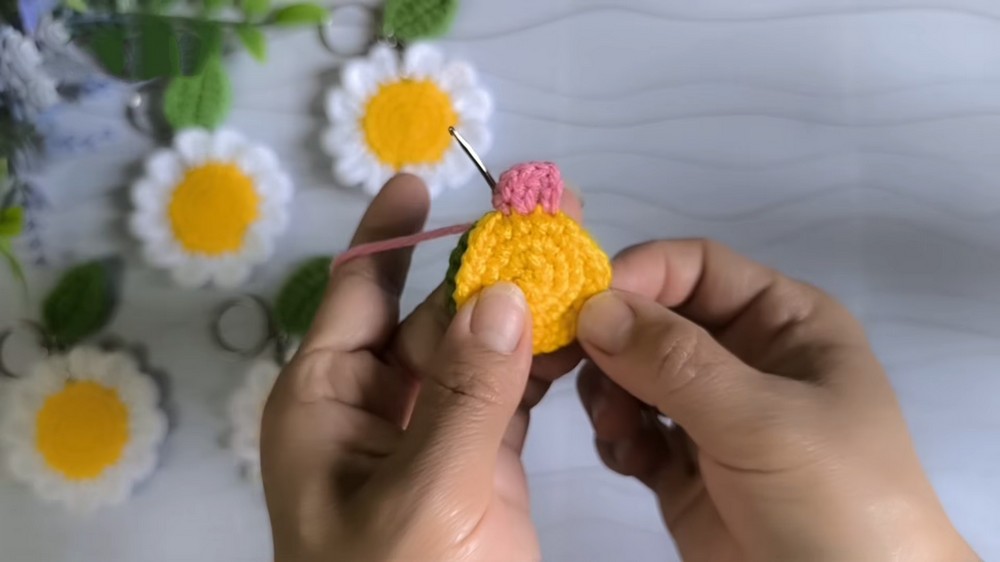
Beginner note: Each petal is formed by two double crochets separated by chain spaces and anchored with slip stitches, giving pointed petal shape.
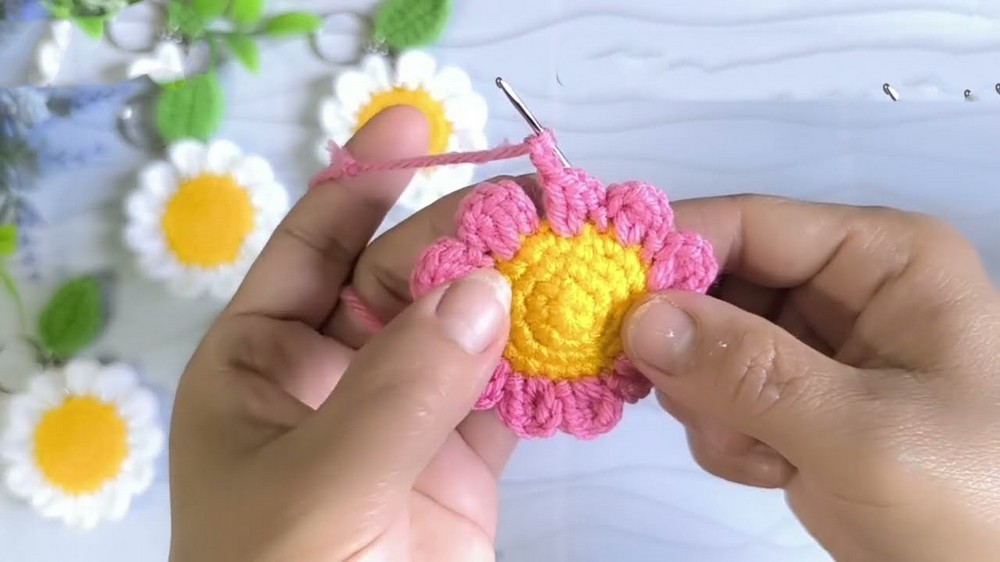
Part 4: Stuffing Petals
- Use leftover yarn scraps or fiberfill to gently stuff inside flower petals to add dimension.
- Do not overstuff to keep petals soft and flexible.
Part 5: Leaf Creation
Leaf Base:
- With green yarn, chain 8.
- Skip the first chain and single crochet (sc) in the second chain from the hook.
- Half double crochet (hdc) in next stitch.
- Double crochet (dc) in next three stitches.
- Half double crochet (hdc) in following stitch.
- Single crochet (sc) in next chain.
- Slip stitch (sl st) in last chain.

Second Side of Leaf:
- Work back on opposite side of the chain repeating the sc, hdc, dc sequence symmetrically to shape leaf evenly.
- Fasten off and cut yarn leaving tail for sewing.
How to Assemble Your Tulip Keychain
- Weave in all yarn tails using yarn needle.
- Position flower petals neatly and sew ends securely.
- Attach jump ring through flower and leaf as shown in diagram or pictured example.
- Connect jump ring to key ring hardware.
- Ensure all attachments are tight and stable for everyday use.

Common Issues & How to Solve Them
- Loose center hole: Pull magic ring tighter before continuing rounds.
- Petals flapping or loose: Check tension on double crochets and slip stitches anchoring petals.
- Uneven round shape: Count stitches carefully and maintain marker placement.
- Leaf curling: Adjust leaf stitches or block gently with steam for flattening.
Additional Creative Ideas for This Pattern
- Use as an ornament for bags, backpacks, or purses.
- Attach multiple flower keychains to create a bouquet-style decoration.
- Create seasonal colors for holidays or themed gifts.
- Size up with thicker yarn and larger hooks for home décor flowers.
- Mix and match yarn textures-cotton, acrylic, or blends-to suit style.