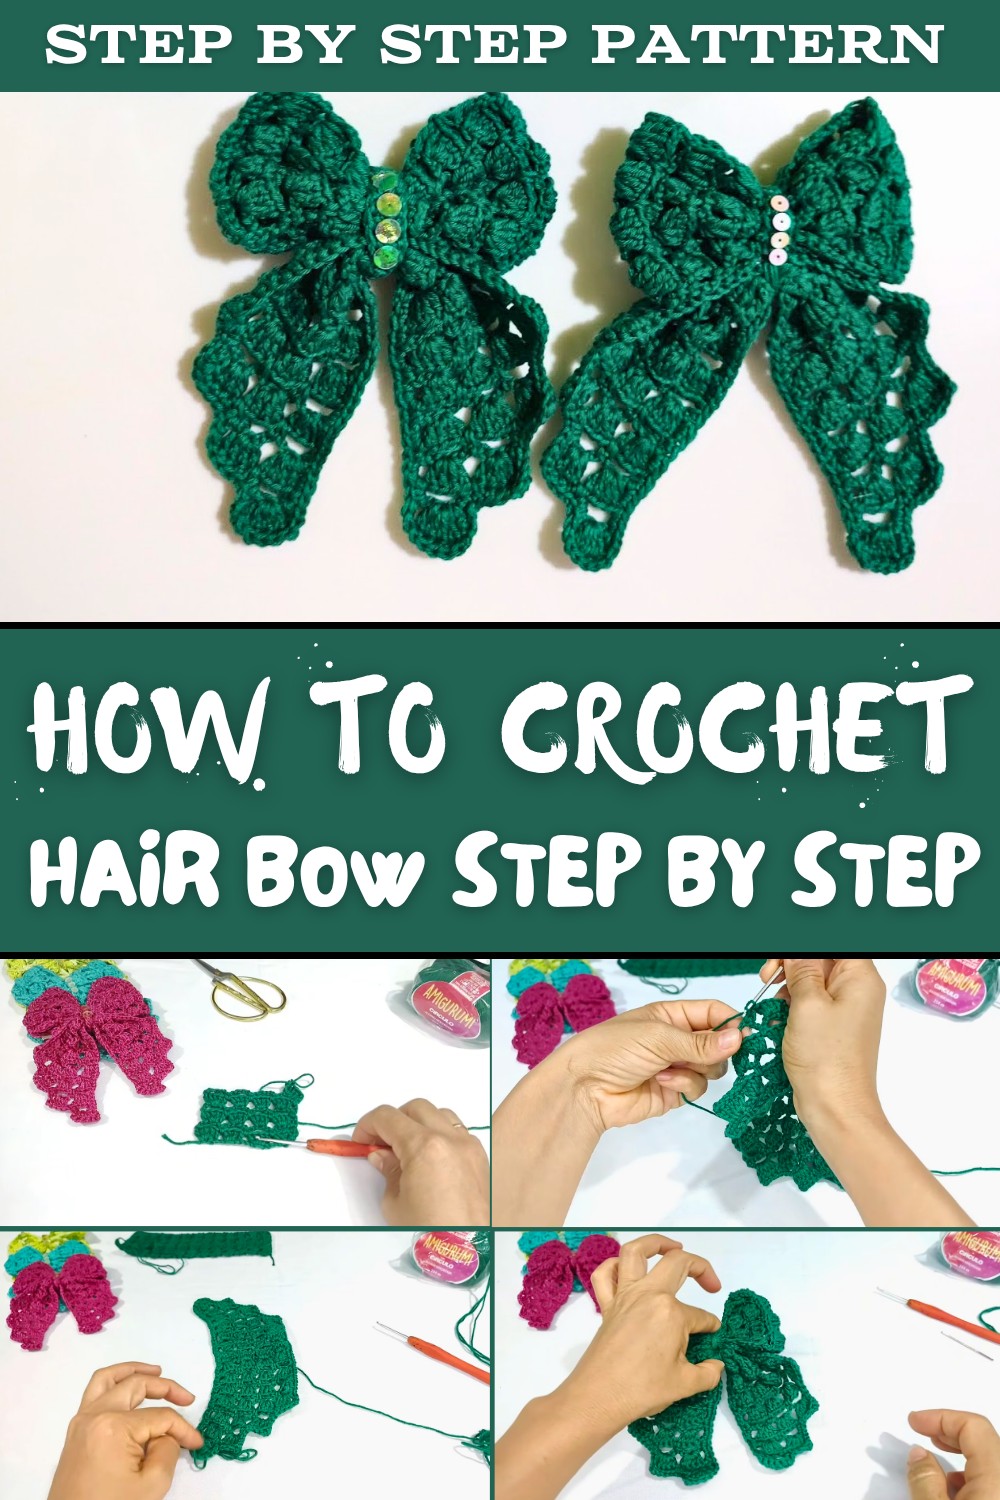
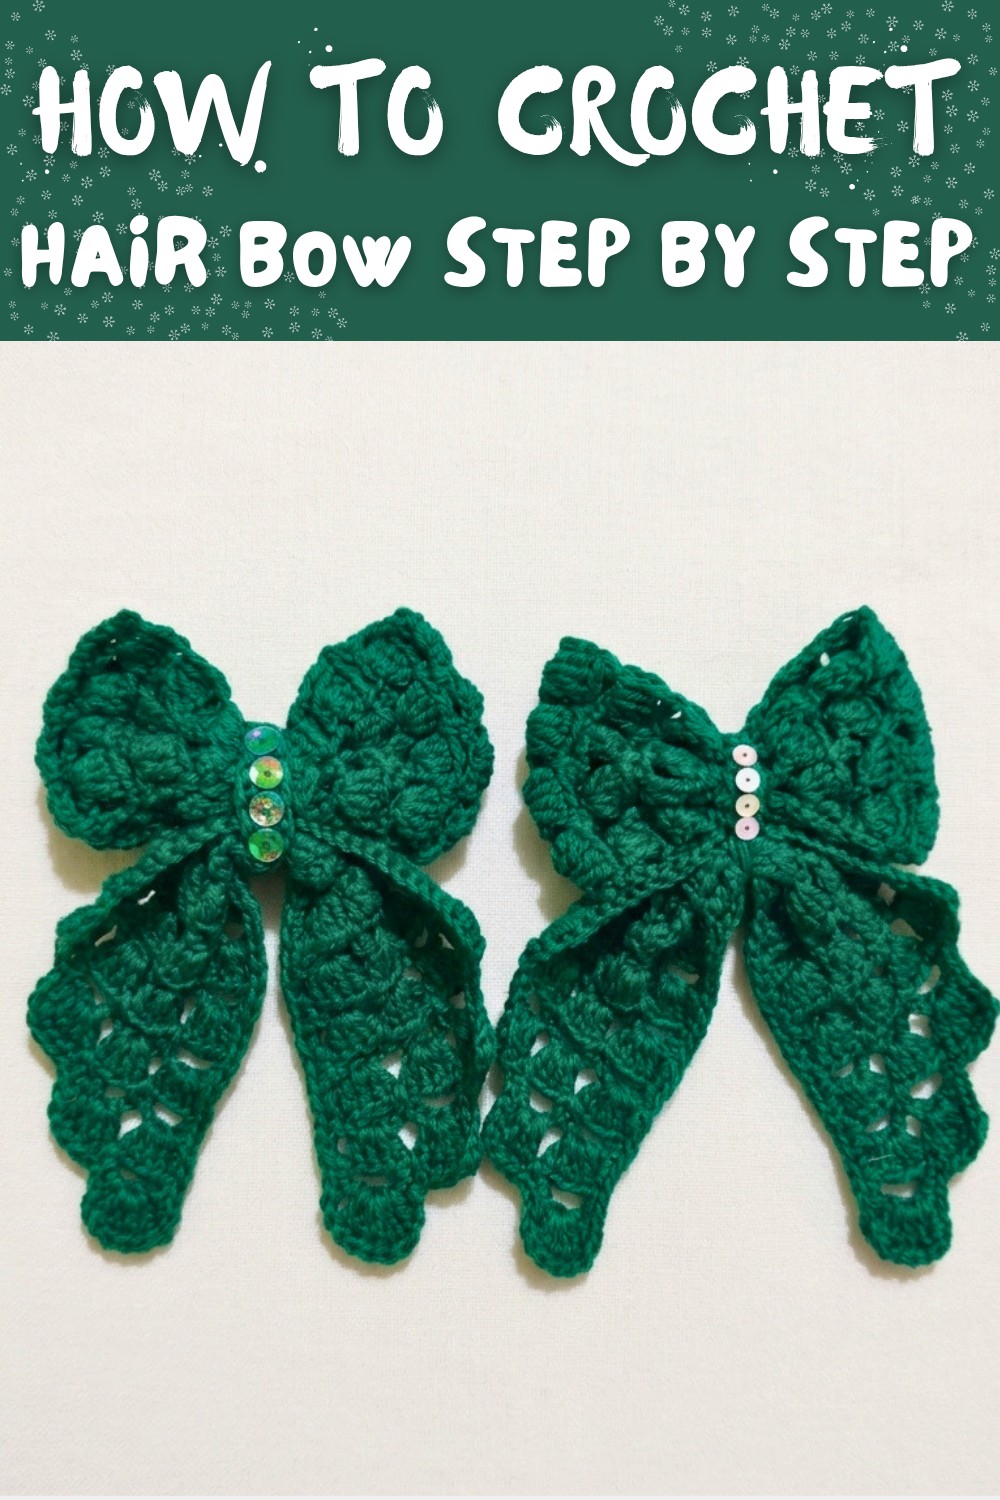
Free Crochet Hair Bow Pattern to Accessorize in Style
Sprinkle a little charm into your day with this free crochet hair bow pattern that makes every hairstyle feel special.
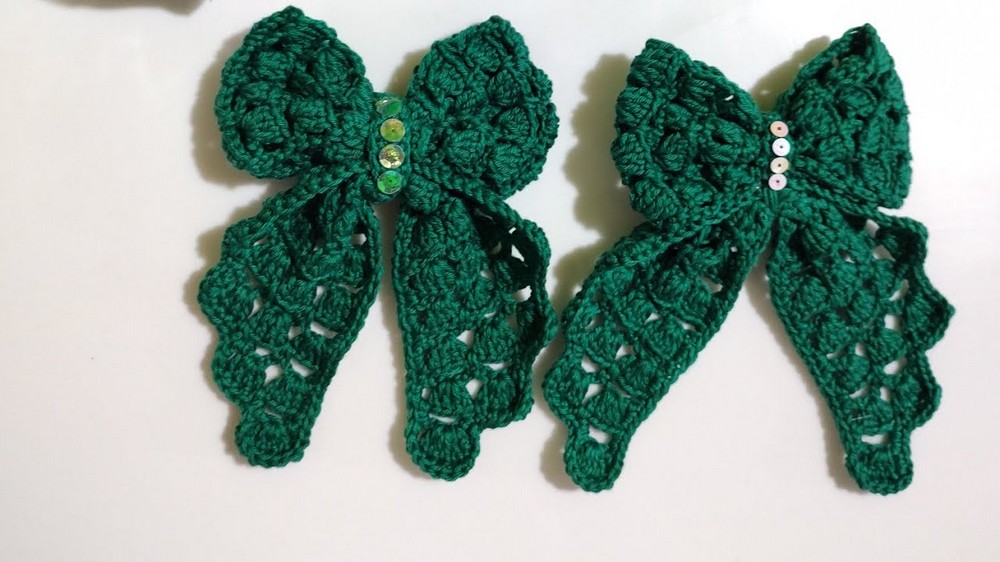
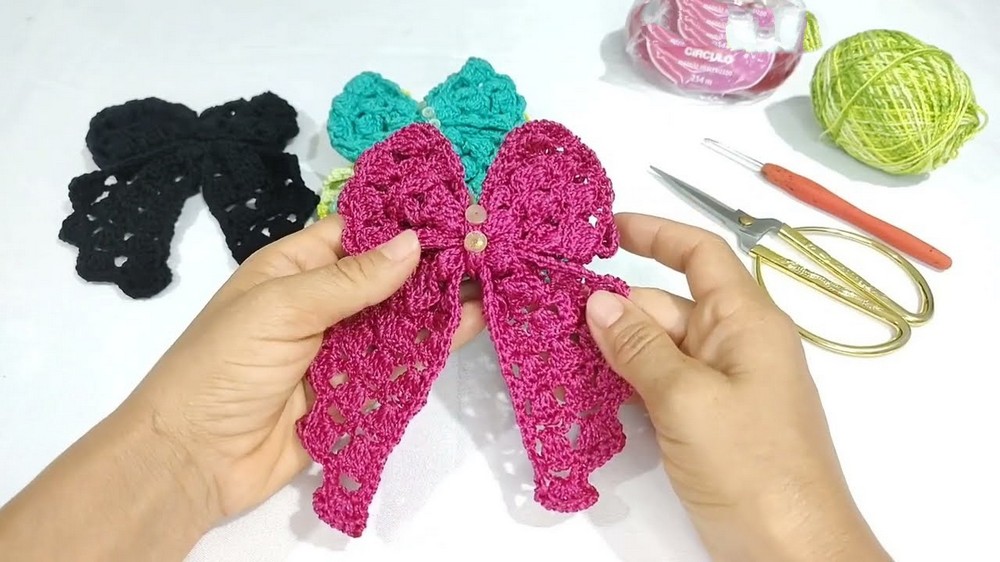
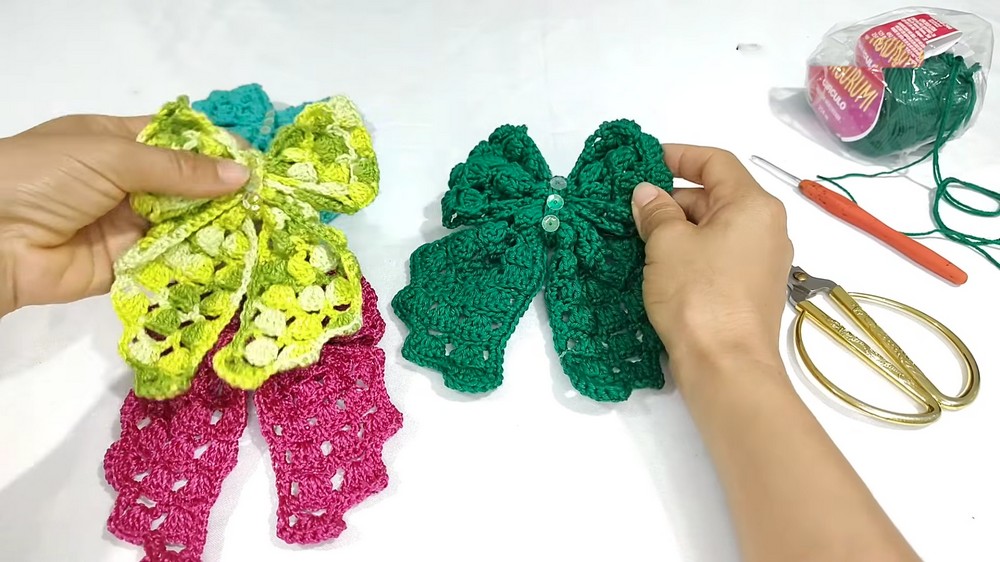
A hair bow is a beautiful handmade accessory that adds charm to your look. It is small and stylish, perfect for girls, women, and even kids. The bow can be used in your hair or added to bags, gift wraps, or even clothes. Its appearance is cute and colorful, making it loved by many people. The best part about this crochet hair bow pattern is it does not need special skills. Even beginners can make it just by following easy steps. This pattern creates bow that is soft and comfortable to wear. You can try different bright yarn colors like pink, red, green, or use soft shades like white and blue. Adding sequins or small pearls makes it even more beautiful and fun.
Stunning Free Crochet Hair Bow Pattern for a Chic Handmade Look
The shape of the bow looks perfect and well balanced, with nice loops and neat stitching. You can make bow in different sizes using thinner or thicker yarn. If you want a bigger bow, use thick yarn like Amigurumi, or for smaller bows, use thinner yarn like Anne yarn. The bow is useful in many ways, like decorating hairstyles for parties, school events, or casual days.
It is also great as a gift for friends or family. Each bow is unique because it is handmade, showing your love and creativity. If you like crochets or want a fun weekend project, this Free Crochet Hair Bow Pattern is perfect for you. It is easy to follow and lets you create something amazing that you can proudly use. Try this pattern and enjoy the beauty of handmade crochet accessories.
Detailed Crochet Hair Bow Pattern
Finished Size
The finished bow size depends on the yarn type and hook used. Using DK weight Anne yarn, the bow measures approximately 4" x 2". If thicker yarn like Amigurumi is used, the finished bow will be slightly larger, around 5" x 3.5".
Necessary Materials
- Yarn:
- DK weight Anne yarn, or any medium weight yarn for smaller bows.
- Thick yarn like Amigurumi for larger bows.
- Polipropileno thread for lighter and thinner bows.
- Crochet Hook: Size 2.5 mm, preferably with a comfortable grip.
- Accessories:
- Hot glue gun with glue sticks.
- Metal or plastic alligator clip (bico de pato) for attachment.
- Decorative items like sequins or small pearls.
- Scissors: To trim and shape the yarn tails.
- Needle: A tapestry needle for weaving ends and final assembly.
Gauge
Gauge isn't critical for this pattern, but for consistency: 20 stitches x 15 rows of single crochet will yield 4" x 4" square with DK weight yarn and a 2.5 mm hook.
Tips for Customization
- Choosing Colors: Use contrasting colors for the bow's sections or opt for gradient and multi tone yarns for an ombré effect.
- Adjusting Size: Increase or decrease the number of rows for larger or smaller bows.
- Decorations: Experiment with embellishments, such as lace trims, small crocheted flowers, or beads glued to the bow's surface.
- Personalize: Attach ribbon tags or labels for gift bows.
Special Techniques
- Double Sided Bow Shaping: Folding the bow evenly ensures a symmetrical and polished look.
- Seamless Joining: Using careful whip stitching with tapestry needles creates an invisible finish without distorting shape.
- Glue Application: Be cautious while working with hot glue; avoid overapplication to maintain flexibility.
Pattern Instructions
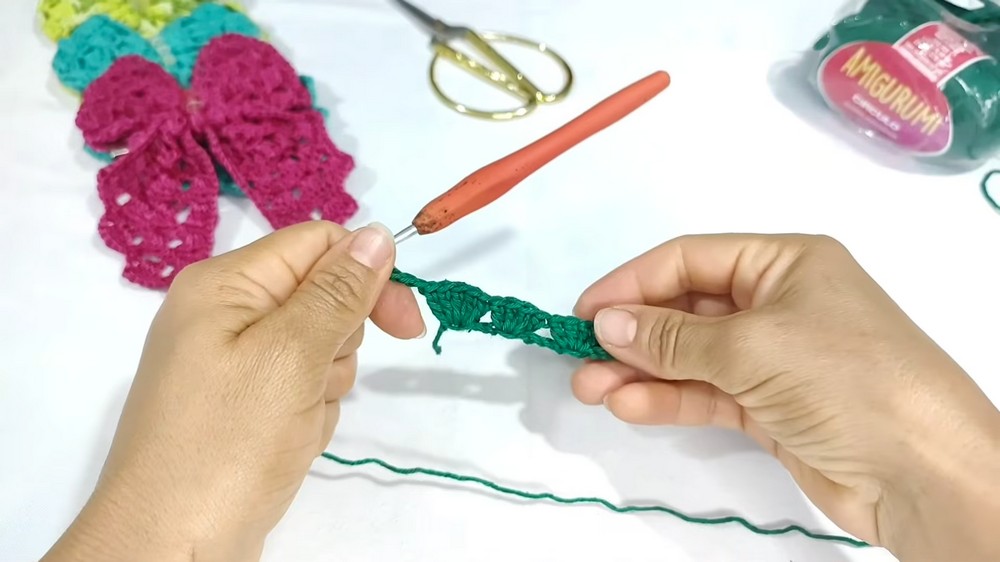
This pattern consists of three main parts: the top ribbon layer, bottom ribbon layer, and joining band.
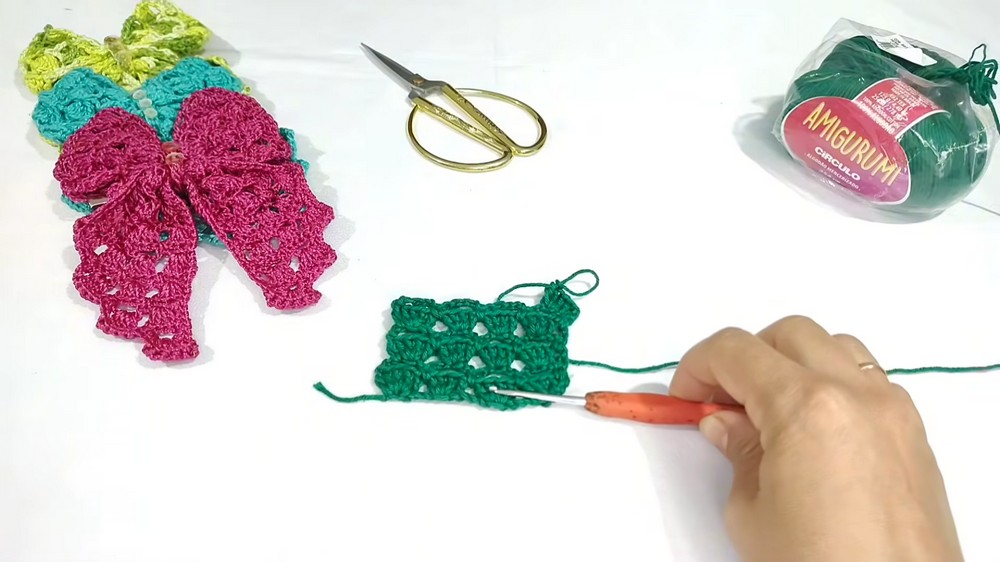
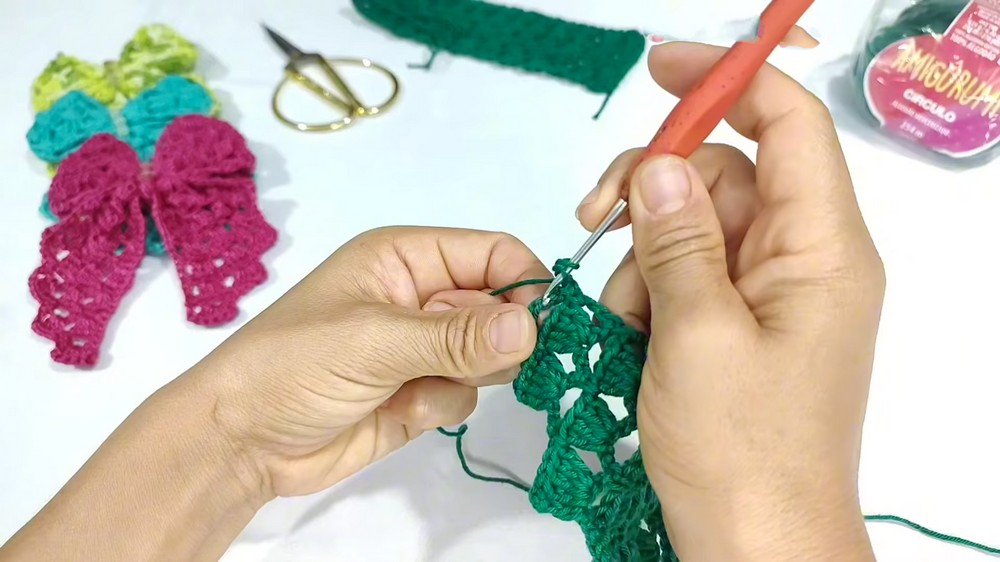
Part One: Top Ribbon Layer
- Foundation:
- Begin by chaining 20 stitches. If you want a wider bow, increase the chains appropriately.
- Building Rows:
- For the first row, work 1 double crochet stitch into the fifth chain from the hook.
- Continue by working 3 additional double crochet stitches into the same chain to form the first cluster.
- Skip the next 4 chains and in the fifth chain, repeat the cluster (4 double crochets in the same stitch).
- Repeat this sequence across the row until you reach the end.
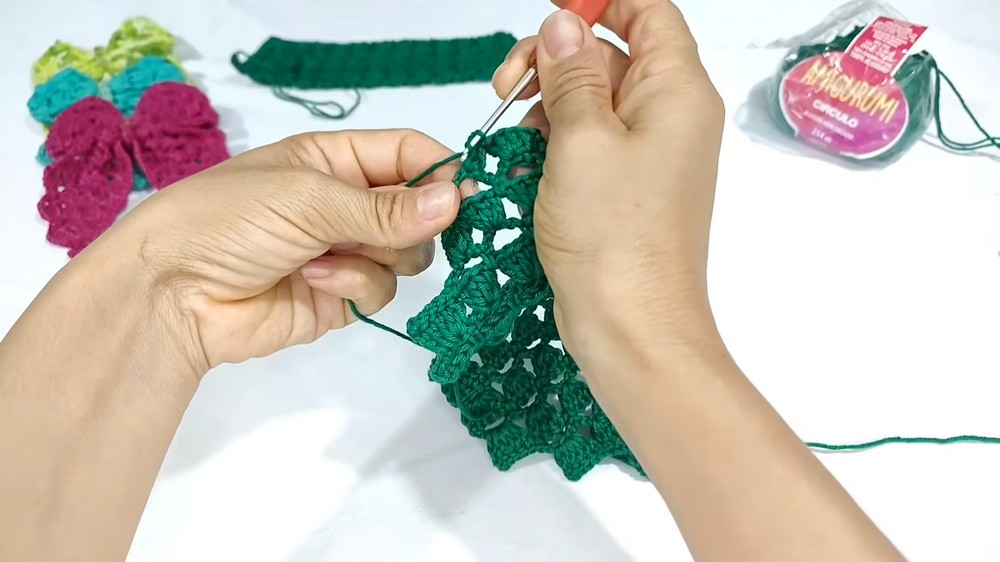
- Transition Rows:
- Chain 5 stitches, turn the work, and secure with a single crochet into the space between each cluster.
- Repeat this process for the next row, creating the framework for the bow.
- Final Rows:
- For the remaining rows, simply repeat the pattern of clusters and anchor chains. A total of 13 rows will yield the standard sized ribbon layer.
- Fasten off the yarn securely, leaving a 4-6" tail for weaving.
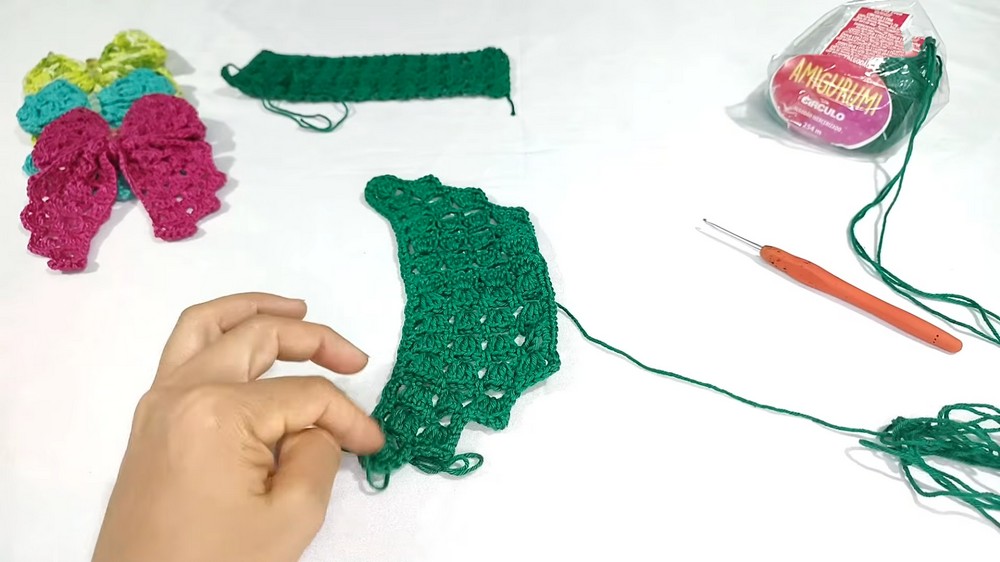
Part Two: Bottom Ribbon Layer
- Foundation Chain:
- Follow the same beginning structure as the top ribbon layer, chaining 20 stitches.
- Cluster Formation:
- Double crochet 4 times into the fifth chain from the hook to form the first cluster.
- Work 3 more clusters, evenly spaced by skipping 4 chains between each cluster.
- Shaping the Ends:
- On the last row, work slip stitches over the first few stitches to taper the ribbon ends.
- Secure with a single crochet and chain stitches for a firmer finish.
Joining Band
- Crochet a band of 20 chains and work single crochet stitches across to create a flat strip.
- Wrap the band evenly around the center of the bow to hold the layers in place.
- Use hot glue or a tapestry needle to secure the band tightly on the back.
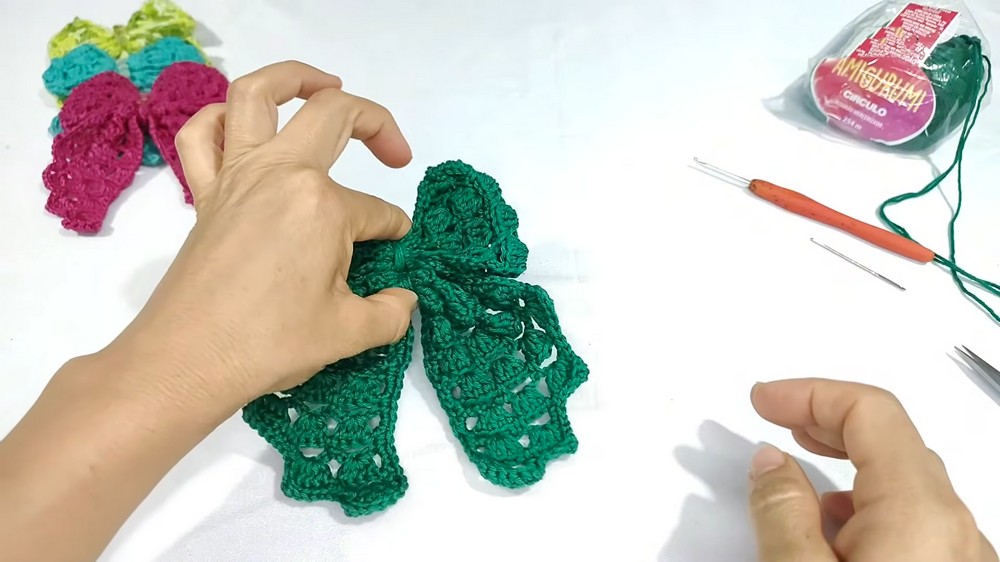
Assembly
- Layering:
- Lay the smaller top ribbon layer over the larger bottom ribbon layer, aligning the centers.
- Fold the layers symmetrically, aligning corners to form soft loops.
- Securing:
- Wrap the crochet band tightly around the center of folded loops and sew or glue securely in place.
- Adding the Clip:
- Position the "bico de pato" alligator clip on the underside and attach using a dab of hot glue.
Decoration
- Place sequins, pearls, or decorative accents along the bow's surface.
- When using hot glue, lightly press decorations onto the bow and let cool for 5 minutes.
Customization Ideas
- For Occasions: Use festive yarns like metallics or glitter enhanced threads for holiday bows.
- Larger Designs: Add extra rows or increased stitches in the foundation chain for oversized bows.
- Layered Effect: Work separate smaller bows and stack them atop the larger bow for 3D elegance.
Final Look
The completed bow is elegant, textured, and versatile, suitable for hair accessories, gift packages, or home decor. With its structured clusters and vibrant embellishments, the ribbon bow adds a handmade charm wherever it is placed.
Conclusion
This detailed crochet ribbon bow pattern is simple yet versatile, allowing for customization in size, style, and decoration. By following the instructions carefully, even beginners can create an intricate, polished bow that adds a touch of handmade beauty to various projects.
Important Remarks
- Ensure row counts are accurate to avoid lopsided designs.
- Test glue placement on practice pieces to prevent visible marks.
- Maintain symmetry while folding and securing the bow layers.
- If using different yarn weights, adjust hook size accordingly for uniform tension.
By adhering to this pattern and integrating personal creative touches, you'll produce a charming bow that is both functional and decorative.