
Free Crochet Pattern: Bucket Hat with Classic Look
Style sunny outings through Free Crochet Bucket Hat Pattern with neat texture, relaxed shape, and playful charm suited for beach days and casual adventures.
A bucket hat is a cool and useful hat that you can wear on sunny days or when you want to add a fun touch to your outfit. If you love making things by hand, the Free Crochet Bucket Hat Pattern is a great way to create your very own stylish hat. This pattern lets you crochet a soft, comfy, and trendy hat that is perfect for all seasons.
The bucket hat made with this crochet pattern looks fresh and charming. It has a round shape with a wide, flexible brim that helps protect your face from the sun. The stitches create a smooth texture that feels nice to touch and looks neat. The design is simple but stands out because of its cozy feel and handmade look. Whether you choose bright colors or soft pastels, this hat can brighten up any outfit and make you feel special. It's lightweight and easy to wear, making it perfect for outdoor walks, trips to the beach, or casual hangouts with friends.
Easy Free Bucket Hat Crochet Pattern for Summer

This project is taught clearly on the YouTube channel Doacrochet, where you can watch easy videos to help you make the hat step by step. Even if you are new to crocheting, the directions make the whole process fun and simple.
Not only is this bucket hat a fun thing to wear, but it also makes a great gift. Handmade hats like this one show love and care, making them special presents for friends and family. Plus, it's a nice accessory that can add flair to your look or become a lovely piece to keep and collect. The Free Crochet Bucket Hat Pattern is a perfect mix of style, comfort, and creativity that anyone will enjoy!
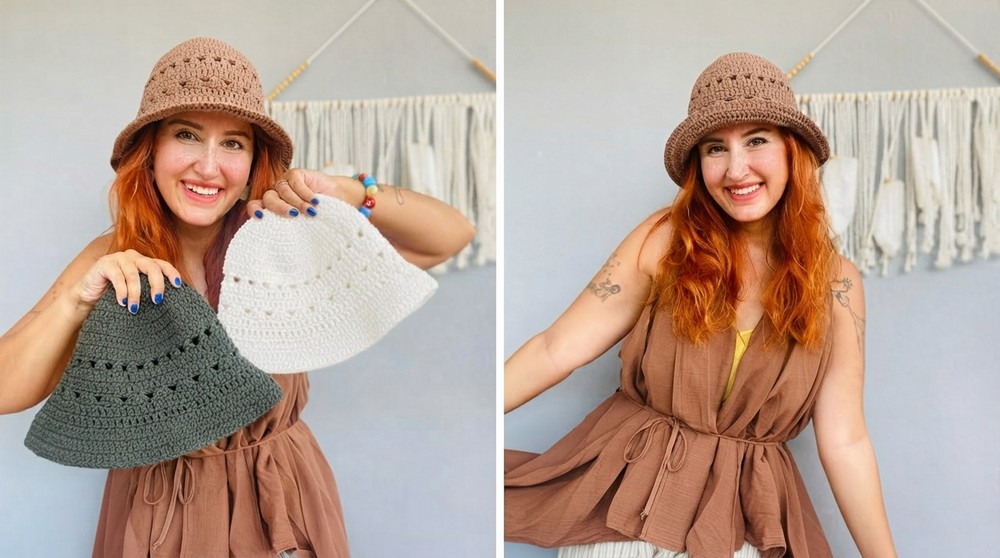
Easy and Stylish Crochet Hat Pattern for Beginners
This pattern teaches you how to crochet a stylish and versatile hat that beginners can complete in just 1-2 hours. Using simple stitches like double crochet and single crochet, you'll create a comfortable, gently curling brim hat suitable for daily use or gifting.
Quick Overview of Pattern
- Worked in the round from the top using a magic ring
- Increases are made systematically for shaping the crown
- Combines simple stitch patterns and repeats
- Features a subtle fan stitch texture and inward curling brim
- Suitable for adults; easily adjustable for children
Notes
- Use a loose tension when chaining and crocheting to maintain softness.
- Check your stitch counts after each round to ensure accuracy.
- The curling brim forms naturally after working some rows without increases.
- Feel free to measure the hat on your head as you go for perfect fit.
- You can adjust hook size slightly for tighter or looser stitches, but 3.5 mm is ideal for this yarn weight.

Skill Level
Beginner to Intermediate, requiring knowledge of:
- Magic ring (mr)
- Chain stitch (ch)
- Double crochet (dc)
- Single crochet (sc)
- Slip stitch (sl st)
- Working in rounds and counting stitches
Materials
- Yarn: Slim macrame or similar cotton yarn (~medium weight)
- Crochet hook: 3.5 mm (US E-4)
- Stitch marker (optional)
- Yarn needle
- Scissors
Measurements / Sizing
- Adult hat circumference: approximately 50-52 cm
- Total height from crown top to brim: approximately 20-21 cm
- Brim width: about 4 cm
- Child sizes: reduce crown height to 10-11 cm before brim
Gauge and Stitch Pattern
- Gauge is flexible; tension affects overall size.
- Worked mainly in rounds of double crochet with increasing early rounds.
- Fan stitch sections create textured design near brim.
- Brim made with alternating single crochet and double crochet stitches for curling shape.
Abbreviations
| Abbreviation | Term | Instructions |
|---|---|---|
| mr | Magic Ring | Adjustable ring for round start |
| ch | Chain | Yarn over and pull through loop |
| dc | Double Crochet | Yarn over, insert hook, pull through two times in two steps |
| sc | Single Crochet | Insert hook, yarn over, pull through two loops |
| sl st | Slip Stitch | Insert hook, yarn over, pull through loop and stitch |
Special Techniques
Magic Ring (MR)
- Wrap yarn to create an adjustable loop instead of a fixed chain start. Allows for tightening center hole at start of round.
The Crochet Pattern
Round 1: Starting the Crown
- Make a magic ring (mr).
- Chain 3 (counts as first dc).
- Work 11 more double crochets (dc) into the ring (total 12 dc).
- Pull ring tight to close hole.
- Join with a slip stitch (sl st) to the 3rd chain.
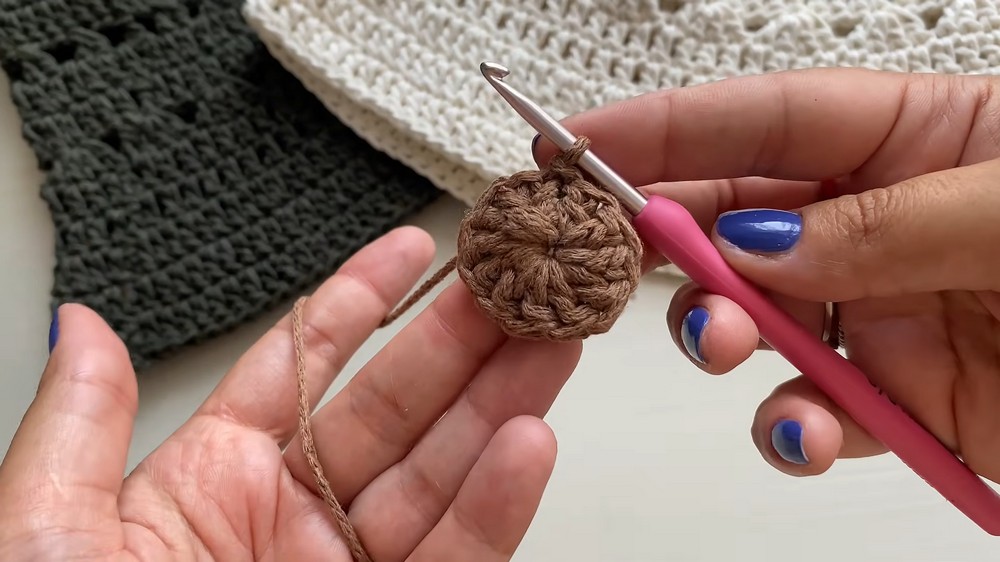
Round 2: Crown Increasing
- Chain 3 (counts as first dc).
- Work 2 dc in each stitch around (total 24 dc).
- Join with a sl st to the top of chain 3.
- Important: Join tightly to avoid holes.

Round 3 to Round 7: Gradual Texture Build
- Chain 3 at start of each round (counts as first dc).
- Work following in pattern around:
- One single crochet (sc), then one double crochet (dc) in the same stitch or chain.
- Increase the number of sc between the dc with each round:
- Round 3: 1 sc, 1 dc
- Round 4: 2 sc, 1 dc
- Round 5: 3 sc, 1 dc
- Repeat pattern around until you reach desired crown diameter (~16-17 cm) or complete 7 rounds in total.

Round 8 & 9: Forming the Brim Curl
- Chain 3.
- Work 1 dc into each stitch around without increasing.
- Join with a sl st and repeat for the next round.
- This no-increase section allows the brim to curl inward naturally over rows.
Round 10: Crossed Double Crochet Pattern
- Chain 3.
- Work crossed double crochets across row as follows:
- Double crochet into the next chain or stitch.
- Skip 2 stitches/chains.
- Double crochet into 3rd stitch.
- Double crochet into the 2nd skipped stitch (working back).
- Chain 1, repeat across the round.
- This forms a diagonal lattice texture.
Round 11 & 12: Plain Double Crochet Rows
- Chain 3.
- Work 1 dc in each stitch around for 2 rounds.
- Join with sl st.
Round 13: Fan Stitch Cluster
- Chain 3 (counts as first dc).
- In next stitch or chain space, work 4 double crochets (dc) into the same stitch/space forming a fan.
- Skip 3 stitches/chains.
- Repeat fan clusters across round.
- Adjust skipped chain count carefully to maintain shape.

Round 14-16: Plain Double Crochet
- Chain 3.
- Work 1 dc in each stitch around for 3 rounds.
Optional Brim Extension
- Continue double crochet rounds until brim reaches preferred length (typically 4 cm).
- Measure on head to confirm fit.
Final Brim Rows: Alternating Single & Double Crochet
- Work rows of alternating 1 sc, 1 dc stitches across brim.
- Start with dc, then sc, then continue alternation.
- Repeat for 2-3 rows to encourage inward fold and finished edge look.
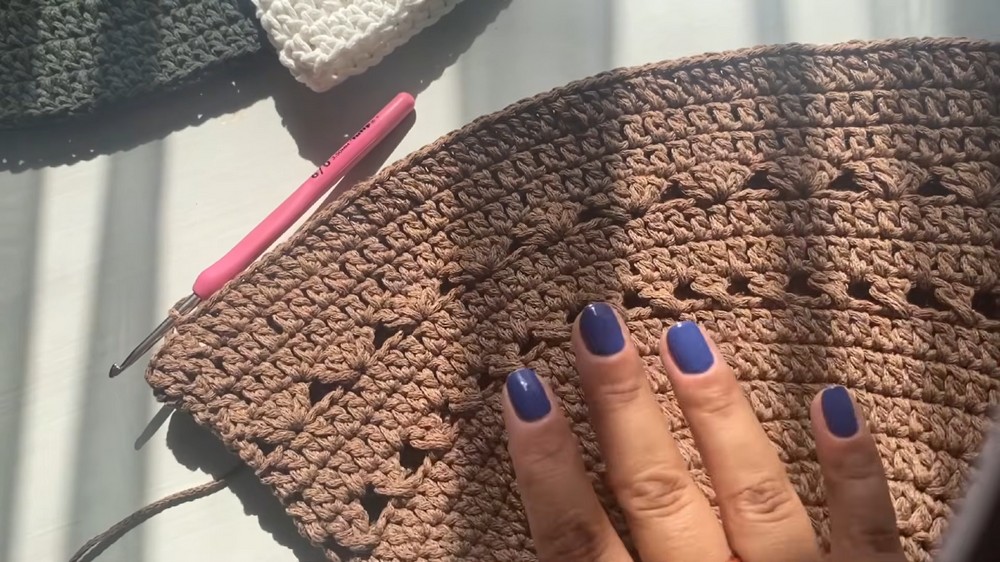
Assembly and Finished Size
- Weave in all yarn ends neatly.
- Lightly block or steam the hat to relax fibers and open stitch pattern.
- Finished measurements are approximately:
- Height: 20-21 cm (top of crown to brim edge).
- Diameter: ~25 cm flat width (fits average adult).
- Brim width: ~4 cm.
- Adjust length and stitch count for child sizes.

Conclusion
This simple yet stylish crochet hat is perfect for beginners and can be tailored to your desired size. Combining basic stitches like double and single crochet along with thoughtful increases, you achieve a neat, textured hat with a flattering silhouette and lovely curling brim. Whether for casual wear or gifts, this pattern offers quick and rewarding results.