
Free Crochet Smiling Face Keychain Pattern That is Joyful
Try this free crochet pattern to make a super cute smiling face keychain that's simple, fun, and a perfect little project for all skill levels,
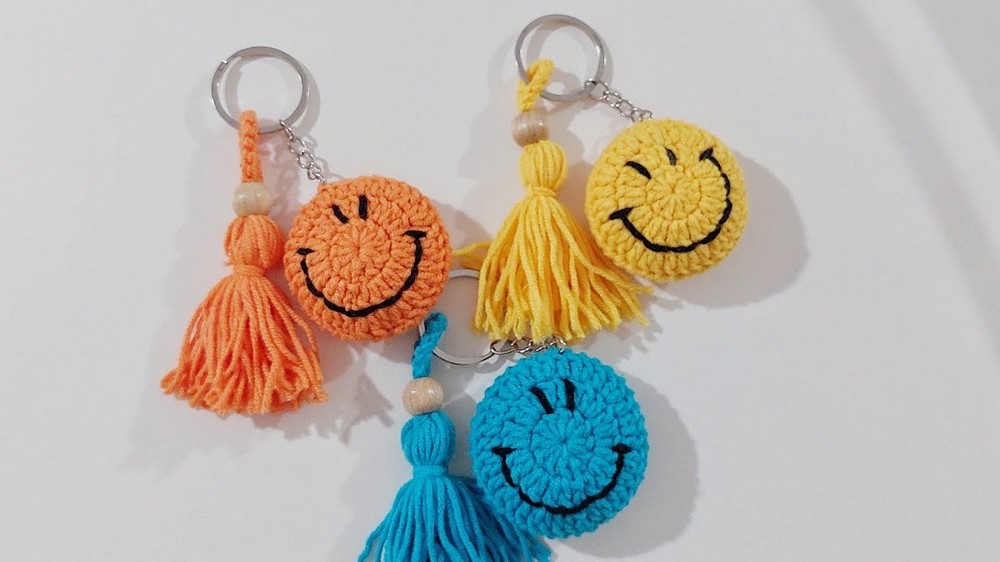
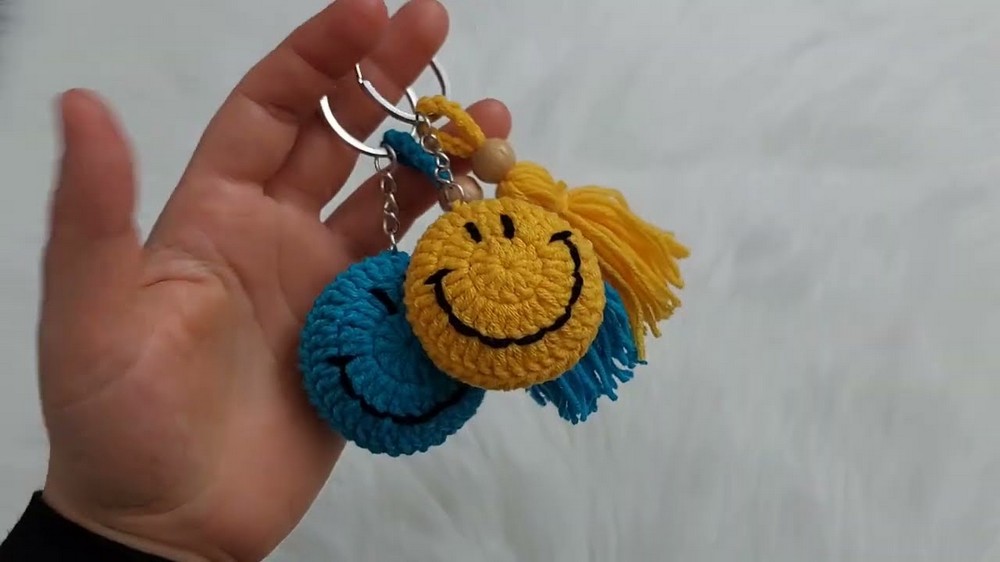
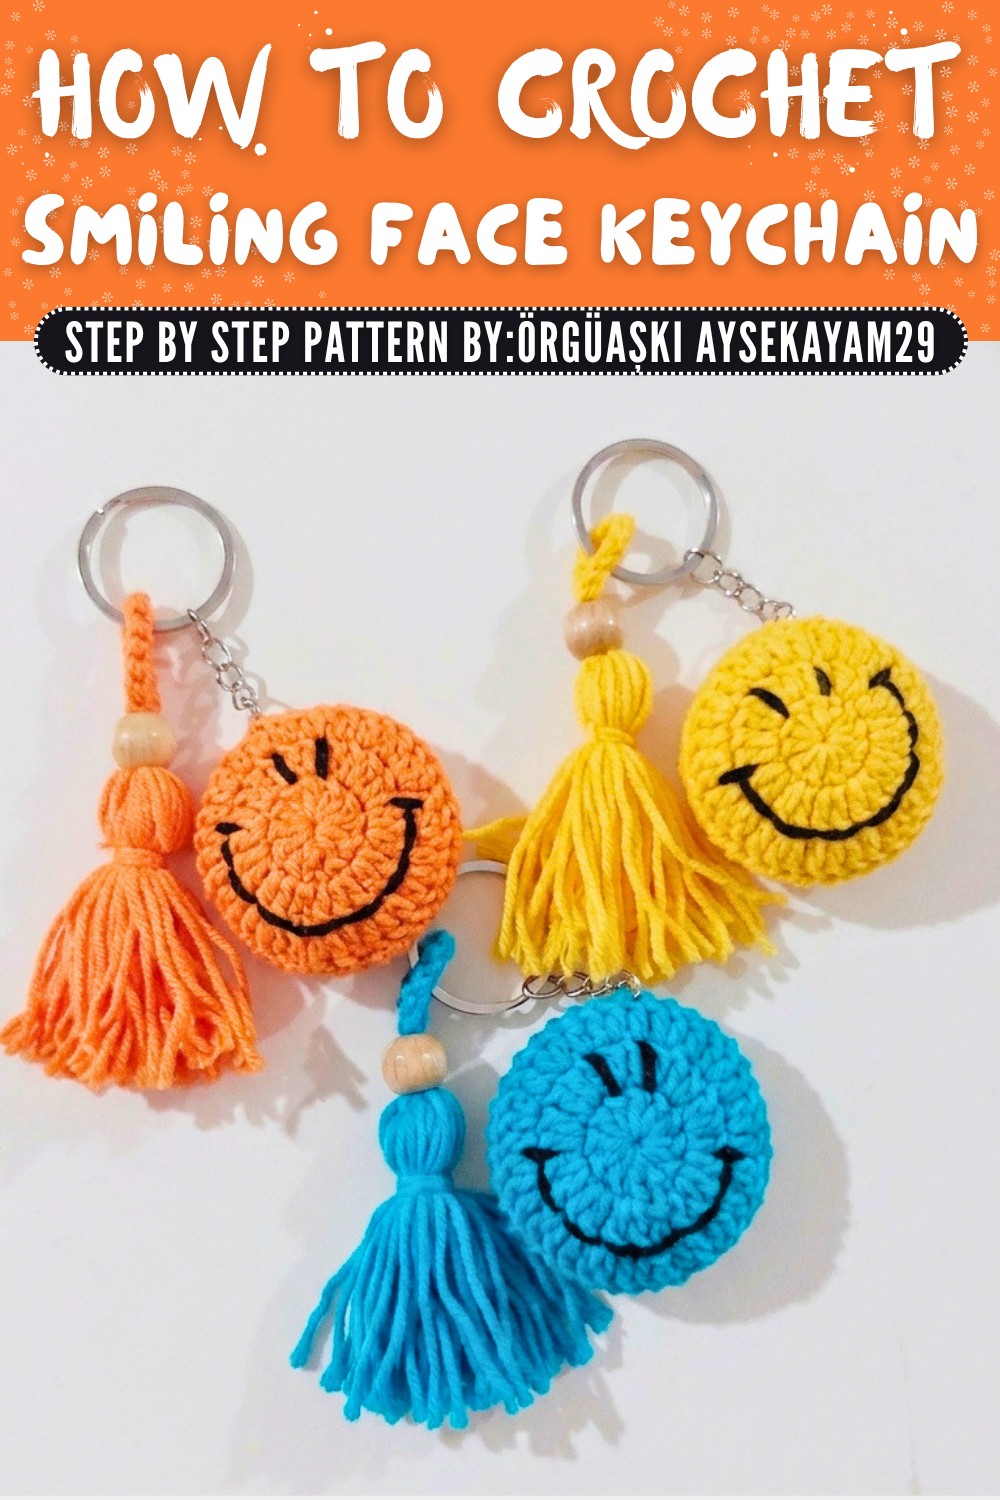
Get ready to carry a little joy wherever you go. This cheerful smiling face keychain is designed to brighten your day with its playful look and vibrant colors. Crocheted from Alize Cotton Gold yarn, with 55% cotton and 45% acrylic, it offers a soft yet sturdy texture that's ideal for daily use. This keychain stands out with its double sided design featuring a cute, embroidered smiley face.
Free Crochet Smiling Face Keychain to Share

The bright black eyes and happy mouth make it instantly eye catching and full of positive vibes. You can make it even more fun by adding silicone stuffing for a soft, squishy feel. Choose your favorite colors, like sunny yellow or cool blue, to match your style and make it truly one of a kind.
The tassels add extra flair, making it even funkier. They're super easy to make with just yarn and a piece of card, and you can customize their length to match your vibe. Clip it to your keys, bags, or even use it as a lucky charm-it's not just cute; it's functional too.
This smiling keychain is the perfect way to spread positivity and joy. It's a playful addition to your day or a thoughtful handmade gift for someone special. Small but full of charm, it's fun, unique, and packed with personality. Something so simple has never been so delightful.
Smiley Emoji Keychain Crochet Pattern
Materials Required
- Yarn:
- Alize Cotton Gold: A blend of 55% cotton and 45% acrylic is used in the project. This yarn ensures an excellent texture and durability for small projects like keychains. You can opt for similar sport weight yarn.
- Colors: Yellow for the smiley face, black for embroidery (eyes and mouth), and optional additional colors for accents (e.g., tassel or bead loops).
- Hook:
- 2 mm crochet hook.
- Accessories:
- Keychain Ring: To attach the final keychain.
- Filling Material: A small amount of polyester stuffing (silicone filling or similar) to add fullness to the keychain. This step is optional.
- Bead: A wooden bead or any decorative bead (make sure the yarn fits through the bead).
- Scissors, yarn needle, and a lighter (optional, for thinning yarn ends).
Special Techniques Used
- Magic Ring (Magic Circle):
This technique allows for a tight, gap free center when starting a circular crochet project.- Wrap yarn around two fingers to form a loop.
- Insert the hook, pull up a loop, and chain 1 to secure. Work all stitches into the loop. After completing the round, pull the tail tight to close the loop.
- Double Crochet (dc):
- Yarn over, insert the hook in the specified stitch or space, yarn over, and pull up a loop (3 loops on hook). Yarn over, pull through 2 loops, yarn over, and pull through remaining 2 loops.
- Slip Stitch (sl st):
A technique used to join rounds or move to the next stitch without adding extra height.
Pattern Instructions
Part 1: Smiley Emoji Circles (Make 2)
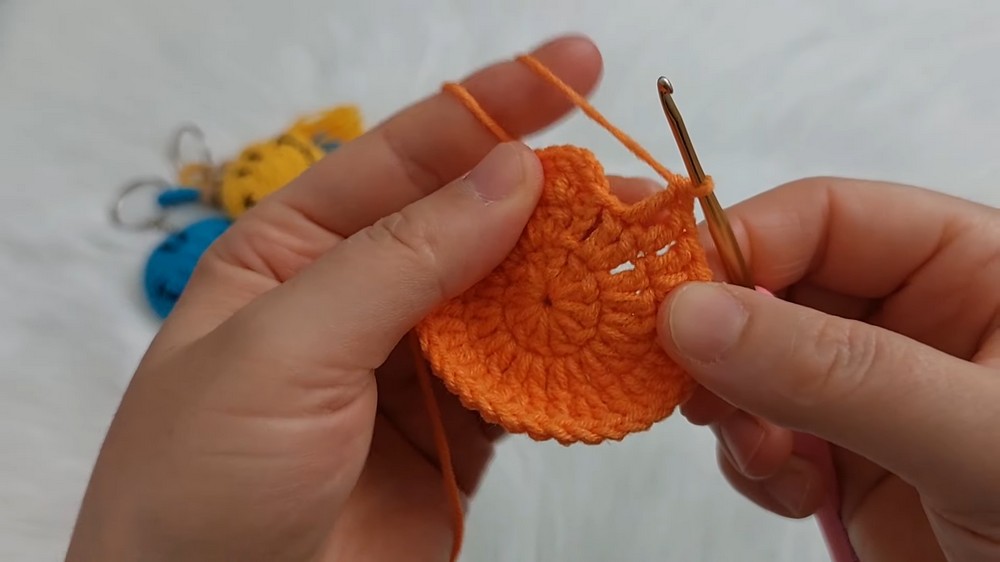
Round 1 - Foundation Ring
- Start with a magic ring and chain 3 (counts as the first dc).
- Work 11 double crochets into the magic ring, for a total of 12 dc (including the starting chain).
- Tighten the magic ring by pulling the free yarn tail.
- Join with a slip stitch into the top of the starting chain 3 to close the round.
Round 2 - Increasing the Circle
- Chain 3 (counts as the first dc), then work 1 dc in the same stitch.
- Work 2 dc in each stitch around, increasing evenly across the round.
- You should have 24 dc at the end of this round.
- Join with a slip stitch to the top of the starting chain 3.
Round 3 - Final Circle Round
- Chain 3 (counts as a dc), then work 1 dc in the next stitch, and 2 dc in the next stitch.
- Repeat this sequence: 1 dc in the next stitch, 2 dc in the next stitch, around the circle.
- At the end of this round, you will have 36 dc.
- Join with a slip stitch to the starting chain 3 to complete the first circle.
Creating the Second Circle
- For the second circle, repeat Rounds 1-3 exactly as above, but leave a long yarn tail for sewing when you cut the yarn.
- Weave in the yarn ends for the first circle using a tapestry needle. The yarn ends will remain hidden as this side will be the inside of the keychain.
Part 2: Facial Embroidery (Eyes and Mouth)
Embroidery Placement
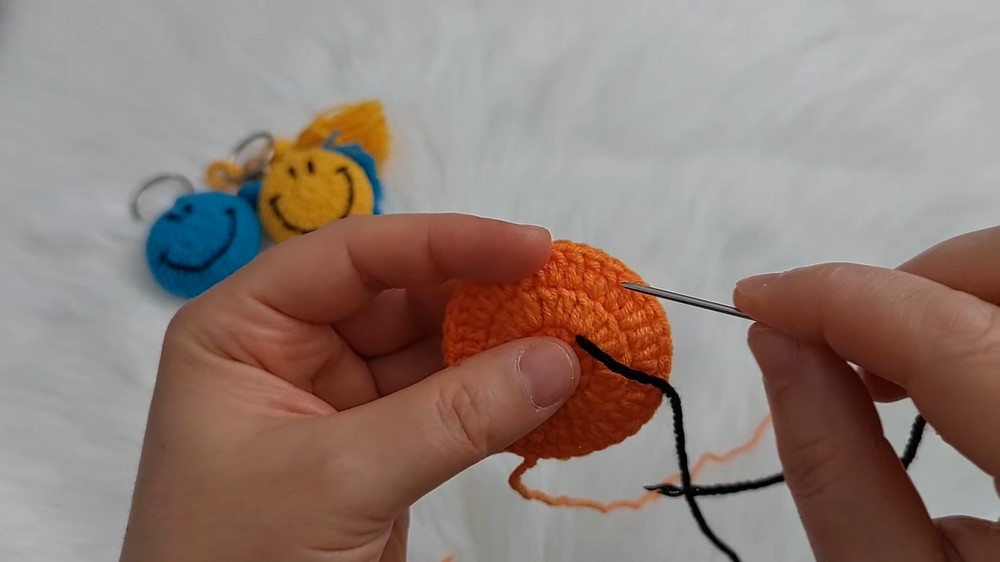
- Use black yarn and a yarn needle to embroider the eyes and a smiling mouth onto one of the circles. This circle will become the "front side" of the keychain.
- Eyes:
- Count two stitches down from the top edge of the circle (looking at it like a clock). Begin the first eye by stitching over one or two stitches. Repeat symmetrically for the second eye, leaving a gap of 2-3 stitches in the middle.
- Mouth:
- Locate the center of the bottom half of the circle to begin the smile. Use a running stitch or backstitch to create a gentle curve across 6-7 stitches. You can make the smile wider by extending the curve.

Securing the Yarn
- Tie a small knot on the back of the piece to secure the embroidery yarn.
- Since this side will be sewn to the back panel, the knots and yarn ends will remain hidden inside.

Part 3: Joining the Circles
- Place the two circles wrong sides together, ensuring that the embroidered side faces outward.
- Thread the long yarn tail from the second circle into the yarn needle.
- Begin sewing the circles together using a simple whipstitch or running stitch along the outer edge.
- Insert the needle under one loop of each stitch around. Continue until only a small gap remains open.
Part 4: Stuffing
- Optional Filling: Before fully closing the circles, insert a small amount of silicone or polyester stuffing into the gap.
- Ensure the stuffing is evenly distributed for a fuller, soft appearance.
- Sew the gap closed and tie a knot securely. Weave in the remaining yarn end to finish.
Part 5: Tassel and Keychain Details
Making the Tassel
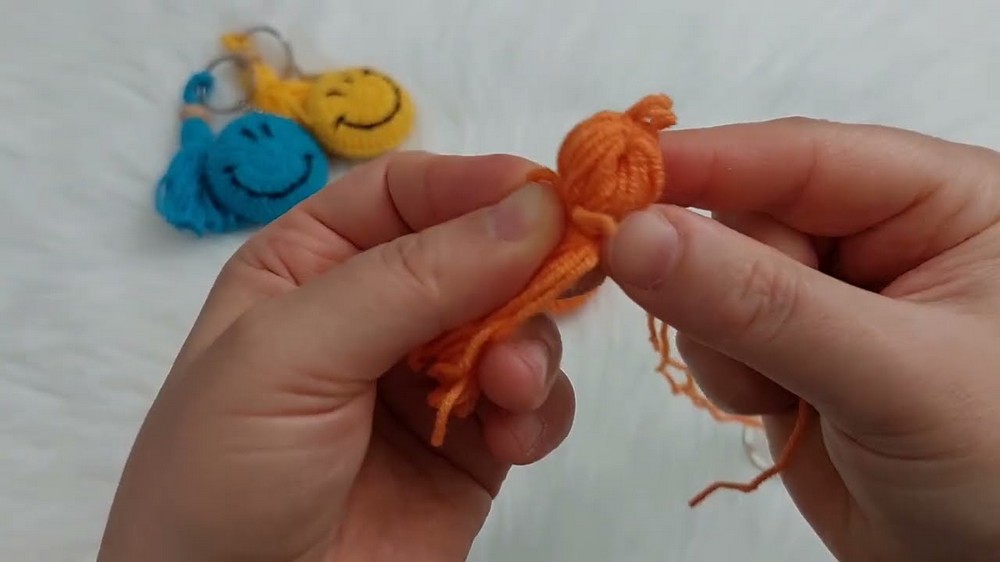
- Cut a piece of yarn 70-80 cm long and double it.
- Wrap the yarn around a piece of cardboard or a similar item approximately 7 cm wide, 30 times.
- Slide the wrapped yarn off the cardboard and tie it securely at the top with the doubled string.
- Cut the bottom ends of the wrapped yarn to create tassel threads.
- Wrap another string around the tassel near the top, creating the "neck" of the tassel. Tie it securely.
Attaching the Keychain Ring
- Thread the tassel and keychain ring together using the long tied off string.
- Alternatively, attach the keychain ring to the top corner of the circles.
- Tie securely, knot firmly, and trim any excess yarn.

Finishing the Keychain
- Check that all yarn ends are secured and hidden.
- Use scissors to trim any uneven tassel pieces to the desired length.
- Thread a decorative wooden bead through the tassel string if desired, tying it snugly to prevent movement.
Conclusion and Tips for Success
Customization Ideas
- Try different yarn colors to create a variety of emojis-classic yellow with black, or colorful variations like blue or orange as shown in the pattern.
- Add embellishments such as small buttons or embroidery to create unique expressions.
Maintenance Tips
- Hand wash with mild soap and air dry to maintain the shape and durability of your yarn keychain.
- Store away from sharp objects to prevent fraying.
Final Remarks
This Smiley Emoji keychain is a delightful and simple crochet project. It's a fun way to use up leftover yarn, experiment with small detailing techniques, and create personalized gifts. Whether used as a keychain, bag charm, or small ornament, this crocheted smiley is a cheerful addition to your collection. With its soft texture, bright colors, and cute tassel detail, you'll want to make more for friends and family.