
How to Crochet Amigurumi Bunny for Free – Step-by-Step Guide
Choose a playful pastime with Free Crochet Amigurumi Bunny Pattern featuring clear instructions suited for newcomers & creative enthusiasts.
Could a tiny bunny become the sweetest part of a room and make every corner feel more cheerful? A cute little rabbit shape slowly comes to life with long ears a gentle face and a lovable appearance that attracts attention right away. The Crochet Amigurumi Bunny pattern helps form this charming figure in a simple and easy way that feels clear and enjoyable for everyone. Its friendly look makes it a wonderful choice for children toy collections room displays and thoughtful gifts for loved ones. The balanced shape gives it a neat appearance while the adorable features make it feel warm and welcoming.
Crochet a Charming Amigurumi Bunny with This Free Pattern

This lovely bunny can sit on a shelf rest on a bed or decorate a nursery with its playful style. Its compact size makes it easy to place anywhere without taking much space. The sweet expression brings comfort and happiness which makes it enjoyable for both children and adults. It also serves as a meaningful keepsake that can be treasured for a long time. Different color choices give each bunny its own personality and unique charm.
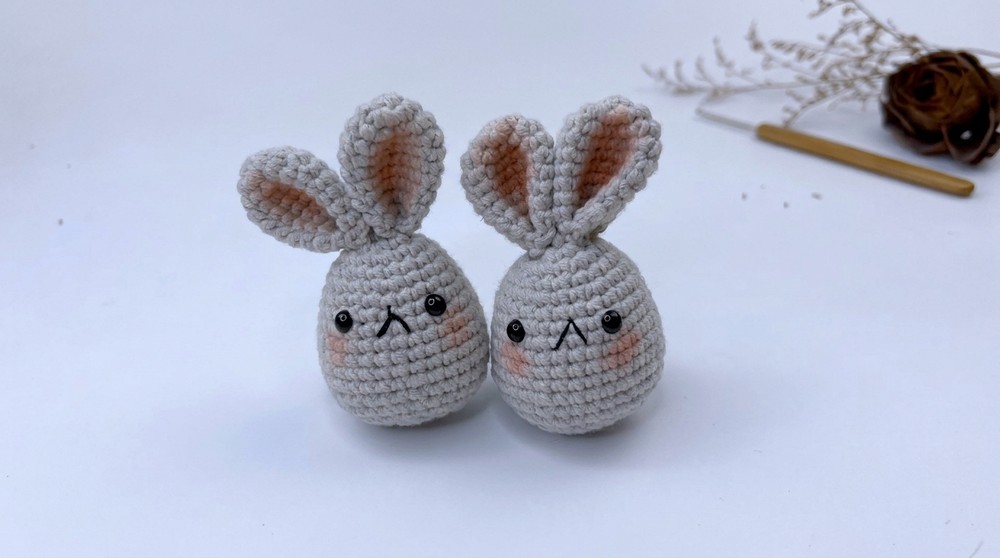
The simple design allows the finished piece to look attractive from every angle. Its cute form encourages imagination and adds a joyful touch to everyday surroundings. Whether displayed as a decoration presented as a gift or kept as a favorite toy this delightful bunny spreads warmth and kindness wherever it goes. The Crochet Amigurumi Bunny pattern combines beauty creativity and playful character in one adorable figure that makes any space feel brighter more welcoming and full of happiness.
Amigurumi Bunny Crochet Pattern
Create a lovable amigurumi bunny, perfect as a gift or a cute keepsake! This beginner-friendly project uses simple stitches combined with shaping techniques to bring your bunny to life.
Preparation and Materials Checklist
- Familiarize yourself with these techniques: Magic Ring, Single Crochet (sc), Slip Stitch (sl st), working in Back Loop Only (BLO), Increase (inc), and Decrease (dec) stitches.
- Use 5 ply milk cotton yarn or similar soft yarn suitable for amigurumi. Approx. 125g is required.
- A 2.75 mm crochet hook is recommended for tight, firm stitches to prevent stuffing from showing.
- Have scissors, a darning needle, stitch marker, safety eyes, and cotton stuffing ready.
- Choose a soft blush color or fabric paint for cheeks if desired.
- Hold your yarn comfortably to keep even tension and neat stitches throughout the project.
Important Information & Tips
- Worked in continuous rounds beginning with a magic ring.
- Uses slip stitches on the back loop for a subtle ridge texture and shaping distinction.
- Stitch marker is essential for marking the end of each round for easy stitch counting.
- Increases and decreases shape the rounds to form the bunny's head and ears.
- The ears are crocheted separately, then sewn together and attached to the head.
- Finishing touches include adding safety eyes, embroidery for the mouth, and optional cheek coloring.

Construction Overview
- The head is worked in rounds with shaping by increasing and decreasing single crochet stitches and slip stitches worked on back loops to create texture.
- Stuffing is added before the last rounds to fill the bunny's head firmly.
- Ears are individually crocheted in rounds, joined, and sewn to the head.
- Facial details are added with eyes, embroidery, and optional cheek color.
Skill Level & Difficulty
Beginner to Intermediate beginner. Some experience with amigurumi techniques and stitch counting will help but all steps are clearly explained.
Dimensions & Final Size
- The completed bunny stands approximately 12-15 cm (5-6 inches) tall depending on yarn and tension.
Supplies Needed
- 125g 5 ply Milk Cotton yarn or equivalent soft yarn.
- 2.75 mm (US C) crochet hook.
- Polyester fiberfill or cotton stuffing.
- Stitch marker.
- Safety eyes (recommended size about 6 mm).
- Scissors.
- Darning/tapestry needle.
- Optional: blush fabric paint or colored pencil for cheeks, embroidery thread for mouth detail.
Size Chart
| Part | Approximate Size | Stitches/Notes |
|---|---|---|
| Head Width | 8 cm (3.15 inches) approx. | Up to 36 stitches per round in widest part |
| Ear Height | 5 cm (2 inches) approx. | 18 stitches per round |
Crochet Gauge Info
- Gauge is not critical for amigurumi but tight stitches are important to prevent stuffing leakage.
- Approximately 8 single crochets = 2.5 cm (1 inch) worked with 2.75 mm hook.

Crochet Terminology & Abbreviations
- ch = chain
- sc = single crochet
- sl st = slip stitch
- inc = increase (2 sc in same stitch)
- dec = decrease (single crochet two stitches together)
- BLO = back loop only
- st(s) = stitch(es)
Explanation of Special Techniques
Magic Ring:
Creates an adjustable starting loop for working in rounds, allowing the center to be pulled tight closed.
Increase (inc):
Work 2 single crochets into the same stitch to add stitch count.
Decrease (dec):
Single crochet two stitches together to reduce stitch count and shape the work.
Slip Stitch on Back Loop (sl st BLO):
Insert hook into the back loop only for slip stitch - creates a ridge line and shapes the round subtly.
Step-by-Step Pattern Directions
Head Construction
Round 1:
- Make a Magic Ring.
- Ch 1, work 6 sc into ring.
- Sl st BLO to join.
- 6 stitches
Round 2:
- Ch 1.
- Inc sc around (2 sc in each stitch).
- Sl st BLO to join.
- 12 stitches
Round 3:
- Ch 1.
- Sc in next stitch, inc sc in next stitch; repeat 6 times.
- Sl st BLO to join.
- 18 stitches
- Place stitch marker on the slip stitch to mark round end.
Round 4:
- Ch 1.
- Sc in every stitch around.
- Sl st BLO to join.
- 18 stitches
Round 5:
- Ch 1.
- Sc in next 2 stitches, inc sc in next stitch; repeat 6 times.
- Sl st BLO to join.
- 24 stitches

Rounds 6-7:
- Ch 1.
- Sc in every stitch around.
- Sl st BLO to join.
- 24 stitches

Round 8:
- Ch 1.
- Sc in next 3 stitches, inc sc in next stitch; repeat 6 times.
- Sl st BLO to join.
- 30 stitches
Rounds 9-11:
- Ch 1.
- Sc in every stitch around.
- Sl st BLO to join.
- 30 stitches
Round 12:
- Ch 1.
- Sc in next 4 stitches, inc sc in next stitch; repeat 6 times.
- Sl st BLO to join.
- 36 stitches
Round 13:
- Ch 1.
- Sc in next 4 stitches, dec sc in next stitch; repeat 6 times.
- Sl st BLO to join.
- 30 stitches
Round 14:
- Ch 1.
- Sc in every stitch around.
- Sl st BLO to join.
- 30 stitches
Round 15:
- Ch 1.
- Sc in next 3 stitches, dec sc in next stitch; repeat 6 times.
- Sl st BLO to join.
- 24 stitches
Round 16:
- Ch 1.
- Sc in next 2 stitches, dec sc in next stitch; repeat 6 times.
- Sl st BLO to join.
- 18 stitches
- Stuff firmly with cotton stuffing.
Round 17:
- Ch 1.
- Sc in next stitch, dec sc in next stitch; repeat 6 times.
- Sl st BLO to join.
- 12 stitches
Round 18:
- Ch 1.
- Dec sc around (6 dec).
- Sl st BLO to join.
- 6 stitches
- Cut yarn, leaving long tail for closing hole.
Simple Explanation for Beginners:
The bunny's head grows bigger and then tapers using increases and decreases. Slip stitches on the back loop add a nice texture. Make sure to stuff the head before finishing to give it shape.
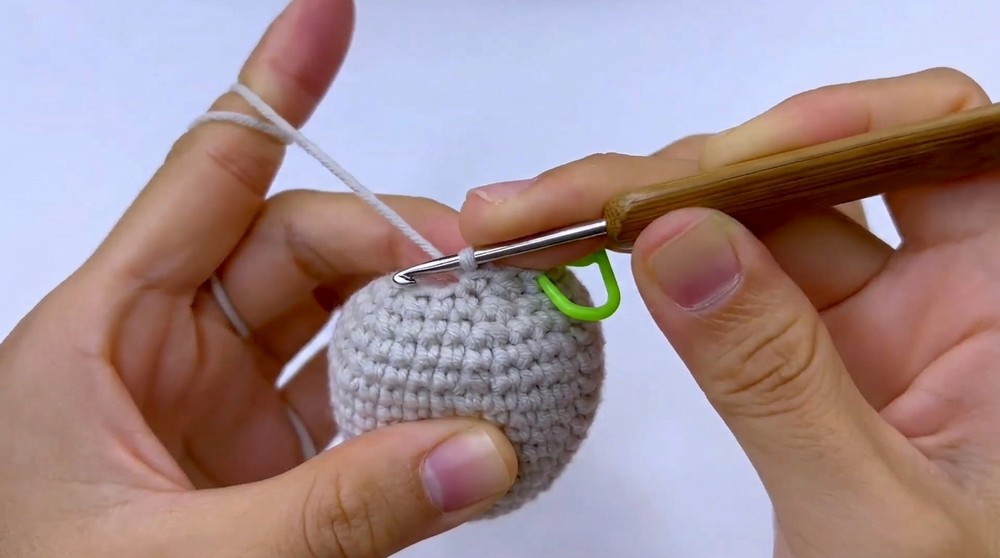
Creating the Ears (Make Two)
Round 1:
- Make Magic Ring, work 6 sc into ring.
- Sl st BLO to join.
- 6 stitches
Round 2:
- Ch 1.
- Inc sc in every stitch around.
- Sl st BLO to join.
- 12 stitches
Round 3:
- Ch 1.
- Sc in next stitch, inc sc in next stitch; repeat 6 times.
- Sl st BLO to join.
- 18 stitches
Rounds 4-9:
- Ch 1.
- Sc in every stitch around.
- Sl st BLO to join.
- 18 stitches
Final Ears Assembly:
- Ch 1, join both ears side by side and sc along edges to connect.
- Repeat to create second ear piece.
- Sew ears securely to the head later.

Beginner Explanation:
Each ear is worked flat in rounds and then joined to make the correct shape before sewing to the bunny's head.
Finishing Touches and Assembly Guidelines
- Sew ears firmly to the top of the head for stability.
- Attach safety eyes in desired position.
- Embroider mouth and nose using yarn or embroidery thread.
- Use fabric paint or colored pencils for cheeks if preferred.
- Weave in all ends to hide strands and tidy appearance.
- Shape the stuffing and smooth out the bunny's form.


Common Issues and Solutions
- Stuffing showing through stitches: Use tighter tension or smaller hook.
- Losing track of rounds: Always use a stitch marker to mark the end of rounds.
- Difficulty closing hole after last decrease: Leave a long tail and close hole using darning needle stitches.

Additional Project Ideas
- Customize color schemes for unique bunnies.
- Make coordinating hats or scarves for your bunny using complementary stitches.
- Adapt this pattern to create other animals (cats, bears) with small modifications.
- Add embellishments like bows, tiny clothes, or accessories.
- Create a collection of amigurumi characters with similar stitch techniques.