
How to Crochet Granny Shorts – Free Pattern & Guide
Refresh summer outfits with a Free Crochet Granny Short Pattern featuring a comfortable fit perfect for warm days casual and relaxed outings.
Warm weather calls for clothing that feels light and breezy yet looks attractive and fits well Handmade shorts made with small square pattern offer just that-comfort combined with style. This shorts are ideal for casual outings, lounging at home, or spending relaxed days by the beach. Their easygoing design pairs nicely with many tops, making them a versatile addition to any summer closet.
Easy & Free Crochet Granny Short Pattern for Summer

A Crochet Granny Short pattern uses a method based on connecting charming square motifs known as granny squares. These squares come together to form a unique fabric full of texture and visual interest. The pattern uses simple stitch techniques, making it approachable for beginners and enjoyable for experienced makers alike. The open spaces between stitches allow air to flow freely which helps keep you cool and comfortable, especially during hot days.
One special feature is the colorful patchwork look that adds a touch of vintage charm and personality to every pair. The handmade appearance and thoughtful arrangement of squares give this shorts a standout style that sets them apart from mass-produced items. The breathable design not only looks good but also feels refreshing on the skin throughout the day.
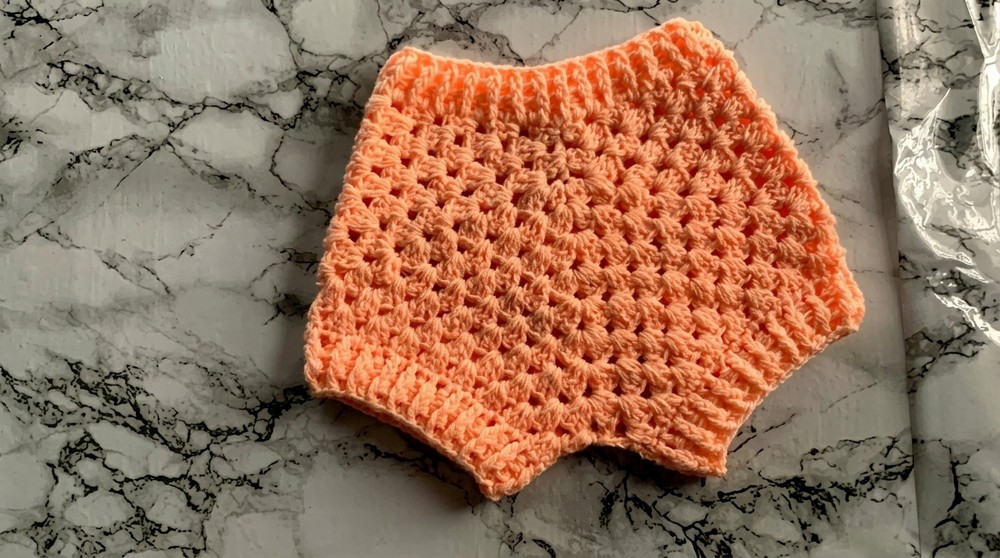
This shorts offer many advantages such as easy size adjustment by adding or reducing rows, ensuring a perfect fit for different body shapes. The yarn used is gentle, making the garment suitable for people with sensitive skin or children. The functionality extends beyond fashion since their lightweight and airy nature makes them practical for a variety of activities and places.
Useful for casual wear, beach days, and gifting, this shorts combine comfort with style and individuality. Because each pair is made piece by piece they carry a special meaning that store-bought clothes often lack. Wearing them is not just about fashion but also about enjoying something thoughtfully made and uniquely yours.
Baby Crochet Shirt Pattern (6 Months to 1 Year)
A beautiful, textured baby shirt designed for ages 6 months to 1 year with easy adjustability for older kids. This pattern uses double crochet clusters and scalloped edges with stretchy leg openings and a comfy waist.
Preparation Tips Before You Begin
- Use baby-friendly, soft 3-ply yarn doubled for medium fabric thickness.
- Crochet hook size 3.5 mm (UK) recommended; adjust if needed for gauge.
- Gather scissors, yarn needle, stitch markers, and tape measure.
- Pattern is measurement-based; follow your measurements for best fit.
- Basic knowledge of double crochet, front/back post dc stitches helpful.
- Work panels flat and join sides for the shirt body.
Important Notes About This Pattern
- Made from two identical panels worked flat with decorative scalloped edges.
- Panels widen by adding "edges" of chains and groups of three double crochets.
- Panels joined at sides using slip stitches.
- Sleeves and body shape created by working leg openings with post stitches.
- Waistband worked last for stretch and fit adjustment.
- Stitch counts increase naturally with edge rows.
Overview of Construction
- Crochet two flat rectangular panels with scalloped edges in rows.
- Join panels side to side to form shirt body.
- Create armhole openings by shaping with clusters and chain spaces.
- Work arm and bottom edges with front and back post stitches for texture and elasticity.
- Finish with waistband rounds.
Difficulty Level
Beginner to intermediate. Knowledge of double crochet and post stitches recommended.
Finished Size
- Designed to fit babies aged 6-12 months.
- Adjustable width and length for larger sizes.
- Approximate chest width after joining ~9½ inches unstretched.
Materials
- Soft baby yarn 3-ply doubled or similar weight yarn.
- 3.5 mm crochet hook (UK).
- Tape measure, stitch markers, scissors, yarn needle.
Sizing & Measurements
- Start foundation chain: 7 chains (adjust width accordingly).
- Work rows to about 8 rows or 6½ inches length for crotch/torso area.
- Waist width adjusted by adding edge rows.
Gauge
- Gauge varies; focus on measurement and tension consistency.
Stitch Abbreviations
- ch: chain
- dc: double crochet
- sl st: slip stitch
- st(s): stitch(es)
Special Techniques
3 Double Crochet Cluster Group (3 dc cluster)
Work 3 double crochets into the same stitch or chain space to form decorative scalloped edges.
Step-By-Step Instructions
Panel Creation (Make 2)
Foundation:
- Tie your yarn and ch 7.
Row 1:
- 3 dc into first chain.
- Skip 2 chains, 3 dc into next chain. Repeat across.
- End with 3 dc in last chain.
Work Back Across Row Without Turning:
- Ch 1, 3 dc into the same space as your last triple cluster.
- Repeat 3 dc clusters into every 3-dc cluster from previous row.
Subsequent Rows (Adding Scalloped Edges):
- Ch 3 (counts as first dc), turn.
- Into each chain space, work 3 dc.
- When you reach edge chain spaces, work 3 dc, ch 3, 3 dc to create edges.
- Finish row with dc in first ch-3 of previous row.
- Chain 3 and turn.

Repeat these rows, expanding panel width with edges, until length about 6½ inches or desired size.
Panel Width Adjustment
- To increase waist circumference after crotch length reached, add edge rows only on one side to widen panel without lengthening crotch.
- Work rows of 3-dc clusters as above on the chosen side, ending with dc on edge.
- Stop when waist matches measurement (~9½ inches).
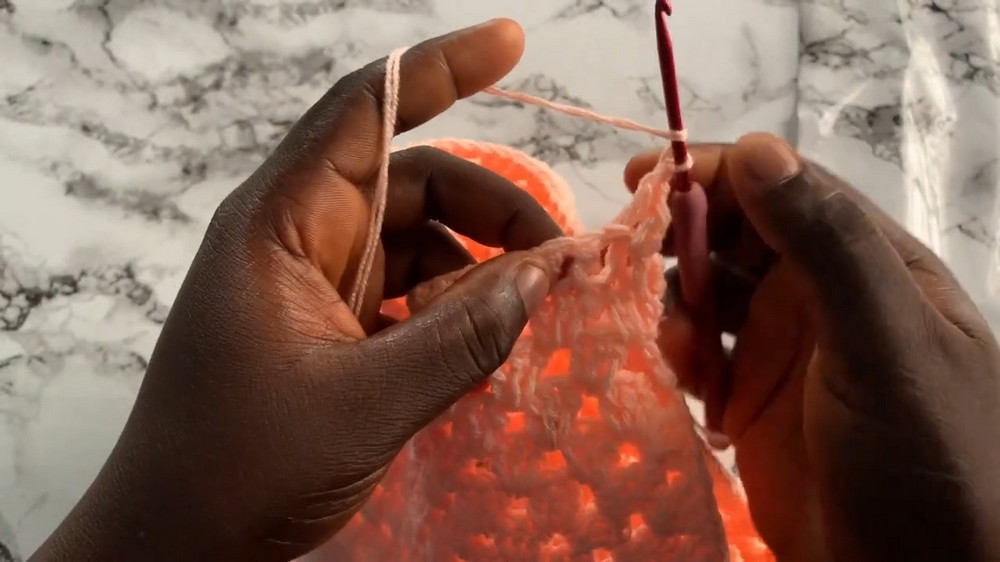
Join Panels
- With right sides facing, align side edges.
- Insert hook through corresponding stitches on both panels, yarn over, pull through both loops.
- Chain 1, then slip stitch through the rest of the side stitches to join.
- Repeat for other side and fasten off.

Arm and Bottom Edge Shaping
- Fold shirt and join crotch with slip stitches to close.
- Chain 1, sc around armhole openings to create sturdy edging and shape.
- Work 2 rows of front post and back post double crochet (fpdc & bpdc) for stretch and texture around sleeves and bottom edge.
Creating the Front and Back Post Double Crochet (Fpdc & Bpdc)
- Fpdc: Yarn over, insert hook front to back around post of stitch on previous row, pull yarn through, complete dc.
- Bpdc: Yarn over, insert hook back to front around post of stitch, pull yarn through, complete dc.
- Alternate fpdc and bpdc stitches around perimeter for stretchy texture.
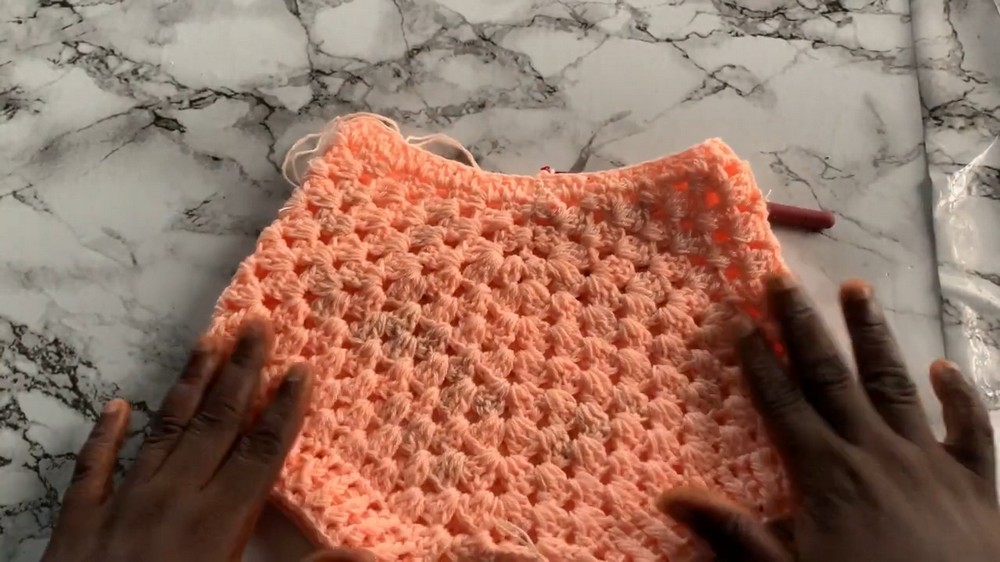
Waistband Rounds
- From center front bottom edge, join yarn with slip stitch.
- Chain 1, work dc rows around waist edge, increasing where needed by adding extra stitches in larger spaces.
- Continue for 2-3 rounds of alternating fpdc and bpdc stitches until waistband fits snugly.
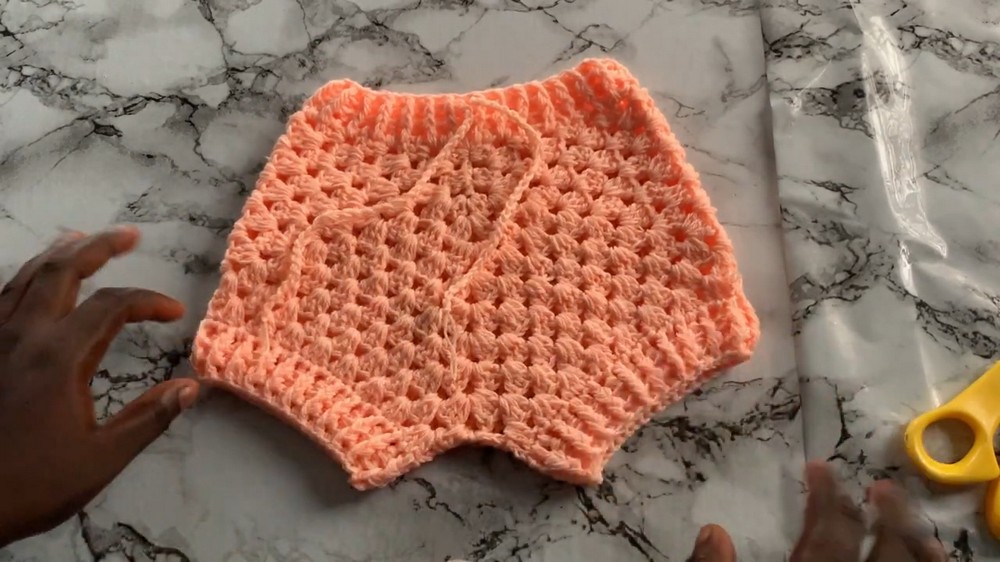
Beginner-Friendly Explanation
You start by crocheting two flat rectangular panels using groups of 3 double crochets separated by chain spaces. Edges are expanded by adding groups of 3 dc and chains, creating scallops that increase width. You join the panels at the sides, closing the crotch, and work around the armholes and bottom edges using front and back post double crochets for a stretchy, comfortable finish. Then you finish the waistband similarly for a snug fit.
Finishing Instructions
- Join panels on sides with slip stitches for clean seams.
- Shape armholes and bottom edges with 2 rows of post stitches for elasticity.
- Weave in all yarn ends carefully.
- Optionally block the finished shirt to even out edges and shape scallops.
- Add optional drawstring or elastic for waist adjustability.
Troubleshooting Tips
- If panels are too narrow or wide, adjust foundation chain or edge rows.
- Scallops uneven? Keep consistent tension and ensure correct placement of edges.
- Waist too loose? Add more post stitch rows or incorporate a drawstring.
- Challenge joining panels? Use stitch markers to align before joining.
Creative Project Ideas
- Use this stitch pattern to create matching baby hats or booties.
- Extend panels for longer shirts or dresses.
- Make coordinating lightweight baby blankets.
- Customize colors and stripes for seasonal wear.
