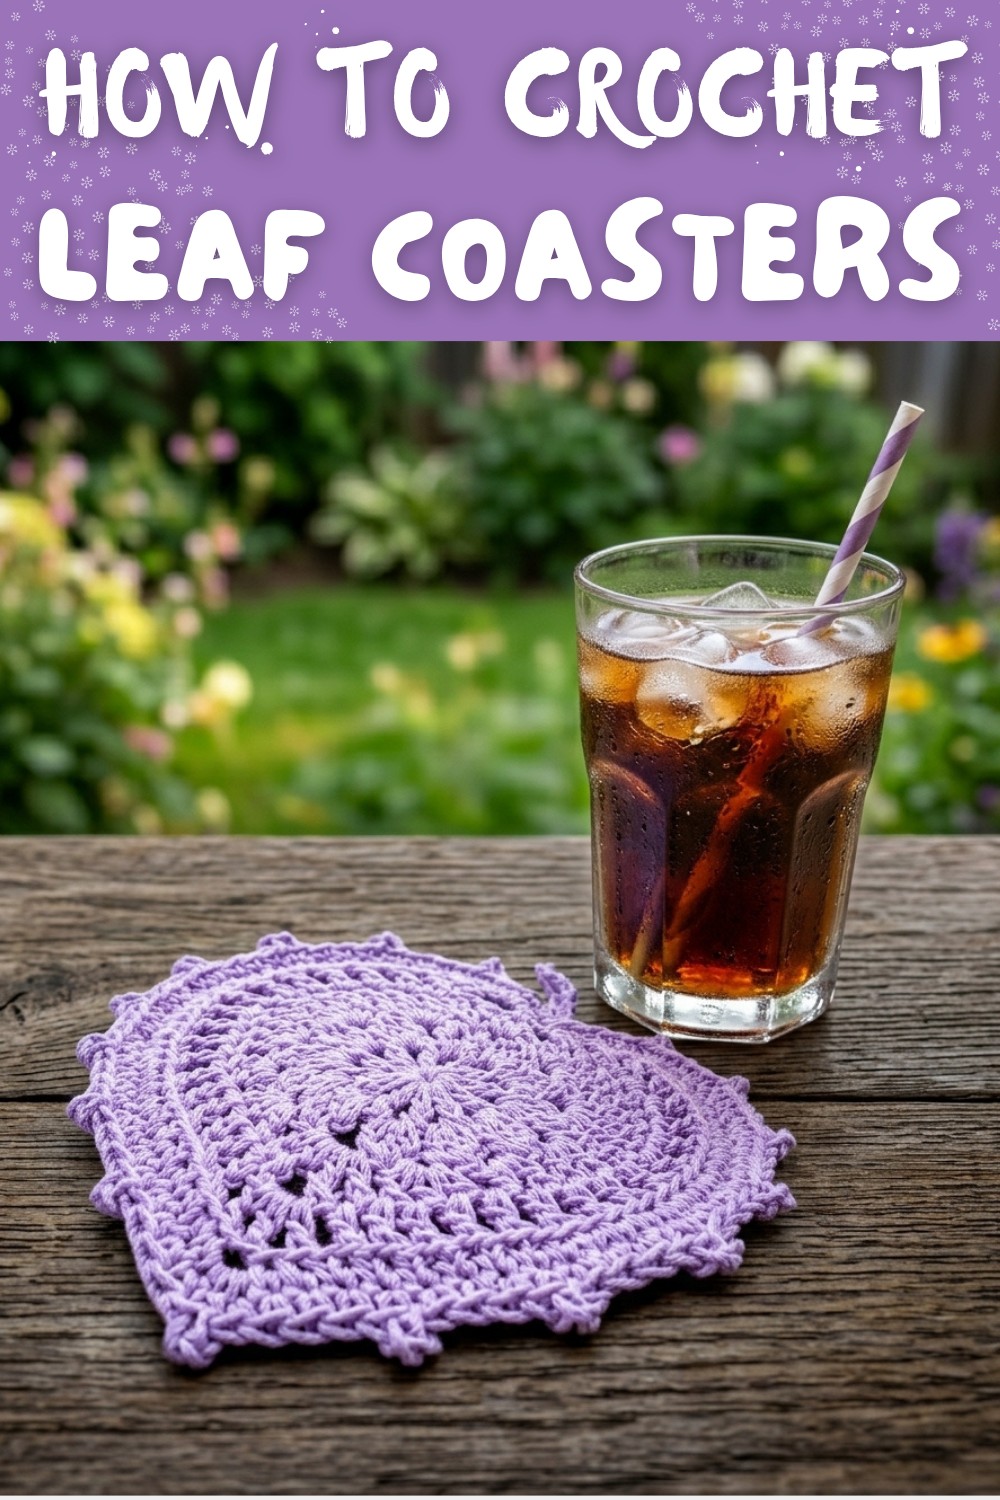
Simple Free Crochet Leaf Coaster Pattern for Cozy Vibes
Warm drinks become a delightful experience with this free crochet leaf coaster pattern, blending the beauty of nature with the charm of soft comfort.
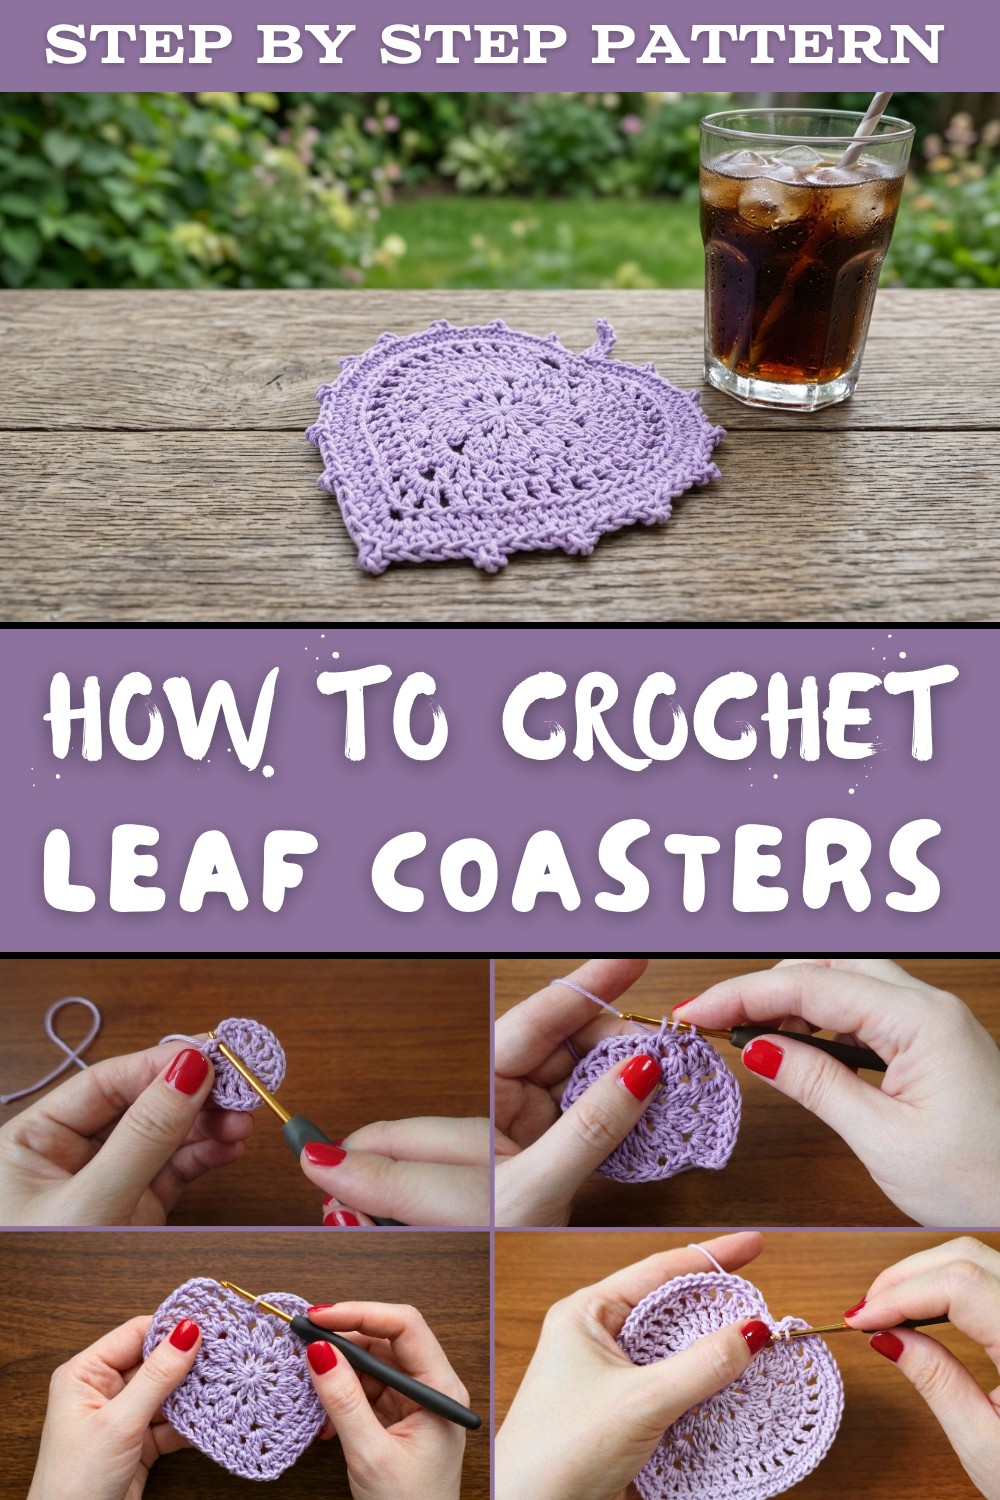
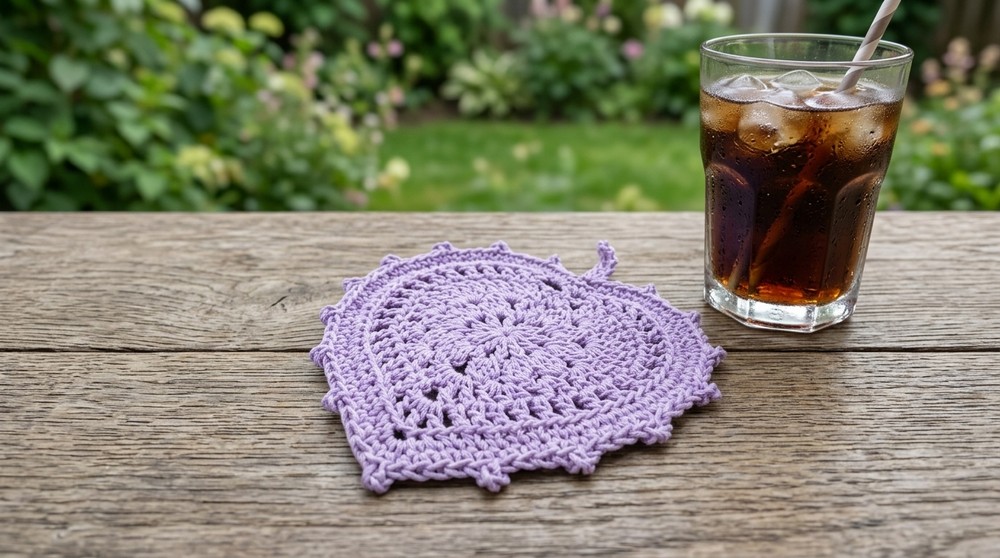
Brighten your summer home with this fun and lightweight accessory that's as practical as it is beautiful. The Free Crochet Leaf Coaster Pattern is here to add a fresh and natural vibe to your kitchen or living space. This stunning coaster features a pointed tip and a thick ribbed center line, making it look just like a real forest leaf. It's a delightful combination of creativity and function, perfect for anyone who wants to try something simple yet stunning.
Made with soft cotton yarn, this coaster has a bright body and a neat matching stem loop that adds a cheerful and realistic touch. The flat and sturdy design ensures your glasses, mugs, or bottles can rest securely without tipping over, even during busy family gatherings. From morning tea to afternoon juice, this little treasure is ready to be by your side.
Try This Free Crochet Leaf Coaster Pattern for Instant Charm
Beginner friendly and budget friendly, this project uses only a small amount of yarn and basic tools, making it perfect for those exploring crochet for the first time. Its lightweight and durable structure mean you're creating something both beautiful and long lasting without spending extra money. You'll also love how this coaster catches unwanted water drops and protects your furniture from heat marks, ensuring your tables stay spotless and safe.
The decorative leaf veins and elegant shape add an extra wow factor, sure to impress guests and make your dining table or study desk look extra stylish. This versatile piece isn't just practical-it's a lovely addition to any space, from the kitchen to your bedroom nightstand. It also makes the perfect handmade gift for holidays or special occasions. With simple step by step instructions, anyone can pick up their hook and yarn and bring this cozy, nature inspired mug mat to life in no time.
Crochet Leaf Coaster Pattern
Materials Needed
- Yarn Type:
- A cotton yarn such as Komamyun yarn, recommended for its durability and crisp structure.
- Example: Lime green cotton yarn for a fresh and vivid look.
- Hook:
- A crochet hook size 4.0 mm is used in the video. Adjust hook size if your tension differs.
- Additional Tools:
- Scissors for trimming yarn.
- Tapestry needle for weaving in ends.
- Optional: Leather or metal tag for embellishment.
Pattern Structure and Techniques
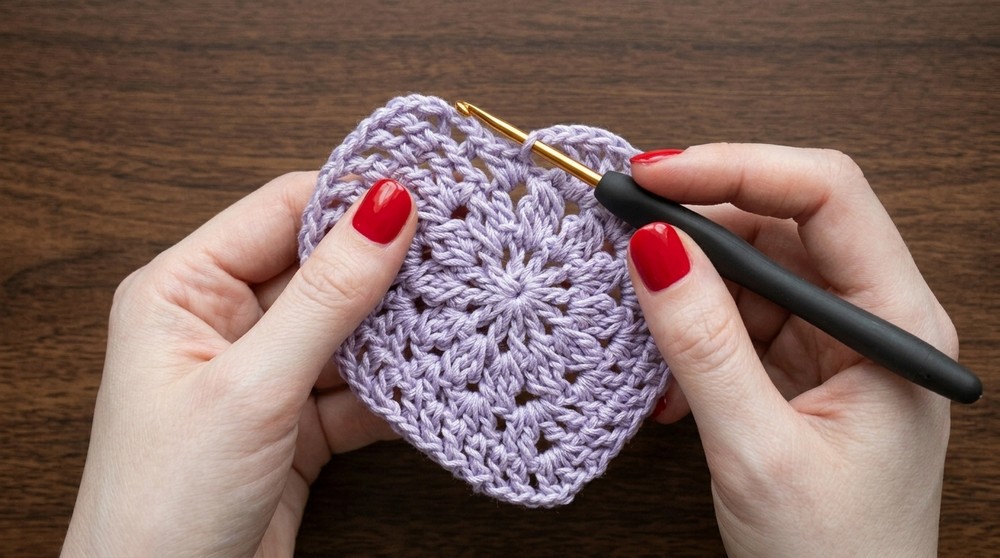
The tea coaster follows a circular crochet base with added leaf like edges. The process uses methods such as magic ring, single crochet (sc), double crochet (dc), and picot stitches.
Crochet Pattern Instructions
Step 1: Starting the Magic Ring
- Create the magic ring:
- Wrap the yarn around your fingers and hook the tail to form a loop.
- Insert the hook into the loop, grab the yarn, and pull it through to create the ring.
- Inside the ring:
- Chain 3 to begin the first round (this counts as your first double crochet).
Step 2: Round 1 - Basic Crochet Base
- Work 12 repetitions of the following stitch sequence:
- Make 1 dc into the magic ring.
- Chain 1.
- Pull the tail tight to close the ring. Slip stitch into the top of the starting chain 3 to finish the round.
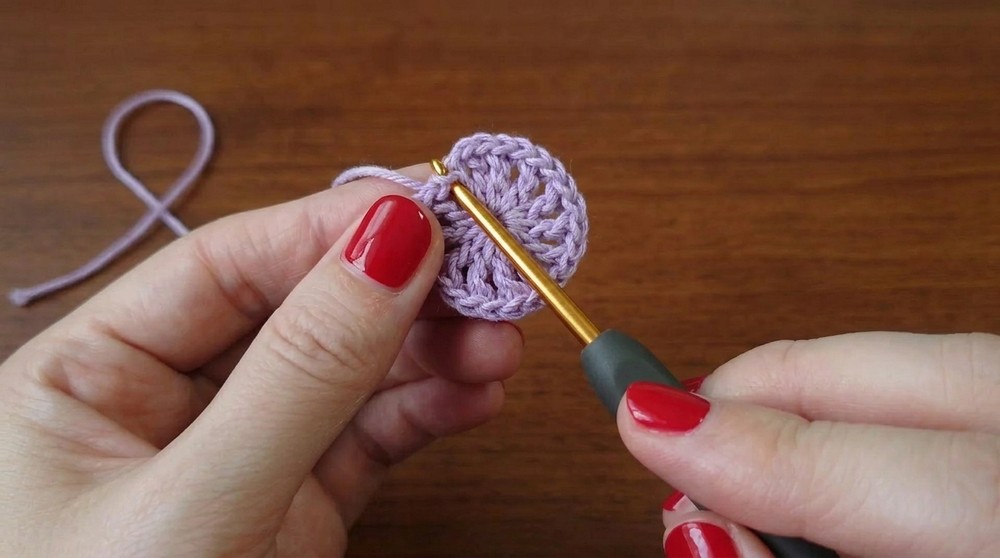
Step 3: Round 2 - Creating Spaces
- Chain 2 (acts as the start of the round).
- In each chain space from the previous round:
- Work one double crochet cluster (dc) followed by chain 2.
- Double crochet cluster: Yarn over, insert into space, and leave unfinished. Repeat twice more to create 3 loops on the hook. Yarn over and pull through all loops.
- Continue this pattern for all chain spaces. Slip stitch to close the round.
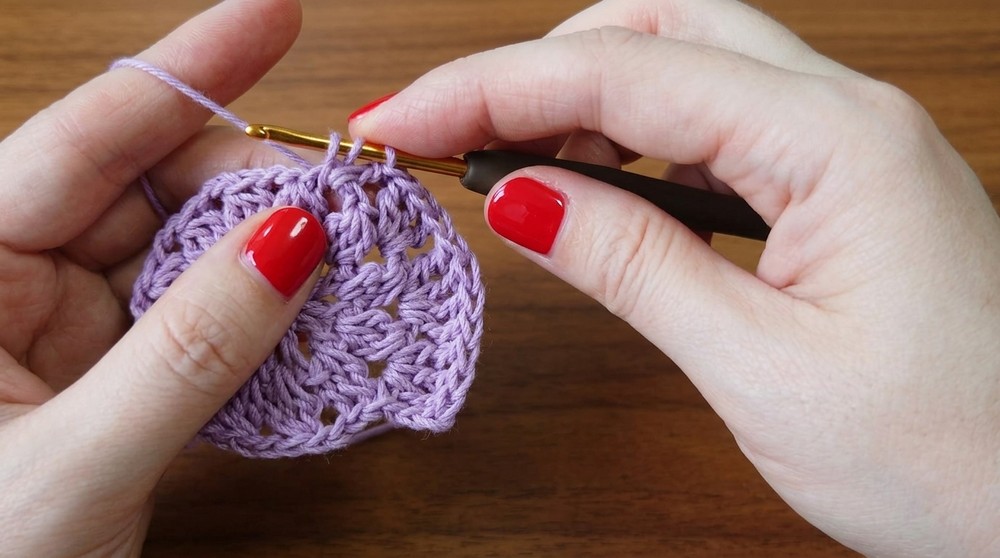
Step 4: Round 3 - Leaf Shape's Base
- Chain 3 (acts as first double crochet).
- Increase stitches to build the leaf shape:
- In the first chain space: Work 2 dc.
- In the second chain space: Work 3 dc followed by 1 chain to form sharper edges.
- Continue alternating double crochet counts as per the pattern.
- On the "sharp point" of the leaf:
- Work 3 dc, followed by chain 1, and insert another dc into the space. This creates a pointed tip.
Step 5: Adding Picots (Design Detail)
- Begin working picot stitches every 3 to 4 dc to provide a textured edge.
- Picot Stitch:
- Chain 2.
- Insert the hook into the base of the last worked stitch. Slip stitch to secure.
- Picot Stitch:
- Alternate between regular stitches and picots to complete the round.
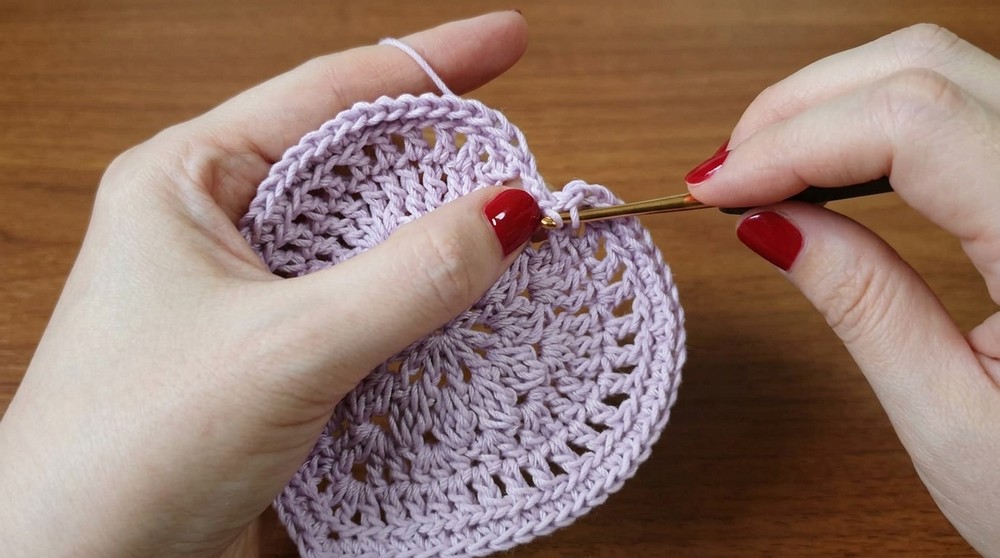
Step 6: Final Round - Creating Depth
- Work single crochet (sc) stitches around the edges:
- Insert one sc into each space from the previous round.
- Add picots to maintain texture as needed.
- At the tip (if applicable): Work 3 sc in the same space for fuller texture.
Step 7: Stem Creation
- Chain about 5 to 10 stitches depending on the desired length for the stem.
- Work back along the chain with slip stitches to create a sturdy stem.
- Attach the stem securely to one corner of the leaf (slip stitch or single crochet).
Finishing the Project
- Fasten off the yarn securely.
- Weave all loose ends into the project using the tapestry needle.
- Ensure the magic ring tail is tightly secured to maintain shape.
- Block the coaster if necessary to ensure the lace pattern lies flat.
- Lightly mist with water and pin to shape, allowing it to dry.
- Optional: Attach a decorative label or embellishment for added charm.
Tips for Maintenance and Variations
- Washing: As this coaster is made from cotton yarn, handwash with mild detergent if necessary. Lay flat to dry to maintain shape.
- Customization: Feel free to use different yarns (e.g., acrylic or thread yarn) for varying textures and sizes.
- Practice Techniques: Beginners can practice techniques like picots and cluster stitches on scrap yarn before attempting the full pattern.
Final Words
This lace tea coaster is not only functional but also a stunning addition to any table setting or cozy space. Its delicate leaf shape and textured edges make it a unique craft project. Whether you use it for hosting or gifting, the charm of this design will surely stand out. With patience and precision, you'll enjoy creating this timeless piece.