
Sweet Free Crochet Bow Pattern For Cute Accessories
Bring extra charm to your projects with this free crochet bow pattern that makes cute bows for gifts, accessories and decorations.
Featuring a delightful design, this bow pattern is a must try for anyone who loves adding handmade charm to their accessories. With its beautiful layered look, this bow showcases soft loops and a textured finish that make it stand out as both stylish and versatile. Whether you're creating a hair accessory, decorating gifts, or enhancing other projects, this crochet bow offers endless possibilities. The bow is crocheted using simple crochet stitches, making it an ideal project for beginners while still being enjoyable for experienced crocheters. Its center band detail not only adds polish but also makes the bow structurally strong, ensuring it keeps its lovely shape over time.
Lovely Crochet Bow Pattern To Refresh Your Style
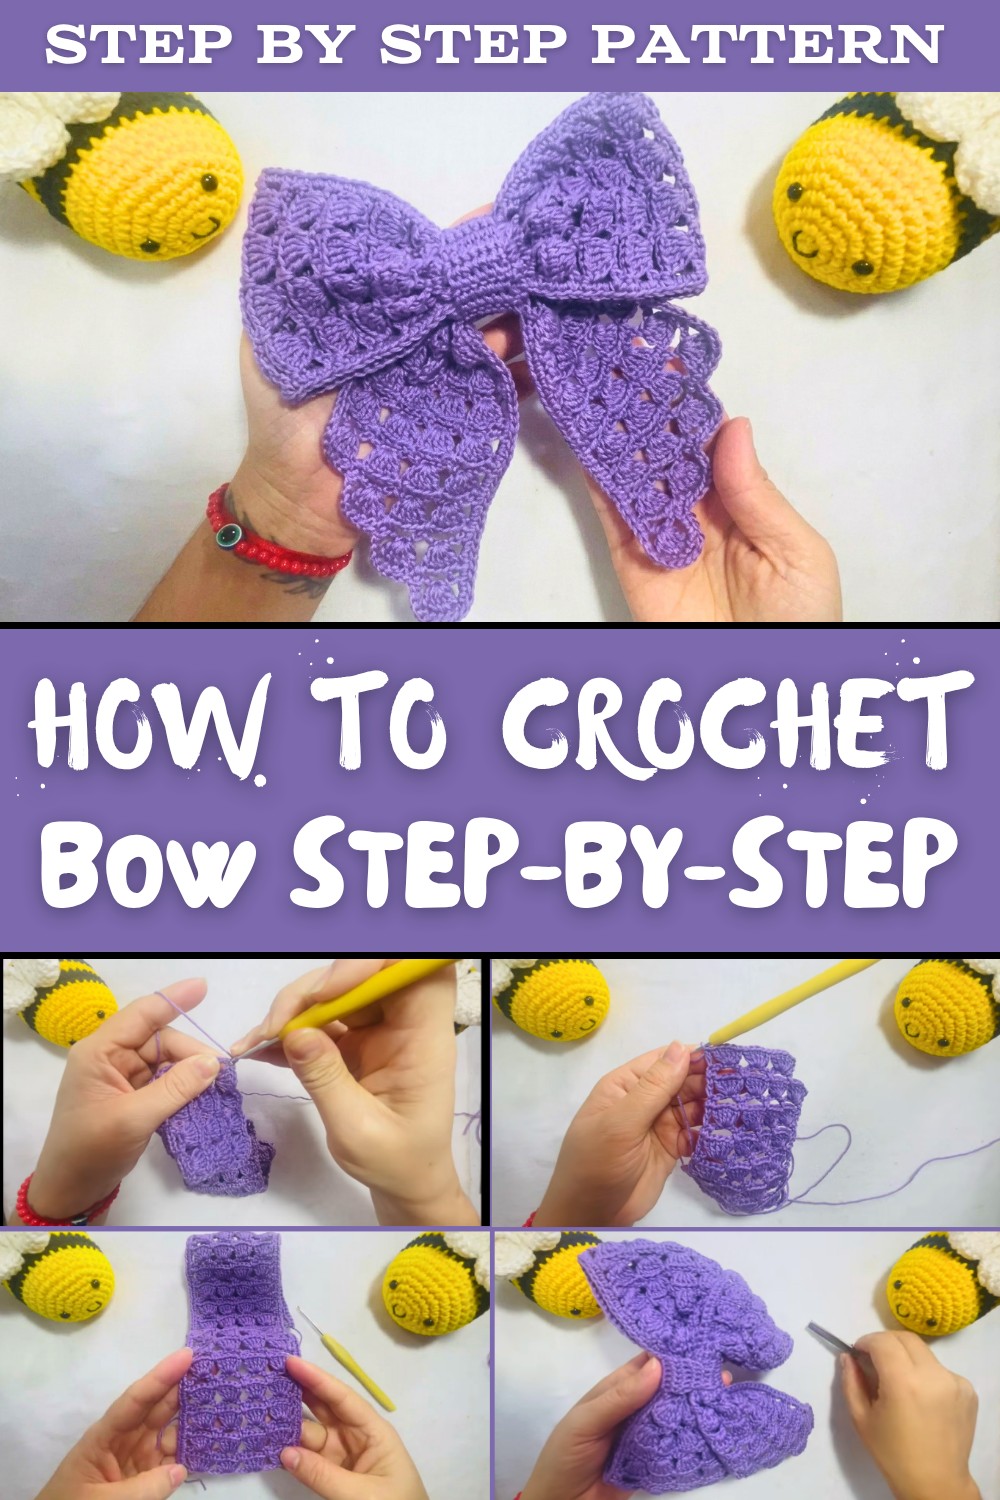
This design is perfect for customization-choose your favorite colors, yarn types, or adjust the size to match your style. One of the unique features of this bow is its versatility. It can be transformed into a charming hair clip, sewn onto bags, used as décor for wrapped presents, or even added to clothing for a fun and personal touch. The bow's compact yet elegant frame ensures it can suit both casual and formal occasions.
Since only basic tools are required, like yarn, a 2.5mm crochet hook, and a needle, this pattern is accessible to everyone. Plus, its step by step method makes it easy to follow, even for those who are entirely new to crochet. With this simple yet beautiful crochet bow project, you'll have a handy skill that lets you express your creativity and bring color and joy to your day.
Crochet Bow Pattern
Materials Needed
- Yarn: Amigurumi yarn (color of your choice). The original bow uses the color "Azaleia," but you can opt for other yarn types such as Anne, Charme, or Cléa if preferred.
- Crochet Hook: 2.5mm crochet hook (adjust to your yarn and preference).
- Tapestry Needle: For sewing and finishing.
- Scissors: To cut excess yarn during the project.
- Hair Clip: For attaching the bow (e.g., an alligator clip or bobby pin).
- Optional: Measuring tape to ensure proper sizes.
Pattern Instructions
Base of the Bow
- Foundation Chain:
- Using your 2.5mm crochet hook and amigurumi yarn, make a slip knot and chain 25 chains for the foundation.
- Note: Begin counting from the first chain after the slip knot.
- First Row:
- Skip 6 chains from the hook. In the 7th chain, make 1 double crochet (DC).
- In the same chain, make 4 more DC stitches (total of 5 DC in one chain). This creates your first block of DCs.
- Skip 4 chains, and in the 5th chain, crochet another block of 5 DCs. Repeat this process until you've made 4 blocks of 5 DCs across the row.
- To close the row, skip 2 chains and make 1 DC in the 3rd chain.
- Second Row:
- Chain 3 and turn your work. In the 3rd chain from the hook, make a block of 5 DCs.
- Continue across the row, spacing the blocks similarly (no chain between the blocks).
- Each row should align with the previous row's blocks.
- Continue Rows:
- Repeat until you complete 21 rows of blocks (for a larger bow). If you'd like a slightly smaller bow, you can stop at 19 rows.
- Edging:
- Work single crochet (SC) stitches evenly around the edges. In the gaps between blocks, make 2 SCs; in the DC stitches, make 1 SC.
- This will help tidy up the edges of your bow.


Second Layer (Smaller Bow Segment)
- Foundation Chain:
- Repeat steps as outlined above, but chain fewer stitches depending on your preferred size for the second layer. Here, make a foundation of 15 chains.
- First Row:
- In the 7th chain from the hook, make a block of 5 DCs. Skip 4 chains and make another block of 5 DCs.
- By the end of the row, you should have only 3 blocks of 5 DCs.
- Subsequent Rows:
- Chain 3, turn your work, and repeat the DC block rows until you have 6 rows in total for the second layer.
- Decreasing Rows:
- After completing 6 rows, start tapering the bow by reducing the number of blocks. To do this:
- Work a chain of 5 from the beginning, then skip one block space.
- Continue until only 1 block remains.
- This gives the smaller segment a slightly rounded or tapered edge.
- After completing 6 rows, start tapering the bow by reducing the number of blocks. To do this:
- Edging:
- Similar to the first segment, add SC stitches evenly around the edges.


Bow Center Band
- Foundation Chain:
- Chain 7 stitches.
- Rows:
- Starting in the 2nd chain from the hook, make 1 SC in each chain stitch (total of 6 SCs).
- Continue crocheting SC rows (chain 1 at the end of each row and turn) until the strip measures 16 rows or long enough to coil tightly around the center of your bow.
- Finishing the Band:
- Leave a long tail for sewing when you finish the strip.
Assembly
- First Layer:
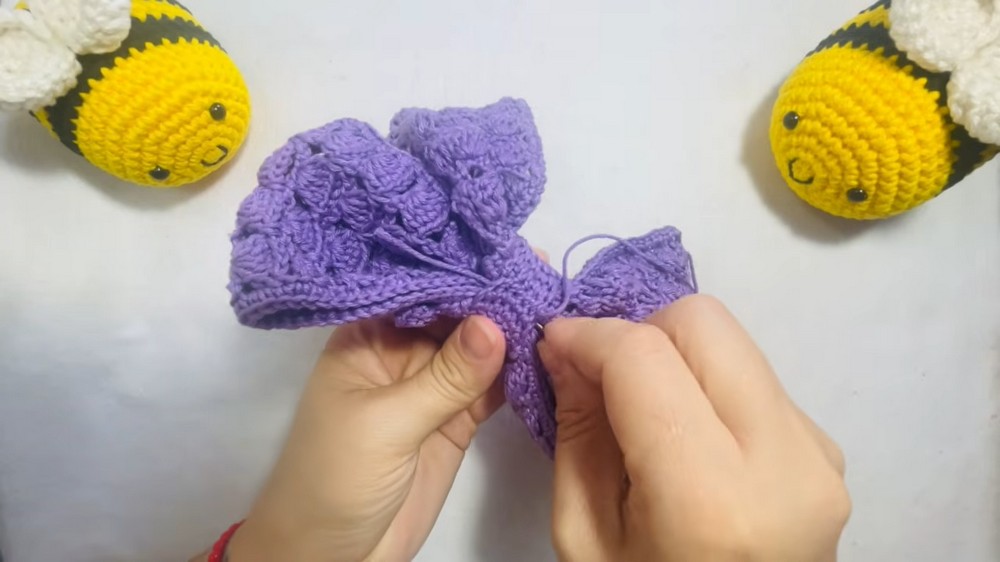
- Using a tapestry needle and the long tail left after completing the first (base) layer, loosely stitch through the middle of this layer. Pull the thread to cinch or gather the fabric slightly in the center.
- Second Layer:
- Repeat the same gathering process with the smaller layer.
- Place this layer on top of the base layer, aligning the centers. Use a few stitches to attach the two layers together securely.
- Bow Center:
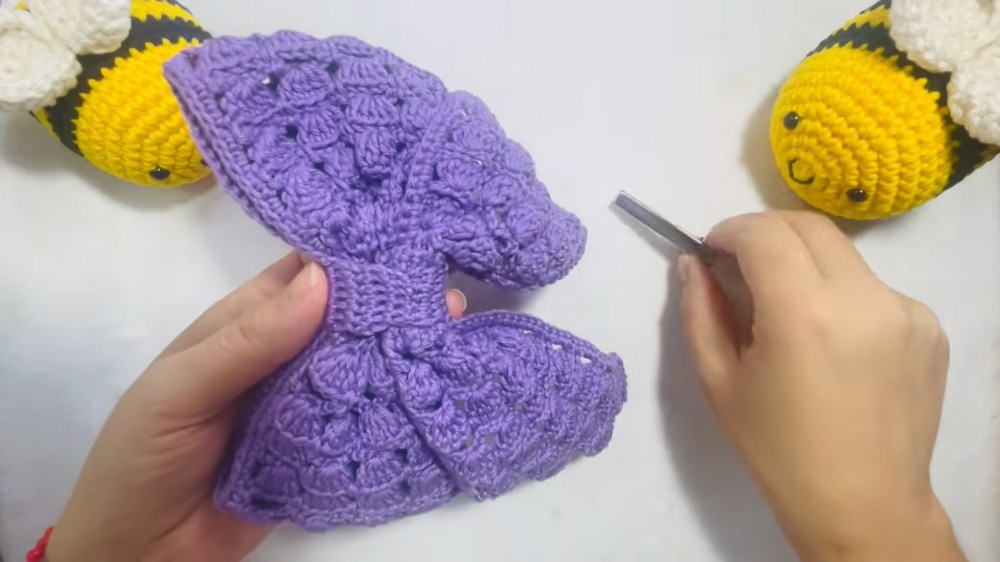
- Take the SC strip and wrap it tightly around the gathered center where the two bow layers meet. Ensure that the strip is snug but not too tight to distort the bow's shape.
- Use the tapestry needle to sew the band in place securely at the back of the bow. Trim any excess yarn and weave in loose ends.
- Clip Attachment:
- Attach your chosen clip (e.g., alligator or bobby pin) to the back of the bow.
- For additional security, consider hot gluing the clip to the bow center before sewing.
Finishing Touches
- Adjust the bow's layers and shape to ensure symmetry.
- If needed, use steam blocking or lightly press the bow with a warm iron under a cloth to set the stitches and maintain shape.
- Ensure all ends are securely tucked and trimmed.

Final Words
Congratulations on completing your crochet hair bow. This timeless design is versatile and can be customized in size and color to suit any style. Whether for personal use or as a handmade gift, this adorable bow is sure to impress.
Tips for Maintaining Your Bow
- Washing: Hand wash the bow gently in cold water with a mild detergent. Do not twist or wring; instead, lay flat to dry.
- Blocking: Occasionally block the bow with light steam to ensure it retains its shape.
- Storage: To prevent damage, store your bow in a dry place, away from direct sunlight or heavy items that could crush the shape.
This bow is not only a delightful project to make but also an excellent accessory to showcase your crochet skills. Enjoy crocheting it in various colors and yarn types to suit all your creative ideas.
