
Vibrant Free Crochet V Neck Sweater Pattern For Casual Elegance
Turn your yarn stash into a show stopping V neck sweater with this beginner friendly crochet pattern that's fun, vibrant, and made just for you.
Bright colors and creativity come together in this amazing sweater that turns simple yarn into soft, wearable beauty. This Free Pattern helps you make a sweater that looks stylish and feels very comfortable to wear. This sweater has a lovely V shaped neckline that makes it look modern and neat. The shape fits nicely on the body and gives a smart and clean look. You can choose any color of yarn you like, such as bright red, soft pink, calm blue, or even mix colors to show your own style. With this pattern, your sweater can be simple and classic or fun and colorful, just the way you want it.
Create A Cozy V Neck Sweater Free Pattern For Everyday Style

The sweater has smooth stitches and ribbed edges on the bottom, cuffs, and neck, which make it stretchy and easy to move in. It feels light but still keeps you warm, so you can wear it at home, at school, at parties, or outside on cool days. You can also add your own special touches such as small crochet flowers, pretty borders, or different color blocks to make it truly unique.
This free pattern is special because it turns learning into a happy and creative time. It does not need hard words or difficult skills. Slowly, step by step, you can watch your sweater grow from a strand of yarn into a beautiful piece you can wear or gift to someone you love. This makes the V neck crochet sweater not just clothing but a little work of art made by your own hands.

V Neck Crochet Sweater with Floral Embellishment
Materials Needed
- Yarn: Medium weight (4 ply) yarn in your choice of main color (sweater) and accent color (flowers).
- Crochet Hook: 3.5 mm (adjust size based on the yarn).
- Stitch Markers/Pins: For marking edges, neckline, and sleeve openings.
- Tapestry Needle: For weaving in ends and attaching flowers.
- Scissors: To cut the yarn.
- Optional: Measuring tape for size adjustments and a glue gun for flower placement.
Stitch Key (US Terms)
- Ch: Chain
- Sc: Single Crochet
- Hdc: Half Double Crochet
- Dc: Double Crochet
- Sl St: Slip Stitch
- BLO: Back Loop Only
- Dec: Decrease (combining stitches to reduce the count)
Techniques
- Back Loop Only (BLO): Use only the back loop of a stitch for ribbed effects.
- Magic Loop: A method for starting a circle, often used for flowers.
- Shaping: Decreasing (Dec) and increasing (Inc) stitches to contour V necklines and other features.
Pattern Instructions
Step 1: Foundation Chain
- Create a slip knot and crochet 147 chains (adjust depending on the size you want; more for larger sizes, fewer for smaller).
- Add 2 additional chains, which will count as the turning chain.
Step 2: Back Panel
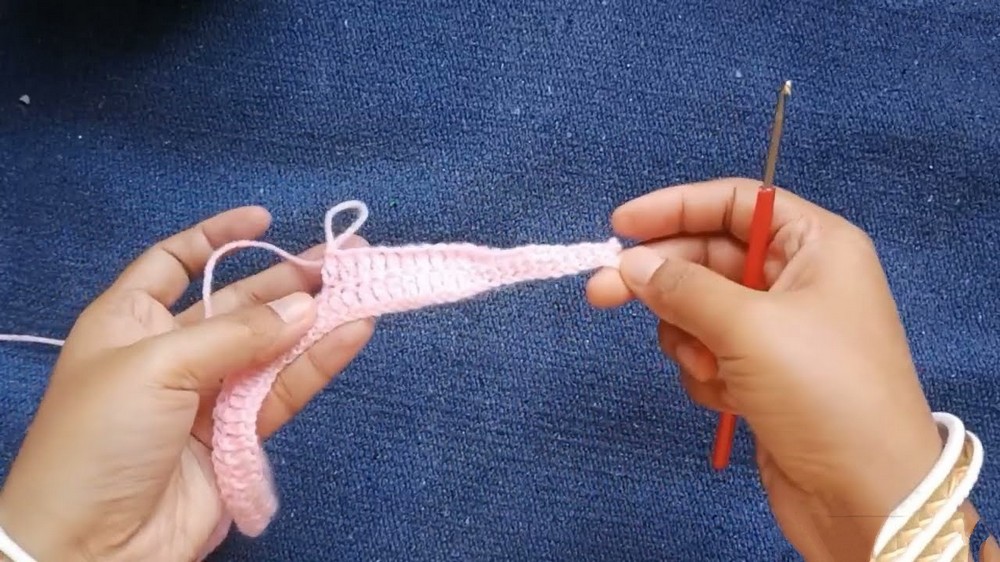
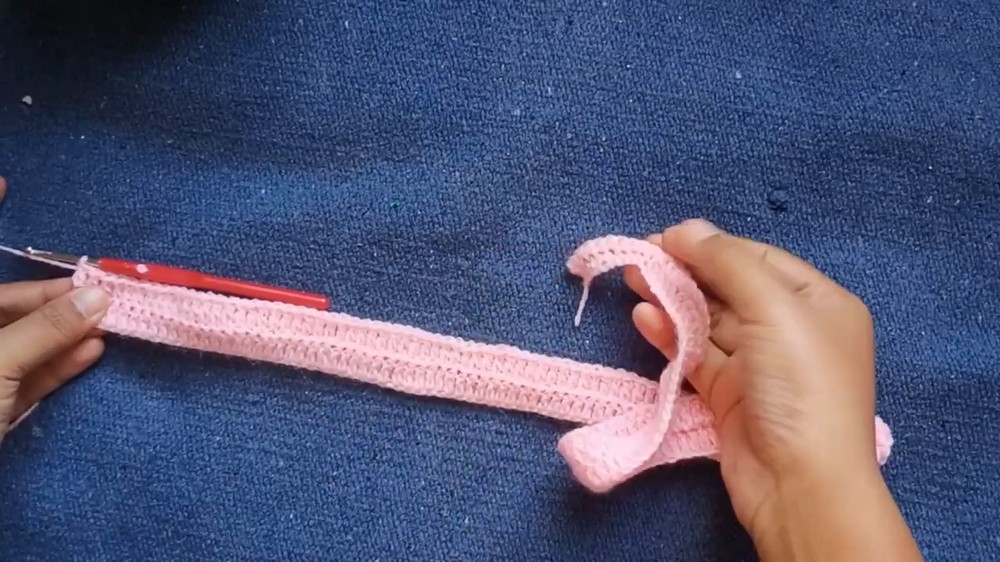
This section forms the back of the sweater. Alternate between ribbing stitches and body stitches.
- Row 1: Starting in the third chain from the hook, crochet 1 Dc in each chain across. Stop leaving the last 10 chains unworked (these form the ribbed portion of the sweater).
- Row 2: Ch 1, turn. Work 10 Sc (BLO) in the ribbed portion to maintain the sweater's flex edge. For the remaining stitches, crochet 1 Dc in each stitch to complete the row.
- Continue alternately using Sc (BLO) for the ribbing and Dc for the body until the back panel reaches your desired length (e.g., waist or hip).
Step 3: Front Panel
The front panel includes the neckline shaping for the V neck.
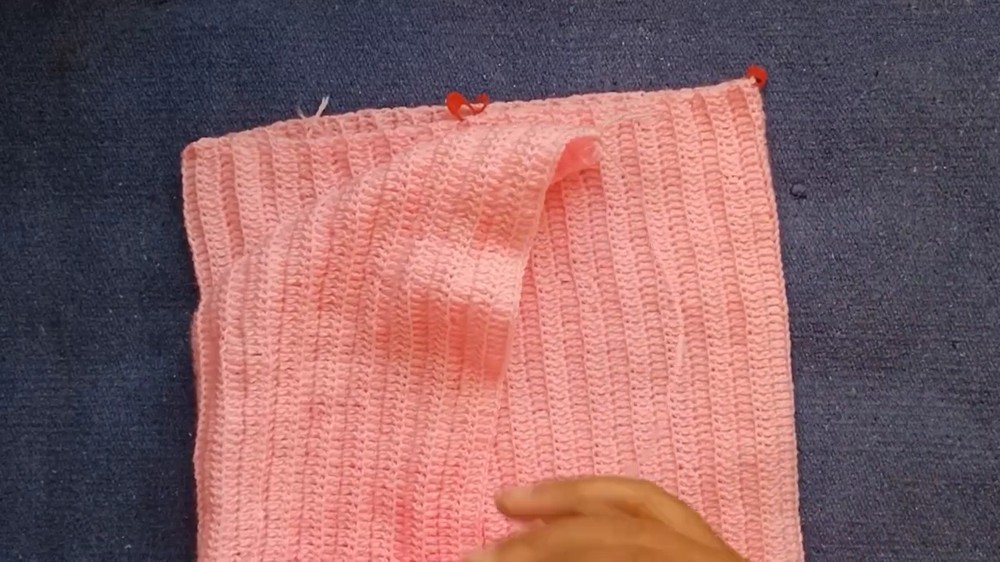
- Lay the back panel flat and mark the center of its width to find the midpoint. Use pins to mark the V neck's lowest point.
- Shoulder Sections:
- Begin crocheting half the width of the back panel for one shoulder. Work only to the midpoint marking.
- Follow the same instructions as the back panel for alternating between ribbing and body stitches.

V Neck Shaping:
- Start decreasing to form the V neckline:
- Each row begins with a Dec (decrease) stitch. Yarn over, pull through two loops halfway, repeat in the next stitch, then complete all together to decrease by one stitch.
- Stop the decrease once the desired depth of the neckline is achieved. Continue straight until the front panel height matches the back panel.
- Repeat the above process for the other shoulder section, ensuring both sides are symmetrical.

Step 4: Joining the Panels
- Place the front and back panels together with right sides facing inward.
- Seams:
- Join the shoulder sections using sl st or sc along the edges.
- Join the side seams, leaving openings for armholes (adjust the size of the opening based on your preference).

Step 5: Sleeves
The sleeves are worked directly onto the armhole openings.
- Attach yarn to any part of the armhole. Work 1 Sc evenly around the entire armhole. Ensure the total number of stitches is divisible evenly (adjust as needed).
- For longer sleeves:
- Ch 2 and proceed with Dc stitches in rounds.
- Add slight decreases (1 stitch every 3 rows) if needed for a tapered sleeve until the desired length is achieved.
- For the cuff, work the final few rows in Sc (BLO) to create ribbing.


Step 6: Neckline
Finishing the neckline ensures a clean, polished V neck.
- Attach yarn at the center V neck. Work an even round of Hdc around the entire neckline.
- For a more defined neckline, repeat several rounds of Hdc, working each successive round only on the front neckline section to enhance the V shape.
- Secure with a sl st and weave in ends.
Floral Embellishment
Step 1: Creating the Flower
- Center:
- Start with a magic loop.
- Ch 2, then work 5 Hdc into the loop.
- Pull the loop tight and sl st into the starting ch to complete the center.
- Petals:
- Ch 3, yarn over, and insert into the next stitch.
- Draw up a loop 10 times (for 10 loops total).
- Yarn over and pull through all loops on the hook.
- Ch 3 and sl st into the same spot to complete one petal.
- Repeat in the next stitch for all 5 petals.
- Finish the flower by cutting the yarn, leaving a tail for sewing.
Repeat for as many flowers as you want for your sweater!
Step 2: Attaching the Flowers
- Arrange flowers around the neckline, hem, or sleeves in the desired pattern.
- Use pins to determine placement before sewing.
- Use a tapestry needle to sew through the flower center and petals, ensuring they are secure.
- Weave in all loose ends.

Final Finishing Steps
- Ensure all seams are secure, and weave in any remaining loose ends.
- Block the sweater by dampening and pinning it to the desired dimensions. Let it dry completely to relax stitches and shape the sweater.
Tips for Customizing the Pattern
- Adjusting Size:
- Add or reduce the initial foundation chain length to adjust for larger or smaller sizes.
- Adjust the number of rows for panel height and sleeves to fit your measurements.
- Making it Lightweight:
- Substitute lighter yarn or use a larger hook for a looser weave.
- Alternative Embellishments:
- Instead of flowers, consider adding buttons or lace trims for a different aesthetic.
Washing and Maintenance Tips
- Handwash: Use mild detergent and cold water to preserve the yarn and pattern.
- Avoid Stretching: Dry the sweater flat to retain its shape, avoiding hanging it on clotheslines or hangers.
- Storage: Keep the sweater folded to avoid unnecessary strain on seams.

Final Words
This V neck crochet sweater is a rewarding project that combines creativity, versatility, and timeless style. Its simple construction and decorative floral embellishments make it perfect for any occasion, whether cozy winter evenings or casual day outings.
Customize this pattern to suit your preferences, and enjoy flaunting your handmade masterpiece with pride!