
Best Free Crochet Hoodie Sweater Pattern for Winter Days
Start your handmade fashion journey with this FREE Crochet Hoodie Sweater Pattern and enjoy a simple, comfy, and trendy cozy sweater anyone can make.
Cold evenings used to mean layering random clothes just to stay warm, but they never felt quite right or comfortable enough. That changed when I started working on a cozy project, and the Free Crochet Hoodie Sweater pattern quickly became a practical and stylish solution.
Free Crochet Hoodie Sweater Pattern for Cozy All-Day Wear

This crochet hoodie sweater is perfect for chilly mornings, evening walks, or relaxed days at home. It pairs easily with jeans, leggings, or even layered over a simple dress for a laid-back look. The soft yarn and textured stitches provide warmth without feeling heavy, making it ideal for everyday wear.
Creating it also helps improve stitch control and shaping skills while allowing full freedom in color and size choice. With this easy crochet sweater pattern, you end up with a warm, wearable piece that feels personal, useful, and effortlessly stylish.
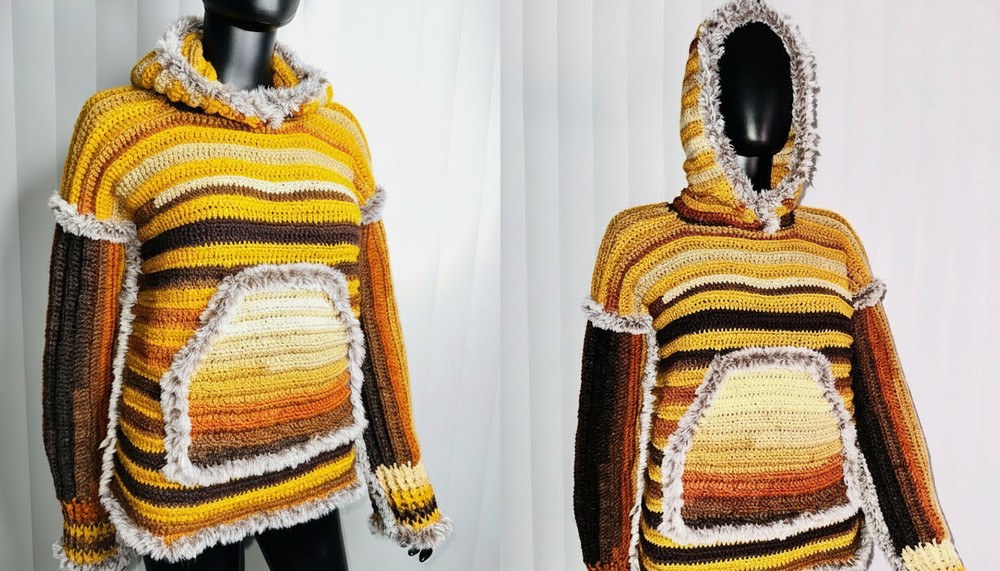
Crochet Hoodie Sweater Pattern
Finished Size
- Width: 20 inches
- Length: 20 inches
- Sleeve Length: 15 inches
- Pocket Width: 10.5 inches
- Pocket Height: 5 inches
- Hood Length: 14.5 inches
- Hood Width: 18 inches
Materials Needed
- Yarn:
- Fire Yarn (details provided in the video)
- Big Twist Yarn, 100% acrylic in mustard and another yarn (super saver)
- Approximately 700-800g depending on the size.
- Hook Size: 5.5mm crochet hook.
- Notions:
- Stitch markers
- Darning needle
- Pair of scissors
- Tape measure
Gauge
- Gauge Sample:
- 10 half double crochet (hdc) stitches x 8 rows = 4 inches using a 5.5mm hook and worsted-weight yarn.
- Adjust hook size if necessary to match gauge and ensure proper fit.
Special Techniques Used
- Half Double Crochet (hdc):
- Yarn over, insert hook, pull up a loop (3 loops on hook), yarn over, pull through all 3 loops.
- Front Post Double Crochet (fpdc) and Back Post Double Crochet (bpdc):
- Front Post: Yarn over, insert hook from front to back around the post of the next stitch, yarn over, pull loop through, complete double crochet.
- Back Post: Yarn over, insert hook from back to front to back around the post of the next stitch, yarn over, pull loop through, complete double crochet.
- Single Crochet (sc):
- Insert hook, yarn over, pull up a loop, yarn over, pull through both loops on the hook.
- Turning Work:
- After completing each row, turn your work.
Pattern Instructions
Step 1: Back Panel
- Foundation Chain:
- Make a slip knot.
- Chain the desired length from shoulder to shoulder. Example: Chain 80 (adjust chain length for different sizes).
- Row 1 (Foundation Row):
- Chain 2 more for turning (total 82). Half double crochet (hdc) in the third chain from the hook and in each chain across.
- Rows 2 and Beyond:
- Chain 2, turn. Work hdc in back loops only across until the last stitch.
- Always work the last stitch through both loops.
- For Stripe Pattern:
- Change colors every 2 rows as desired.
- Total Rows:
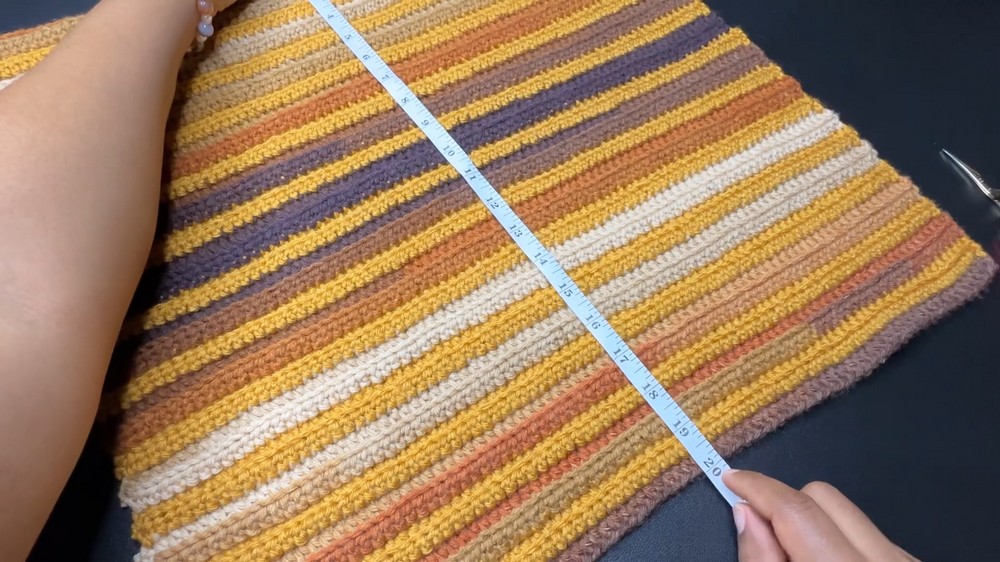
- Continue until the panel measures 20 inches in height (total 53 rows).
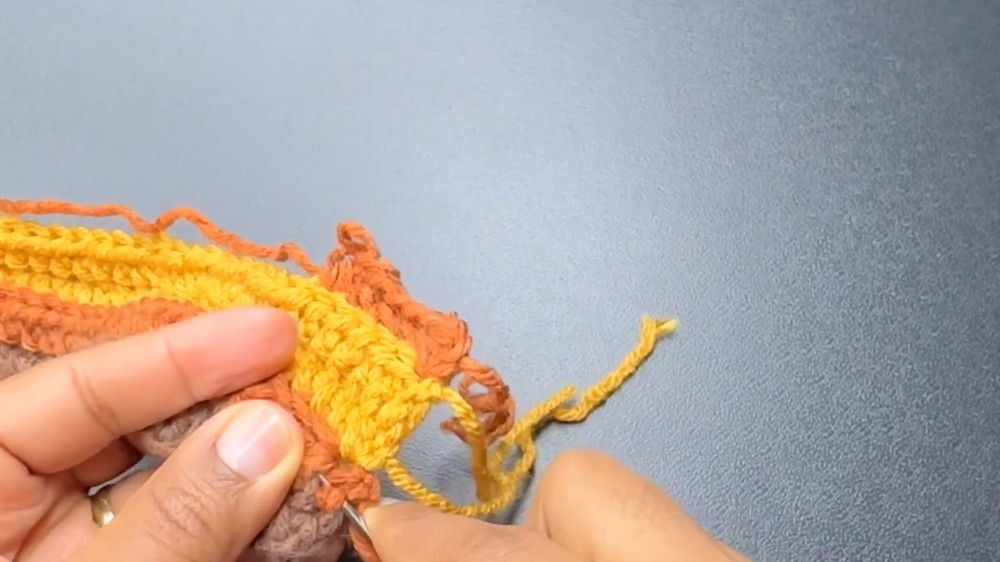
- Fasten off and weave in ends.
Step 2: Front Panel
- Foundation Chain:
- Chain 80 (or same number as back panel foundation chain).
- Row 1 (Foundation Row):
- Chain 2 for turning (total 82). Work half double crochets (hdc) into the back loops only.
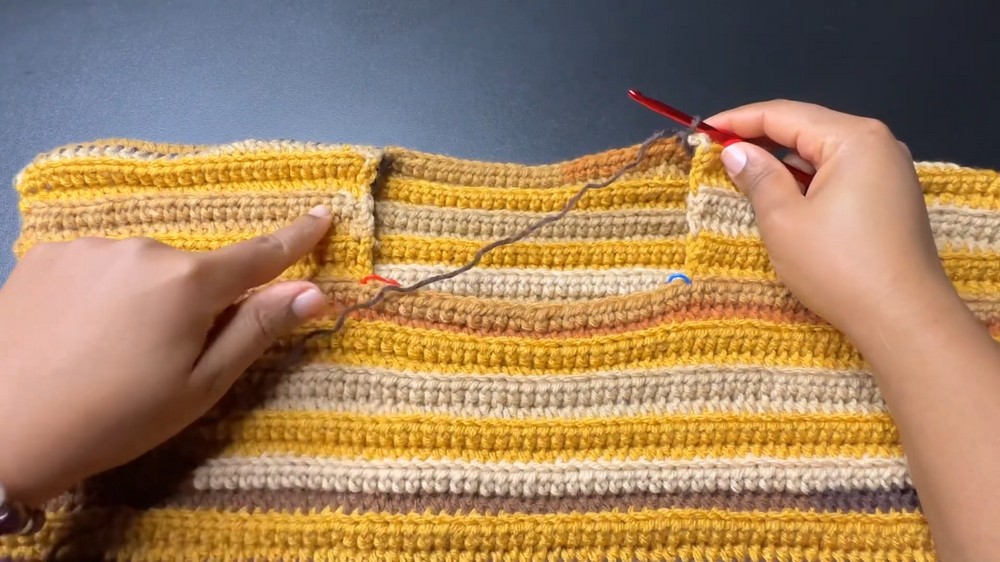
- Neckline Shaping:
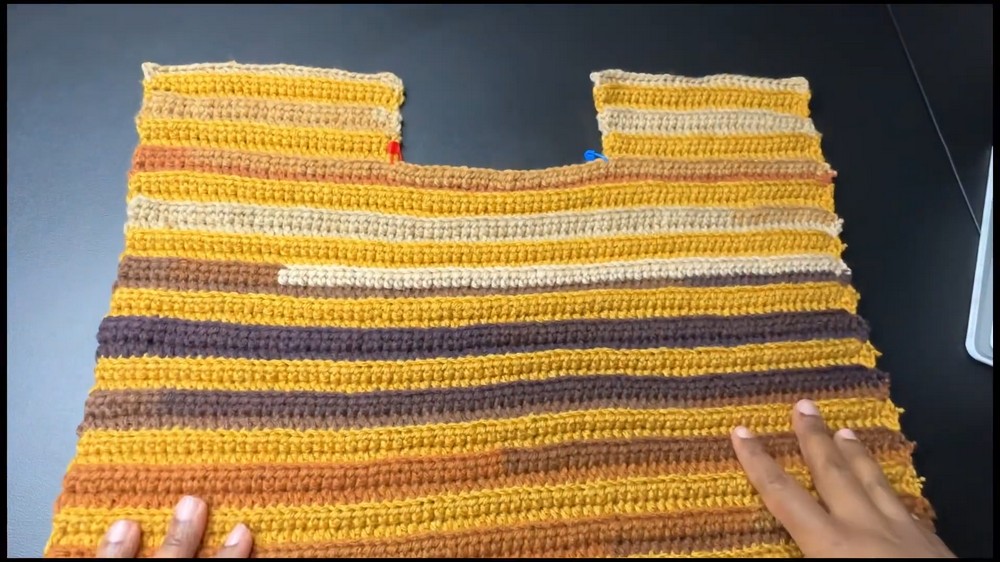
- After 46 rows, mark the center for neckline. Leave 19 stitches unworked in the center for the neckline.
- Work 7 more rows on each shoulder separately (27 stitches each shoulder).
- Total Rows:
- Ensure that the front panel has the same total height as the back panel (53 rows).
Step 3: Sleeves
- Foundation Chain:
- Chain 60 (or desired width for the sleeve).
- Rows:
- Work hdc in back loops across as per rows for the front and back panels.
- Make a total of 30 rows (adjust length if needed).
- Ribbing:
- Chain 2, work front post double crochets (fpdc) and back post double crochets (bpdc) alternating across for ribbed cuff.
- Repeat ribbing pattern for 9 rows, ending with 1 row of single crochet (sc) for finishing.

Step 4: Assembly
- Join Shoulders:
- Align front and back panels, right sides facing each other.
- Seam shoulders using single crochet (sc) method or preferred joining method.
- Attach Sleeves:
- Center the top of the sleeve to the shoulder seam, right sides together. Attach using sc method.
- Seam Sides and Sleeves:
- Fold sweater right sides together and seam from sleeve cuff to bottom hem.
Step 5: Hood
- Attach Yarn for Hood V-neck:
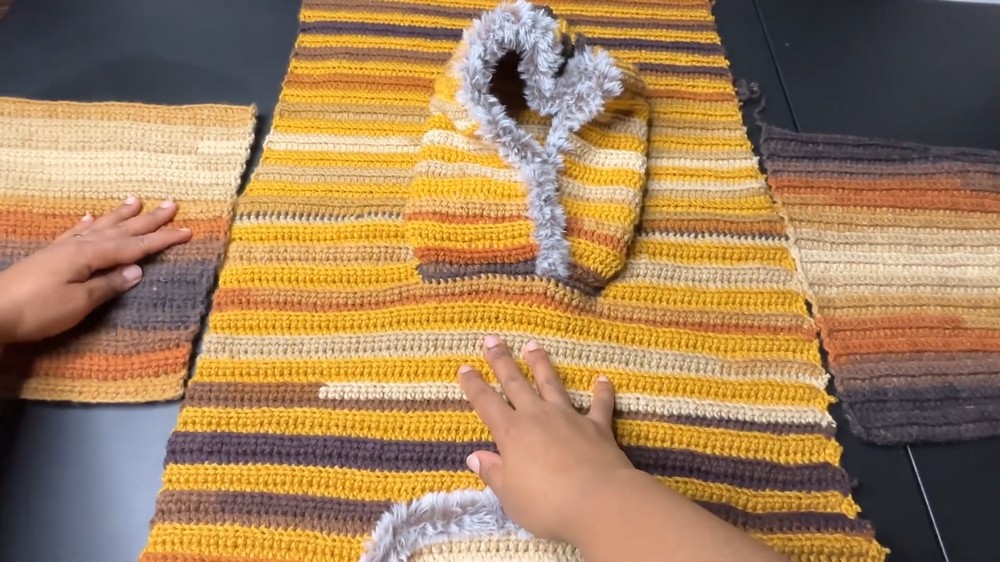
- Attach yarn to marked stitch at the neckline, ch 2, work hdc in front loops only to the opposite marked stitch.
- Rows:
- Continue working hdc in back loops evenly around the neckline until you have 33 rows or desired hood height.
- Join Hood Top:
- Fold hood, right sides together, seam the top using single crochet method.
Step 6: Hood Edging
- Attach Yarn:
- Attach fire yarn (or contrasting yarn) to any point around the hood edge, ch 2, work single crochet evenly around the edge.
- Complete Round:
- Slip stitch to the beginning sc, fasten off, and weave in ends.
Step 7: Front Pocket
- Foundation Chain:
- Chain 40 for a 10.5 inch wide pocket. Adjust length as needed.
- Rows:
- Row 1: Hdc in third chain from the hook, work hdc across (total 40 stitches).
- Rows 2-10: Chain 2, turn. Hdc in back loops across.
- Pocket Decrease:
- Begin decrease rows for 10 more rows by working hdc2tog at the beginning and end of each row.
- To decrease: Yarn over, insert hook in first stitch, yarn over, pull up a loop, yarn over, insert hook in next stitch, yarn over, pull up another loop (total 5 loops), yarn over, pull through all 5 loops on the hook.

Step 8: Attach Pocket
- Position Pocket:
- Center the pocket on the front panel, about 6 inches from the bottom.
- Attach Pocket:
- Join yarn to the lower corner of the pocket, work sc around the pocket edges (except for the top), attaching it to the front panel.

Step 9: Finishing Touches
- Weave in all loose ends.
- Block the sweater if necessary for a cleaner finish.
Customization Tips
- Adjust Sizing: Modify the foundation chain length and row counts to fit different body sizes.
- Color Blocking: Use multiple yarn colors for different sections of the sweater for a trendy style.
- Adding Length: Easy to add additional rows for longer sleeves or sweater body.
Conclusion and Final Look
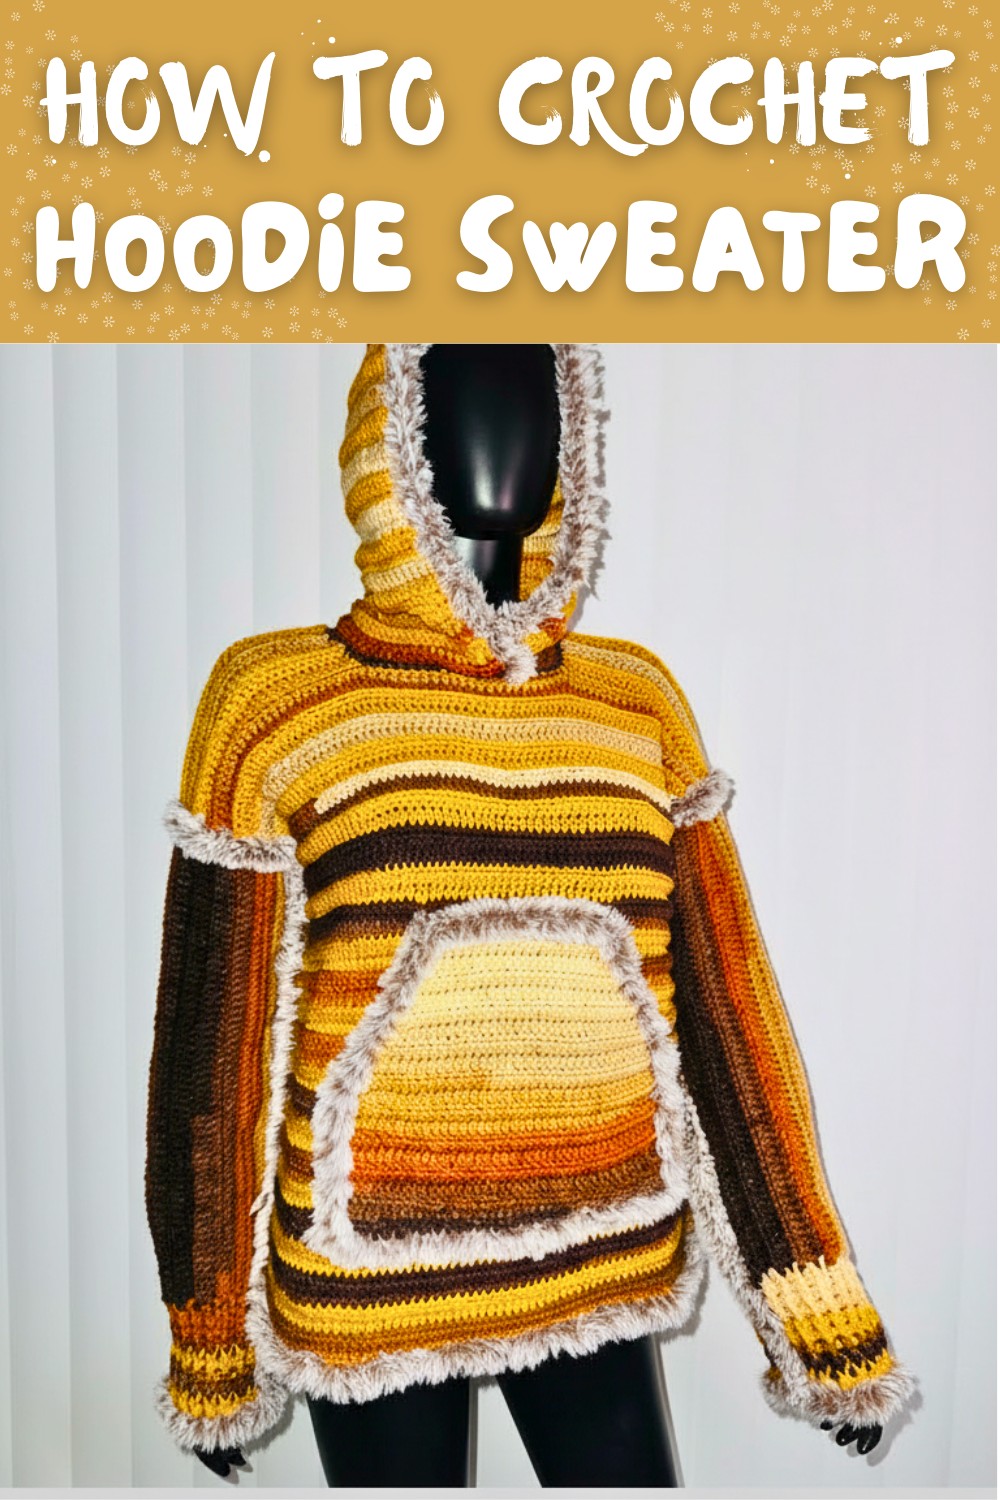
Your finished hoodie sweater will have a snug yet comfortable fit with a stylish ribbed cuff and hood detail. The final look highlights the textured clusters of the half double crochets with color changes adding a unique touch. Perfect for staying cozy and fashionable in cooler weather.