
Free Crochet Christmas Tree Pattern for Winter Decorations
Gather festive charm indoors with Free Crochet Christmas Tree Pattern featuring classic holiday, cheerful accents and cozy seasonal spirit.
The fireplace was decorated, the lights were glowing, and something still felt missing. A small handmade Christmas tree was placed on the shelf, and suddenly the whole room felt warmer and more festive. That is the charm of handmade holiday décor. The Free Crochet Christmas Tree Pattern is a lovely way to crochet a decoration that brings the joy of Christmas into any corner of your home while becoming part of your holiday traditions for years to come.
How to Crochet Christmas Tree Free Pattern for Holiday Gifts

This crochet Christmas tree is full of simple details that make it stand out. Its layered shape gives it a full and realistic look, while the textured stitches add depth and character. You can crochet a classic green tree, choose snowy white for a winter theme, or use gold, silver, or colorful yarn to match your holiday decorations. Tiny stars, bows, beads, mini ornaments, or a decorative base can give every tree its own unique style. Some people enjoy making one large tree as a centerpiece, while others crochet several small ones to decorate shelves, tables, gift baskets, or even the Christmas tree itself. The project is suitable for beginners with basic crochet knowledge and is just as enjoyable for experienced crocheters who love adding creative details.

Each section is worked step by step, allowing the tree to grow a little more with every round. Along the way, you'll become more comfortable with shaping, joining pieces neatly, and adding decorative finishing touches that give the project a polished appearance. The process is calm, enjoyable, and rewarding from beginning to end.
By the time the final detail is added, you'll have a festive decoration that can return to your home every Christmas season. It also makes a thoughtful handmade gift that friends and family will enjoy displaying year after year. Settle in with your favorite yarn, enjoy every stitch, and let this charming Christmas tree become a special part of your holiday celebrations.
Crochet Christmas Tree Ornament Pattern
Create a festive Christmas tree ornament with this easy-to-follow crochet pattern. Designed for beginners, this project uses basic stitches to craft a charming tree, perfect for holiday decorations or gifting.
Skill Level & Terminology
- Skill Level: Beginner
- Terminology: US terms
Materials & Tools
- Worsted weight green yarn (for the main body)
- Gold yarn (for the trunk and hanging loop)
- Crochet hook size H/8 (5.0 mm)
- Tapestry needle for sewing
- Fiberfill stuffing
- Scissors
- Lighter or candle for singeing yarn ends
Gauge
Not critical for this project as the ornament is small and stuffing provides structure. However, your gauge with the recommended hook and yarn should approximate:
- 20 single crochet stitches = 4 inches (10 cm) over the foundation chain length
Abbreviations List
- ch = chain
- sc = single crochet
- st(s) = stitch(es)
- sl st = slip stitch (not used in this pattern)
- tog = together (for stitches worked as one)
- rnd = round (not used, this is worked in rows)
- sp = space
Special Stitch Instructions
- Single crochet (sc): Insert hook into stitch, yarn over, pull through stitch, yarn over, pull through both loops on hook. Works into either the top loops or both loops depending on instructions.
- Working in top loops only: Crochet into the front loop of the chain/stitch only rather than under both loops.
- Singeing yarn ends: After cutting yarn tails, carefully melt the ends with a lighter to prevent unraveling.
Finished Size
Approximately 8-9 cm tall and 5 cm wide at the base once assembled and stuffed.
Pattern Instructions
Phase 1: Main Body (22 Rows)
Foundation Row:
- Using green yarn, start with a slip knot.
- Chain 21 stitches.
- Note: Chain count includes the foundation chain with 21 chs.

Row 1:
- Skip the first chain from the hook.
- Work 1 single crochet (sc) into each of the next 20 chains, working into top loops only.
- (Total: 20 scs)
Row 2:
- Chain 1 and turn your work.
- Crochet 1 single crochet (sc) into both loops of each stitch from the previous row.
Row 3:
- Chain 1 and turn your work.
- Crochet 1 single crochet (sc) into both loops of each stitch from the previous row.
Row 4:
- Chain 1 and turn your work.
- Crochet 1 single crochet (sc) into both loops of each stitch from the previous row.
Row 5:
- Chain 1 and turn your work.
- Crochet 1 single crochet (sc) into both loops of each stitch from the previous row.
Row 6:
- Chain 1 and turn your work.
- Crochet 1 single crochet (sc) into both loops of each stitch from the previous row.
Row 7:
- Chain 1 and turn your work.
- Crochet 1 single crochet (sc) into both loops of each stitch from the previous row.
Row 8:
- Chain 1 and turn your work.
- Crochet 1 single crochet (sc) into both loops of each stitch from the previous row.
Row 9:
- Chain 1 and turn your work.
- Crochet 1 single crochet (sc) into both loops of each stitch from the previous row.
Rows 10 to 22:
- Chain 1 and turn your work.
- Crochet 1 single crochet (sc) into both loops of each stitch from the previous row.
Finishing the Body:
- After completing Row 22, cut an 80 cm tail of yarn.
- Secure the last stitch by pulling the yarn end through.
- Use a lighter to gently singe the cut end to prevent unraveling.
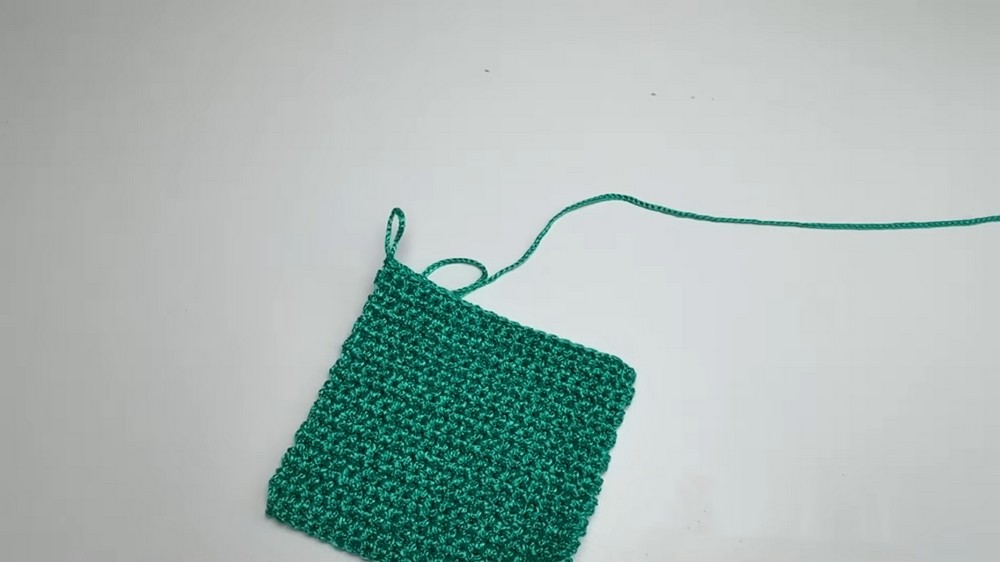
Summary of Phase 1:
In this section, you create a rectangular piece resembling a fabric strip that forms the tree's main body. The foundation chain sets the width, and 22 rows of single crochet build the height. Working the first row in top loops only helps establish a neat edge.
Phase 2: Assembly and Shaping
Step 1: Initial Seam
- Fold the rectangular piece in half lengthwise, matching the short ends.
- Using a tapestry needle and the long green yarn tail, sew the short edges together with a whip stitch or mattress stitch, creating a tube shape.
Step 2: Shaping into a Triangle/Cone
- Open the seam so the piece now forms a triangle or cone shape with the seam in the middle.
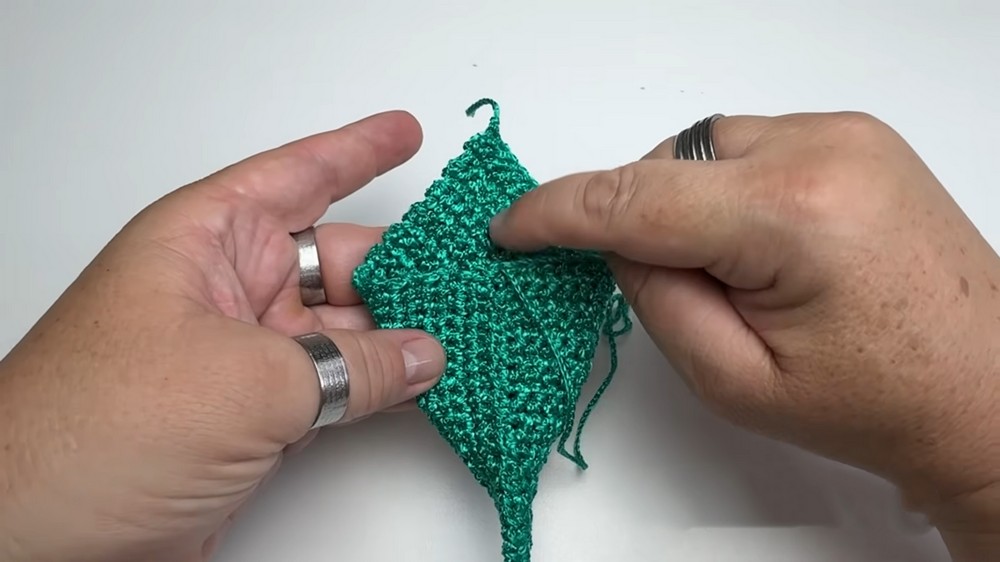
Step 3: Adjusting the Top
- Weave the yarn through the stitches at the top edges.
- Pull the yarn to gather the edges to a point at the top.
- Tuck the gathered tip inside the cone to give it structural support and create the tree's peak.
Step 4: Stuffing and Closing the Base
- Insert fiberfill stuffing inside to add volume and shape.
- Sew the bottom opening shut by passing the needle evenly between the bottom edges, ensuring no stuffing falls out.
Step 5: Final Securing
- Tie a secure knot inside to finish.
- Cut the yarn tail and singe the end to prevent fraying.

Summary of Phase 2:
Here, you transform the flat rectangle into the familiar triangular shape of a Christmas tree by folding and sewing edges, making a cone. The gathering of stitches at the top forms the tree peak, while stuffing adds volume for a soft ornament. Closing off the base keeps the stuffing secure.
Phase 3: Trunk and Hanging Loop
Trunk:
- Using gold yarn, attach the yarn at the center bottom of the tree.
- Row 1 (Trunk): Crochet 5 single crochet stitches (sc) across.
- Row 2: Chain 1 and turn, then work 5 sc stitches in the row.
- Row 3: Repeat row 2.
- Cut the yarn leaving a tail.
- Use a tapestry needle to weave in the ends inside the trunk for a neat finish.
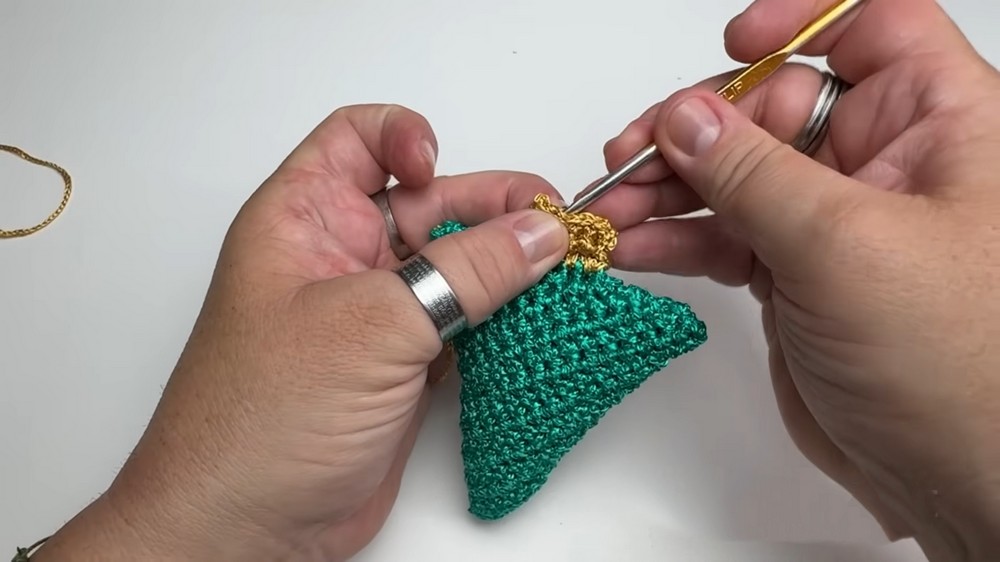
Hanging Loop:
- Thread gold yarn through the top peak of the tree.
- Tie 2 to 3 firm knots to form a loop for hanging.
- Cut the yarn ends and carefully singe with a lighter to secure.

Summary of Phase 3:
This phase creates the tree trunk in gold yarn and adds a hanging loop at the top, making the ornament ready to display on the tree. The trunk acts as a sturdy base, and the loop ensures easy hanging.
Final Notes on Pattern Start and Stitches Used
- Starting the Pattern: Begin by creating a slip knot and chaining 21 stitches with green yarn. This foundational chain sets the width of your ornament.
- Stitches Used: The entire pattern relies on the single crochet (sc) stitch, alternating between worked in top loops only (for Row 1) and worked in both loops (for Rows 2-22). The assembly uses sewing stitches with a tapestry needle, and finishing includes basic knotting and yarn end singeing.
- Overall, this pattern uses straightforward stitches, making it highly accessible for beginners to intermediate crocheters.
Assembly & Finishing
- Seam the short ends of the rectangle with tapestry needle and yarn tail.
- Shape by gathering the top and tucking it inside to form the cone.
- Stuff with fiberfill and close base securely.
- Attach trunk using gold yarn in 3 rows of 5 sc each.
- Create a hanging loop at the top with gold yarn, knot tightly, and singe ends to finish.
- Secure all yarn tails with weaving and singeing to prevent fraying.
Summary
You have now completed the charming crochet Christmas tree ornament! This project highlights basic crochet techniques like chaining, single crochet, and shaping via folding and stitching. The final product is festive, lightweight, and perfect for decorating your home or gifting this holiday season.
