
Crochet Coconut Keychain Free Pattern for Keys That Need a Bit of Fun
Carry the joy of a happy little coconut wherever you go with this Free Crochet Coconut Keychain Amigurumi Pattern that is easy, fun, and adorable to make.
The coconut is like nature's little treasure - simple yet so beautiful. Its round brown shell and soft, snowy white center remind us of sunny beaches and happy moments. Now, imagine carrying that tropical charm everywhere with the Free Crochet Coconut Keychain Amigurumi Pattern. This adorable little keychain looks just like a real coconut, only cuter and more fun. This tiny coconut keychain isn't just pretty; it's also super easy to make. The soft brown shell and the white top give it a realistic coconut look, while its small size makes it perfect for decorating your keys, backpacks, purses, or even pencil cases.
Crochet a Coconut Keychain Free Pattern That's Perfect to Keep or Gift

It's lightweight, soft, and won't scratch your things, making it practical as well as charming. When you crochet it yourself, it becomes more meaningful - like a small piece of love that you can keep or give as a gift to friends and family. You can even pick different colors if you want to customize it and make it truly unique.
This coconut keychain isn't just an accessory; it's a tiny bundle of joy. Its simple charm, cute design, and usefulness make it stand out. Whether it's for yourself or a gift for someone you care about, it's sure to bring smiles. So, start today and turn this little coconut keychain into something you'll cherish for years. It's small in size but big on happiness.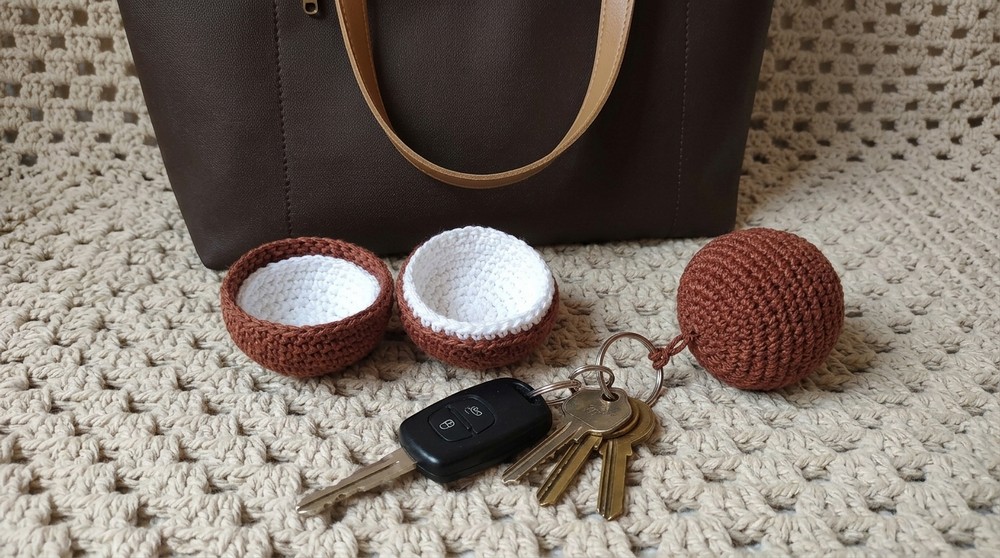
Crochet Coconut Keychain Pattern
Materials Required
- Yarn:
- Amigurumi Cotton Yarn in two colors:
- Brown (outer layer of the coconut).
- White (inner layer of the coconut).
- Amigurumi Cotton Yarn in two colors:
- Crochet Hook:
- 2.5 mm crochet hook (to maintain a tight tension suitable for amigurumi).
- Additional Tools:
- Tapestry needle (for finishing).
- Scissors.
- Stitch markers (optional: a small piece of yarn can also be used for marking stitches).
- Hot glue or silicone glue (for securing parts).
- Small amount of acrylic stuffing for the inner layer.
Gauge
Gauge is not critical for this project due to its small size. However, ensure that your stitches are tight enough to prevent the stuffing from showing through.
Recommended tension: 6 to 7 single crochet (sc) stitches per inch.
Finished Size
- Approximate diameter: 5 cm (2 inches).
- Height (when assembled): 4 cm (1.5 inches).
This size makes the keychain compact, lightweight, and easy to attach to keys or a bag.
Special Techniques Used
- Magic Ring (Magic Circle):
- Wrap yarn around your fingers to form a loop. Insert the hook, pull up a loop, and work the specified stitches into the loop. Pull the tail tight to close the circle.
- Invisible Decrease:
- Insert hook into the front loops of the next two stitches, yarn over, pull through both loops, yarn over, and pull through the remaining loops on the hook.
- Single Crochet (sc):
- Insert hook into the stitch, yarn over, pull up a loop (2 loops on hook), yarn over, pull through both loops.
- Slip Stitch (sl st):
- Insert the hook into the stitch, yarn over, and pull through both the stitch and loop on the hook.
Pattern Instructions
Part 1: Inner Coconut Base (White Shell)
- Round 1: Create a magic ring. Work 7 single crochet (sc) into the ring. Pull the yarn to close the ring tightly.
- Stitch count: 7 sc
- Round 2: Work 2 sc in each stitch around (increase in every stitch).
- Stitch count: 14 sc
- Round 3: Work 1 sc in the first stitch, 2 sc in the next stitch. Repeat (1 sc, 2 sc) around.
- Stitch count: 21 sc
- Round 4: Work 1 sc in each of the next 2 stitches, 2 sc in the next stitch. Repeat (2 sc, 1 increase) around.
- Stitch count: 28 sc
- Round 5: Work 1 sc in each of the next 3 stitches, 2 sc in the next stitch. Repeat (3 sc, 1 increase) around.
- Stitch count: 35 sc
- Rounds 6 to 8: Work 1 sc in each stitch around (no increases).
- Stitch count: 35 sc per round
- Fasten Off: Cut the yarn, leaving a short tail for securing. Use a tapestry needle to make the final stitch neat and finish the edge.


Part 2: Outer Coconut Base (Brown Shell)
- Round 1: Create a magic ring. Work 7 sc into the ring.
- Stitch count: 7 sc
- Round 2: Work 2 sc in each stitch around.
- Stitch count: 14 sc
- Round 3: Work 1 sc in the first stitch, 2 sc in the next stitch. Repeat (1 sc, 2 sc) around.
- Stitch count: 21 sc
- Round 4: Work 1 sc in each of the next 2 stitches, 2 sc in the next stitch. Repeat (2 sc, 1 increase) around.
- Stitch count: 28 sc
- Round 5: Work 1 sc in each of the next 3 stitches, 2 sc in the next stitch. Repeat (3 sc, 1 increase) around.
- Stitch count: 35 sc
- Rounds 6 to 8: Work 1 sc in each stitch around (no increases).
- Round 9 (Decreases): Work 1 sc in each of the next 4 stitches, then 1 decrease. Repeat (4 sc, 1 decrease) around.
- Stitch count: 28 sc


Part 3: Assembly
- Using a tapestry needle, sew one white piece and one brown piece together. Place a small amount of acrylic stuffing in the center before finishing the seam to give the inner layer its plump shape. Hot glue can also be used to secure the layers.
- Repeat the same steps to make the second half of the coconut.
- For the outer brown shell, work 1 extra round of sc to create a slight overlap that helps the two halves fit snugly. Use brown yarn to stitch or glue the extra layer for durability.

Part 4: Decorative Ridge
- Use white yarn to create an even ridge along the seam on one of the brown bases.
- Attach white yarn with a slip stitch on the outer edge, then work 1 sl st in each stitch around to create a clean edge.
- This loop will help secure the fit when closing the coconut halves.

Part 5: Adding the Keychain Loop
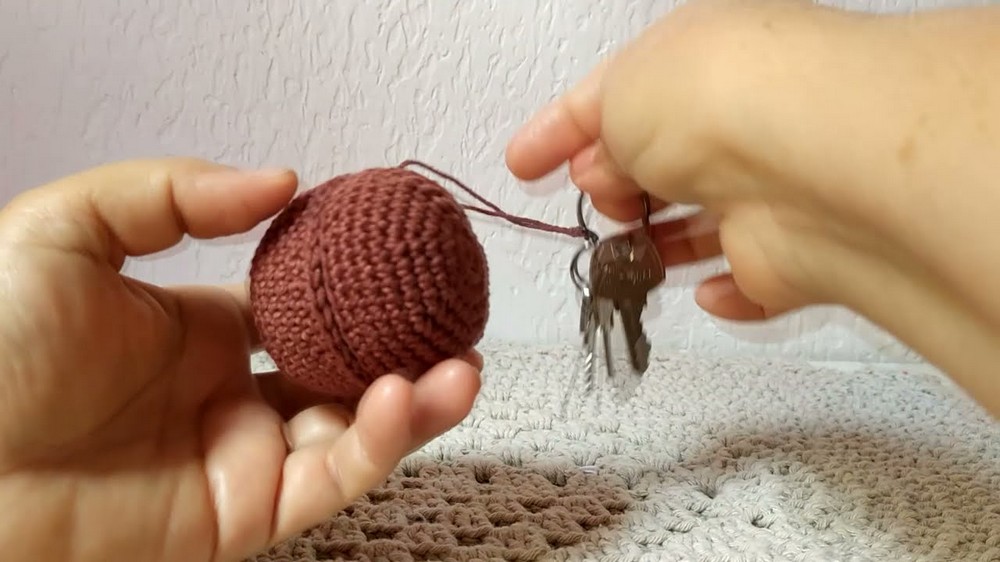
- Cut a 10 cm strand of yarn (brown or white).
- Attach the strand to the outer edge of the coconut using the tapestry needle and secure with a knot.
- Thread the keyring through the strand.
Finishing
- Fasten Off and Weave in Ends:
- Use a tapestry needle to weave in loose yarn ends. Secure the stitches to ensure the keychain remains durable during use.
- Securing Each Half:
- Apply a dot of silicone glue to the seams where the two halves meet for a tighter fit, if desired.
- Final Adjustments:
- Ensure the coconut halves align properly. The extra overlap from the brown shell ensures a snug closing fit.
- Press gently on the edges to test the closure mechanism.

Customization Ideas
- Colors:
- Experiment with other colors for a playful take on the pattern. Make your coconut a pastel hue or metallic finish for added flair.
- Size Variations:
- Adjust the foundation chain and increase rounds to make a larger or smaller coconut keychain.
- Decorations:
- Stitch small leaves or embroider accents to the outer layer to create unique designs.
- Use as Containers:
- Add a mini zipper along the seam to transform the coconut into a small storage pouch for coins or jewelry.
Tips for Success
- Tension Control:
Ensure your stitches are tight to prevent gaps in the final design. This is especially important for the white inner shell. - Snug Fit:
The extra round on the outer brown shell helps achieve a snug fit for the coconut halves. Be precise when aligning the seams during assembly. - Blocking:
If the pieces curl during crocheting, use light steam blocking to help shape them before assembly.
Conclusion
Congratulations on creating your crochet coconut keychain. This adorable and practical accessory is bound to be a conversation starter. Its versatile design allows you to experiment with size, color, and functions, making it ideal for gifting or personal use.