
Free Step-by-Step Crochet Summer Top Pattern for Beginners
Enjoy sunny days with a Free Crochet Summer Top Pattern featuring a light breezy style perfect for beach trips casual outings and summer fun.
Warm sunny days call for clothing that keeps you feeling light and fresh. A Crochet Summer Top pattern helps you create a handmade top that is both soft and breezy, making spending time outside more enjoyable. Its open stitches let air flow freely, stopping you from feeling too hot or uncomfortable.
Lightweight and Lovely Free Crochet Summer Top Pattern Guide

A Crochet Summer Top pattern is like a helpful map that shows you how to make this cool and comfy top yourself. With simple steps, anyone can follow along and create a one-of-a-kind piece that matches their favorite colors and style. This hands-on approach means your top will be truly yours, unlike anything found in stores.
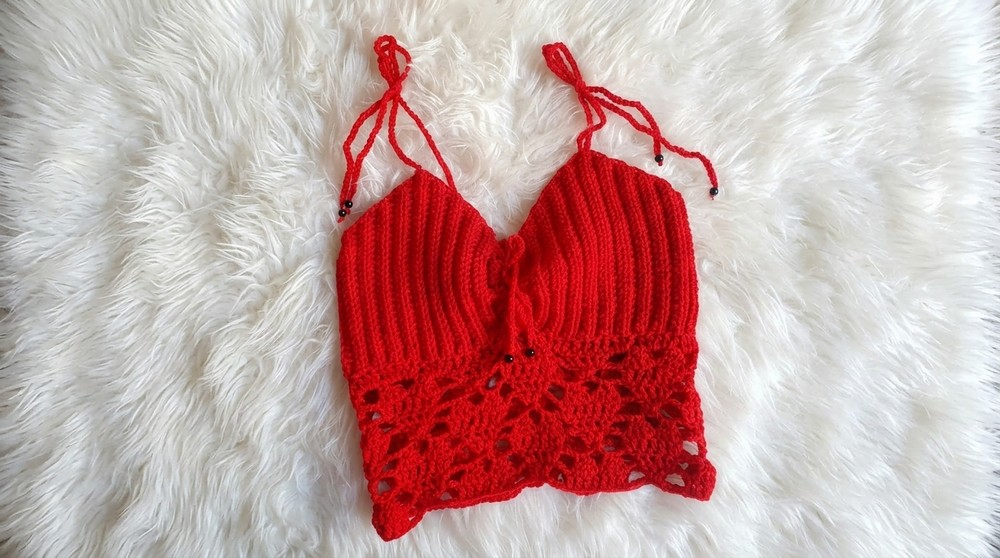
There are many good reasons to choose a handmade summer top. It works well for lots of occasions - walking on the beach, relaxing in the park, or casual get-togethers with friends. The soft yarn used in crochet feels gentle on the skin, which is great for people who find some materials itchy or rough. Plus, this top are easy to wash and stay nice even after many uses.
Making your own top is also a fun way to spend time and feel proud of what you create. Each stitch brings joy and a sense of achievement at seeing the beautiful design grow. Piece by piece, you build not just clothing but memories you carry with you.
Waffle Stitch Crochet Cropped Top Pattern
Embrace cozy style with this elegant waffle stitch cropped top, perfect for any season. This pattern is clear, beginner-friendly, and crocheted to help you crochet a flattering textured top with easy-to-follow steps. Whether you want a casual summer look or layering piece, this top is a versatile wardrobe gem.
Preparation & Supplies
- Use fingering weight yarn (thin yarn), doubled for a medium weight texture and excellent stitch definition.
- Crochet hook size: 4.0 mm (G-6). Adjust hook size if needed to match gauge or personal tension.
- Other tools: scissors, yarn needle for weaving ends, tape measure, and at least 4 stitch markers.
- Measure your underbust circumference accurately before starting, as this determines foundation chain length.
- The foundation chain is a multiple of 16 + 4 chains for stitch pattern consistency.
- Keep your chains loosely enough to stretch comfortably to your underbust measurement.
- Familiarity with basic crochet stitches and working in rows will benefit you.
Design & Construction Details
- Top is crocheted flat starting with a foundation chain that stretches to your underbust size.
- Stitch pattern uses groups of double crochets with chain spaces creating a lovely lacy waffle texture with heart-like motifs.
- Construction is worked in rows, joined seamlessly later for a clean finish.
- Straps are added separately after main body is complete.
- Edges finished with simple slip stitches and single crochets for neatness.
- Shaping is created by increasing and decreasing strategically within rows to form the front and back silhouette.
How This Pattern Comes Together
- Foundation chain multiples of 16 + 4 create base width to stretch across underbust.
- Patterned double crochet and chain spaces establish the heart waffle motif.
- Seams are joined by slip stitching to connect front and back smoothly.
- Straps attached after body completion by chaining and slip stitching at armhole edges.

Skill Level
Intermediate beginner: Requires basic stitches and understanding of increases, decreases, and joining techniques.
Final Dimensions
- Fit depends on underbust measurement for foundation chain.
- Straps are tailored for a comfortable fit and can be lengthened by increasing chain length.
- Length is approximately cropped to ribcage height; customizable by adding rows.
Materials List
- Fingering weight yarn, doubled (example: off-white or desired color).
- Crochet hook 4.0 mm (G-6).
- Stitch markers (4 or more).
- Tape measure.
- Yarn needle.
- Scissors.
Sizing Guidelines
- Foundation chain length should comfortably stretch to your underbust measurement.
- For example, 96 chains + 4 additional chains will comfortably stretch to 28 inches underbust.
- Final stitch counts and shaping depend on this initial measurement.
Gauge Information
- No strict gauge but chain foundation is multiple of 16 + 4.
- Stitch pattern creates a textured heart waffle motif repeating every 16 chains horizontally.
- Always stretch foundation chain before beginning to estimate fit.
Common Crochet Abbreviations
- ch: chain
- dc: double crochet
- sc: single crochet
- sl st: slip stitch
- st: stitch
- yo: yarn over
- inc: increase (more than one stitch in same sp)
- dec: decrease (combine stitches together)
Special Stitch Techniques
Four Double Crochets Together (4-dc cluster)
- Yarn over, insert hook into indicated stitch, yarn over, pull up a loop (3 loops on hook).
- Yarn over, pull through 2 loops (2 loops remain).
- Repeat 3 more times in next stitches (5 loops on hook).
- Yarn over, pull through all 5 loops for cluster stitch.
Detailed Crochet Instructions
Section 1: Foundation Chain & Row 1 - Base Setup
- Measure your underbust and make a foundation chain in multiples of 16 + 4.
- Example: Chain 96 + 4 = 100 chains total.
- Yarn over, skip first 3 chains, dc into the 4th chain from hook.
- Chain 3, skip 4 chains, dc into the 5th chain, then dc in next 6 chains. (Repeat for pattern across chain.)
- End row with chain 3, skip 4 chains, and place 2 dc in last stitch.
Explanation:
This chain and double crochet placement form the base for your waffle stitch heart shapes.
Section 2: Row 2 - Continuing Heart Motif
- Chain 3, turn.
- Skip 4 dc, into next chain space work 3 dc cluster (three dc in one chain space).
- Chain 3, skip 4 dc, dc in each of the next 7 dc.
- Repeat this pattern to end row, ensuring cluster stitches and heart shapes align.
Explanation:
We make clusters of three double crochets separated by chain spaces to build the heart motifs.

Section 3: Row 3 to Row X - Repeat Pattern
- Repeat Row 2, maintaining increases in clusters where indicated, aligning heart motif rows.
- Increase stitches by adding multiple dc clusters in designated areas (using 4 dc together stitches) to shape the top.

Section 4: Join Body Sides
- After completing the desired length, fold the piece so edges meet evenly without twists.
- Join edges with slip stitches or single crochet through both loops from each side for a clean seam.

Section 5: Armhole Straps
- Attach yarn at armpit edges with a slip knot.
- Chain 50 (or desired length for strap).
- Join back to opposite side's armpit edge with slip stitch.
- Repeat for the second strap.

Section 6: Finishing Edge & Weaving Ends
- Work single crochet or slip stitch along bottom and neckline edges for neat finish.
- Weave in all yarn tails securely using a yarn needle.

Assembly and Finishing Tips
- Join front and back panels with a neat seam using single crochets or slip stitches.
- Attach straps carefully so they lie flat and comfortably.
- Weave in tight ends to prevent unraveling.
- Optionally block your top gently to enhance stitch definition.

Troubleshooting Hints
- Work feels too tight or small: Check foundation chain length and ensure it stretches to your underbust measurement.
- Heart motifs not aligning: Carefully count stitches and maintain stitch multiples for your row counts.
- Increases or decreases uneven: Use stitch markers to track increases/decreases and ensure even shaping.
Creative Ideas and Variations
- Create matching scarf or headband using waffle stitch heart motif.
- Change yarn color for stripes or contrasting hearts.
- Lengthen top for crop to full-length styles.
- Add embellishments like buttons or ribbons on straps for a personalized touch.