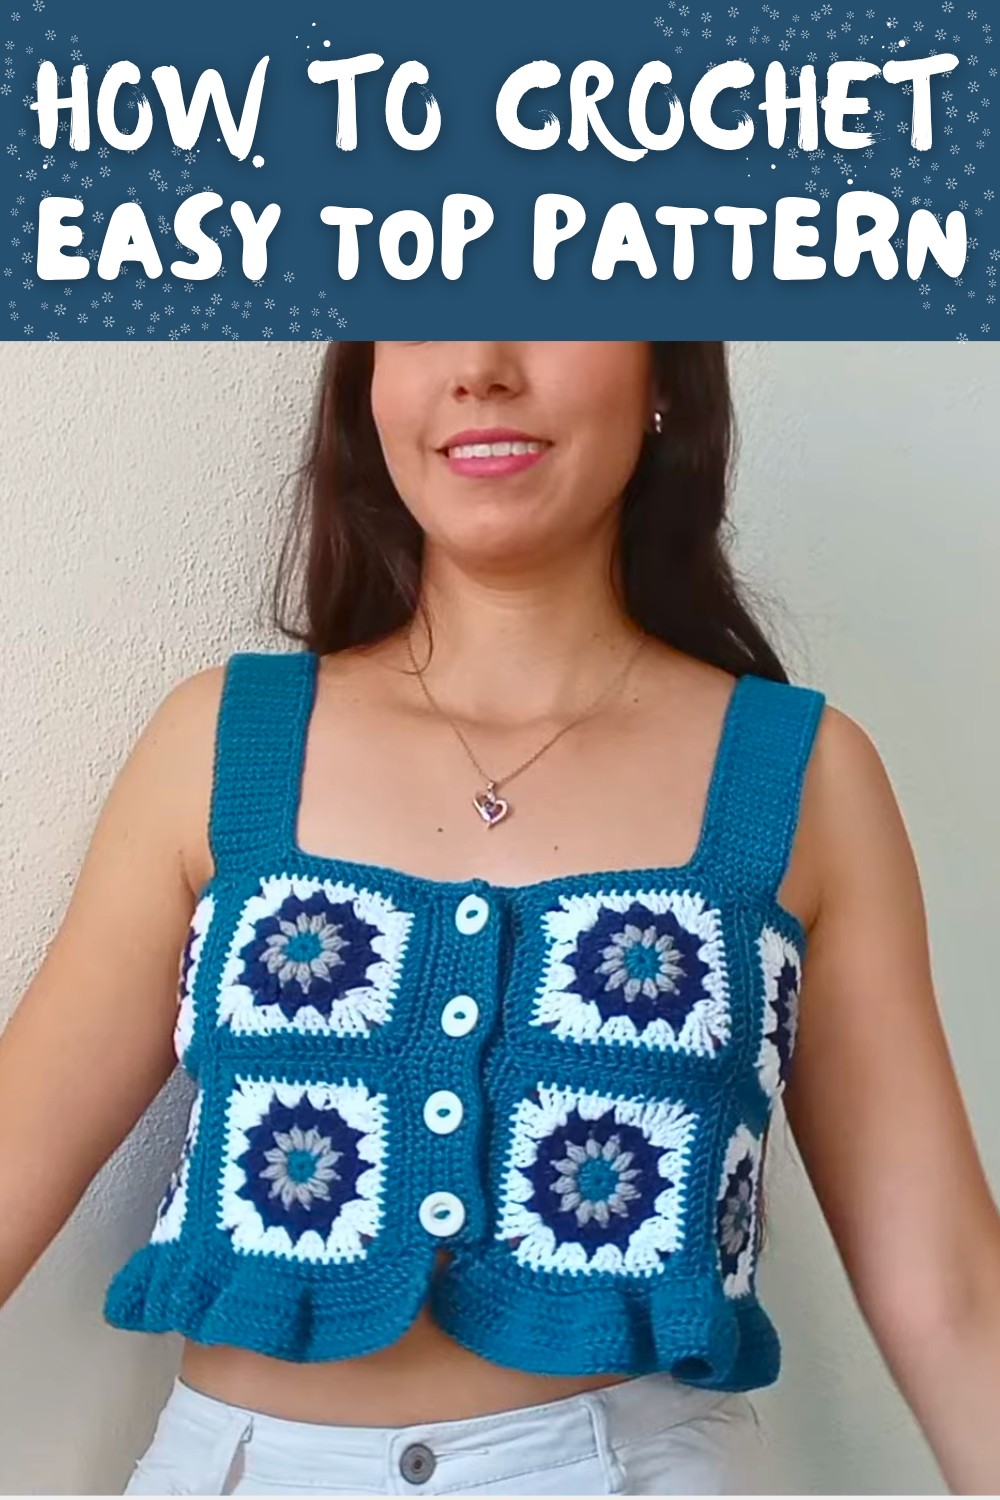
Granny Square Top Free Crochet Pattern with Modern Design
Refresh everyday outfits with Free Crochet Granny Square Top Pattern offering vintage style relaxed comfort and eye catching fashion.
I still remember the first time I wore a handmade crochet top on a sunny afternoon. Someone asked where I had bought it, and it felt wonderful to say that I had made it myself. That simple moment made me appreciate handmade clothing even more. The Free Crochet Granny Square Top Pattern is a lovely project that turns classic granny squares into a stylish top you can enjoy wearing throughout the warmer months and even layer during cooler seasons.
Cute Granny Square Top Free Crochet Pattern for Summer

This top stands out because of its timeless granny square design and colorful appearance. Each square adds beautiful texture, and together they form a comfortable garment that feels both classic and modern. You can choose bright colors for a cheerful summer look, soft earthy tones for everyday wear, or gentle pastels for a delicate style. The length, neckline, sleeves, and color arrangement can all be changed to suit your own taste, making every finished top unique. The project is suitable for beginners who know the basic crochet stitches, while experienced crocheters can enjoy trying different layouts and creative finishing details.

One of the most enjoyable parts of making this top is seeing a collection of small granny squares slowly turn into something you can actually wear. Working on one square at a time keeps the project relaxing and easy to manage. As you continue, you'll become more comfortable with joining the pieces, shaping the garment, and adding the final touches that give it a neat and finished look.
When the last square is joined, you'll have more than just another crochet project. You'll have a handmade top that reflects your creativity and personal style. It looks wonderful with jeans, skirts, shorts, or layered over a simple outfit, making it a piece you'll reach for again and again. Follow the pattern, enjoy the process, and have fun crocheting a granny square top that you'll proudly wear wherever you go.
Crochet Granny Square Blouse Pattern
This tutorial guides you through making a charming blouse constructed entirely of colorful granny squares. Perfect for beginners or intermediate crocheters, this blouse showcases four different yarn colors combined into a lovely wearable piece.
Skill Level & Terminology
- Skill Level: Beginner to Intermediate
- Terminology: US crochet terms
Materials & Tools
- 100% mercerized cotton yarn; four colors (Slate Gray, White, Blue, Navy)
- Brand used: La Abuelita, 50g skeins (~110 yards)
- Size 2 crochet hook (recommended sizes 2 or 3 also suitable)
- Scissors
- Tapestry needle
- Stitch marker
- Measuring tape
- Buttons (optional) for front closure
Gauge
- Gauge is not critical but for reference, work a sample granny square with the yarn and hook you have.
- Adjust hook size if needed to match the look and size of the blouse.
Abbreviations List
- ch: chain
- sc: single crochet
- hdc: half double crochet
- dc: double crochet
- sl st: slip stitch
- st: stitch
- sp: space
- puff stitch: see special instructions below
- magic ring: adjustable ring starting method
Special Stitch Instructions
- Magic Ring: Form an adjustable ring as the foundation for the granny square.
- Puff Stitch: Yarn over, insert hook into stitch, yarn over, pull up a loop - repeat 3 times to get 5 loops on hook, yarn over and pull through all loops, chain 1 to close.
- Half Double Crochet (hdc): Yarn over, insert hook into stitch, yarn over, pull through (3 loops on hook), yarn over and pull through all 3 loops.
- Double Crochet (dc): Yarn over, insert hook, yarn over and pull through (3 loops on hook), yarn over and pull through 2 loops, yarn over and pull through remaining 2 loops.
Finished Size
- Suitable for small size with bust circumference approximately 70 cm after reducing ease.
- Length and width can be customized by increasing or decreasing granny squares and rows.
Pattern Instructions
Part 1: Granny Square Foundation
Step 1: Magic Ring
- Form a magic ring by:
- Wrapping yarn around two fingers twice.
- With hook, pull yarn through the loop to create adjustable ring.
Step 2: Chain 2
- Chain 2; counts as first hdc.
Step 3: Half Double Crochet (hdc) into Ring
- Work 12 hdc into the magic ring.
- To make each hdc:
- Yarn over, insert hook into ring, yarn over, pull through (3 loops on hook).
- Yarn over, pull through all loops.
- After 12 hdc, pull the shorter yarn end to tighten the ring closed.
Summary of Part 1:
You begin with a magic ring foundation and 12 half double crochet stitches that form the center circle of the granny square.
Part 2: Change Color and Puff Stitch Round
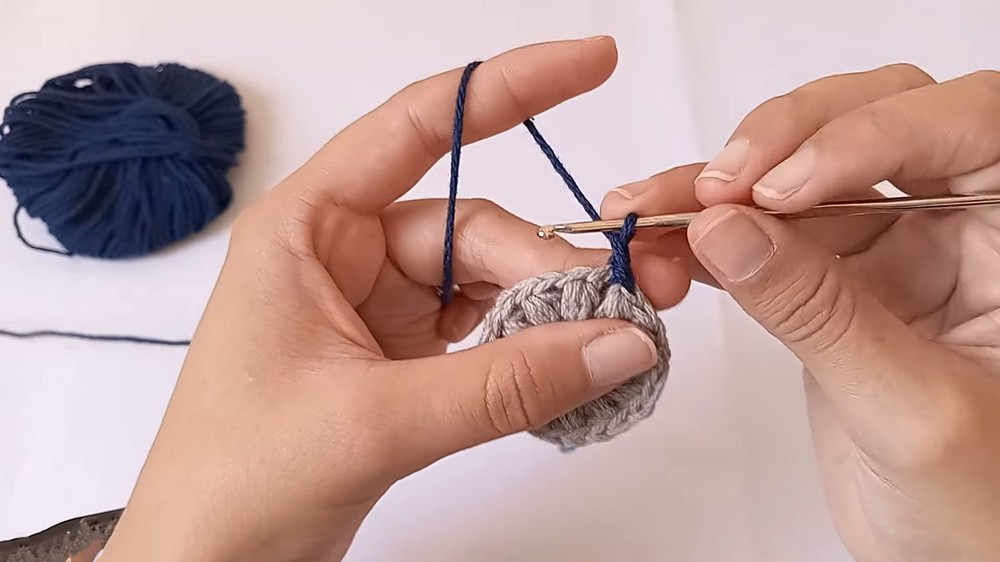
Step 1: Color Change to Gray
- Join the gray yarn at the 2nd chain of the first row.
- Secure with a slip stitch.
- Tie knots at back for color security.
Step 2: Single Crochet
- Work a single crochet (sc) into the same stitch where you joined gray yarn.
Step 3: Puff Stitches
- Create puff stitches around:
- Yarn over, insert hook into the same stitch.
- Pull up a loop, repeat 3 times to have 5 loops on hook.
- Yarn over, pull through all loops.
- Chain 1 to close.
- Make 12 puff stitches around the square.
- Join with a slip stitch.
Summary of Part 2:
Changing to gray yarn, you embellish the granny square edges with puff stitches to add texture and dimension.
Part 3: Color Change to Navy and Double Crochet Groups
Step 1: Change Color to Navy
- Slip stitch to join navy yarn.
- Knot to secure.
Step 2: Chain 1 and Move to Middle Spaces
- Work slip stitch between puff stitches.
Step 3: Groups of Four Incomplete Double Crochet
- In each space, work four incomplete double crochet stitches (yarn over, insert hook, pull through loop halfway, repeat 4 times).
- Yarn over and pull through all loops.
- Chain 2.
- Repeat this 12 times around.
- End with slip stitch joining the start.
Summary of Part 3:
The navy yarn is added next, forming clusters of four unfinished double crochets chained together for an open, lacy effect.
Part 4: Color Change to White and Beginning of Granny Square Shape
Step 1: Join White Yarn with Slip Stitch
- Knot at back.
Step 2: Slip Stitch Between Groups
- Slip stitch into middle point between groups.
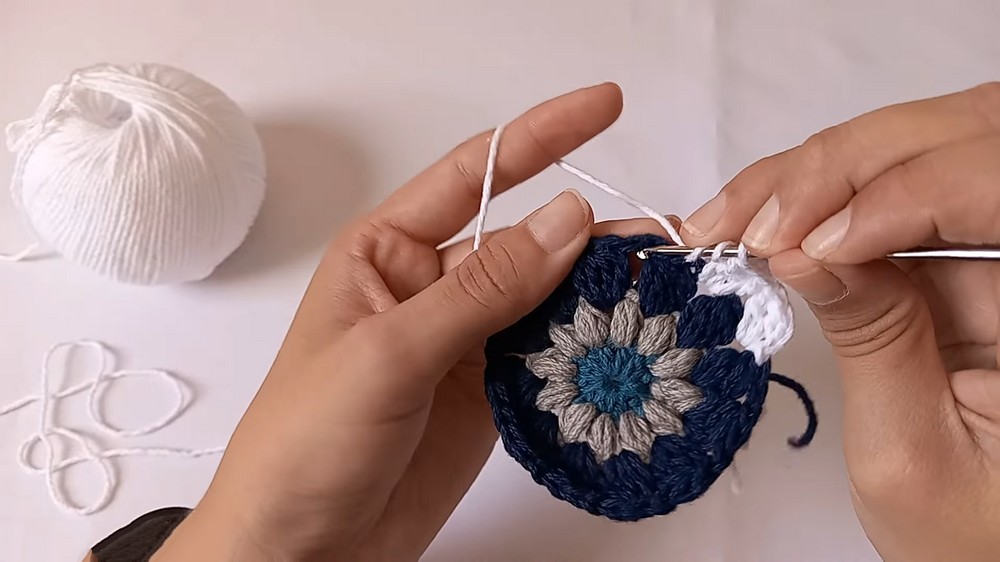
Step 3: Chain 2 to Begin
- Chain 2 (counts as first dc).
Step 4: Groups of Three Double Crochet (dc)
- Work groups of 3 dc into each space formed by previous round clusters.
- At corners, work (3 dc, chain 2, 3 dc) to form square corners.
- Complete 12 sets around.
- Close with slip stitch.
Summary of Part 4:
The white yarn shapes the granny square with classic three-double crochet groups and chain 2 corners.
Part 5: Continuation - Corners and Sides With Double Crochets
- Repeat round of 3 dc, chain 2, 3 dc corners.
- Between corners, work 3 dc into each side space.
- Slip stitch join at end.
- Chain 2 and turn.

Summary of Part 5:
This builds the granny square bigger, emphasizing the square shape with multiple double crochets and hearty corners.
Part 6: Crochet Required Number of Granny Squares
- Make 7 to 8 granny squares to meet bust circumference approximately 70 cm after subtracting 10-15 cm ease.
Summary of Part 6:
You create enough individual granny squares for the blouse width by making 7-8 squares.
Part 7: Joining Granny Squares Lengthwise
Step 1: Place two squares right sides together
- Sew together using tapestry needle and yarn.
- Pass needle through corresponding corner stitches and edge stitches.
- Secure with knots.
Step 2: Continue joining squares in a row
- Repeat until desired length is reached with joined granny squares.

Summary of Part 7:
Squares are joined lengthwise to form the blouse's circumference; fabric will lay flat with seams inside.
Part 8: Seam Up and Down - Forming the Blouse Structure
- Join squares vertically at desired points.
- Use same whipstitch joining method.
- Leave sensible openings for armholes and neckline.
- Knot ends securely and weave in loose ends.
Summary of Part 8:
Seams create the blouse structure, giving shape and defining sleeves and neckline.
Part 9: Adding Borders and Extensions
- Attach yarn at bottom edge.
- Work single crochet (sc) stitches evenly around the bottom for edging.
- Add 2-3 rows of sc for thickness and uniformity.
- Repeat border around armholes and neckline for neat finish.
Summary of Part 9:
Borders polish edges, reinforcing shape and creating a nice finish around sleeve holes and neckline.
Part 10: Button Band and Buttonholes
Step 1: Button Band
- Pick one side of front opening.
- Work rows of sc for button band approximately 7 rows high.
Step 2: For Buttonholes
- In button band row 4 (middle), chain 3, skip 3 stitches, sc in next stitch.
- Repeat to create evenly spaced buttonholes matching buttons.
Step 3: Sew Buttons
- On opposite band, sew buttons aligned with holes.
- Secure buttons tightly.

Summary of Part 10:
Buttons and buttonholes allow the blouse to close neatly, adding functionality and charm.
Part 11: Making the Straps
Step 1: Attach yarn at marked strap start
- Chain desired strap length (18 cm recommended for small size).
- Work 8 sc across the chain.
- Work back rows of 8 sc to make strap width.
Step 2: Attach straps to front and back of blouse
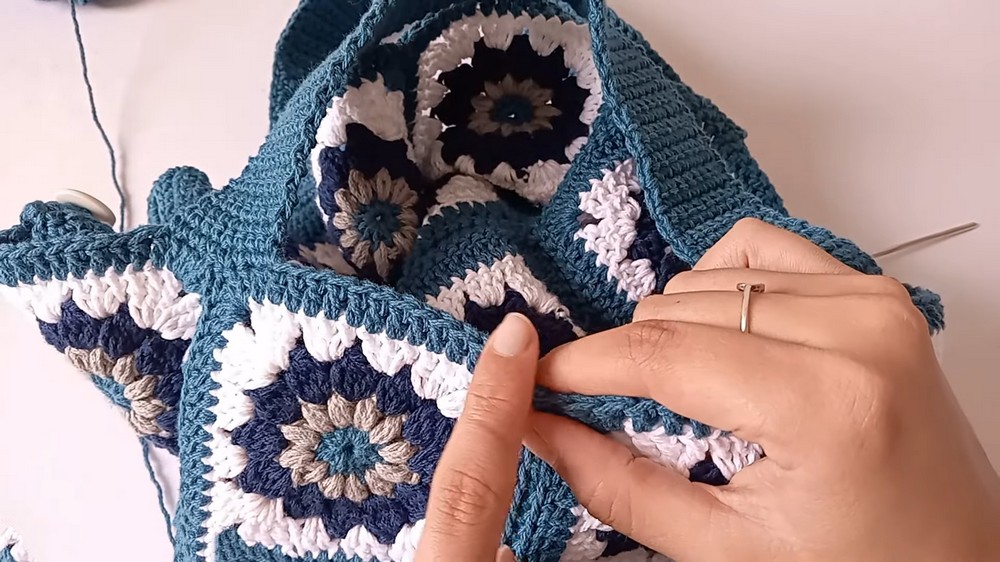
- Sew securely with yarn and tapestry needle.
Summary of Part 11:
Straps provide shoulder support and shape for wear; dimensions can be customized for size.
Assembly & Finishing
- Weave in all loose yarn ends using tapestry needle or crochet hook.
- Block blouse gently to shape.
- Make final adjustments for fit and style.
- Optionally decorate with additional buttons or embellishments.

Pattern Overview: Stitches Used & Starting Guide
- Stitches Used: Chain (ch), single crochet (sc), half double crochet (hdc), double crochet (dc), puff stitch, slip stitch (sl st).
- Starting the Pattern: Begin each granny square with a magic ring, then progress through rounds changing colors per instructions.
- Work each subsequent granny square identically.
- Assemble by joining granny squares, add edges, button bands, then straps.