
Light & Airy Crochet Open Back Mesh Top Free Pattern – Must-Try
Wear a trendy handmade top with this free crochet open back mesh top pattern that combines comfort and modern summer style.
Summer's biggest trend is here, and it's all about the Open Back Mesh Top. This stylish and fun crochet pattern lets you create a light, airy top that's perfect for sunny days and warm evenings. Whether you're heading to the beach, a casual outing, or relaxing at home, this design is versatile enough to fit any occasion while keeping you cool and comfortable. The best part? This free crochet pattern is easy to follow and doesn't require complicated steps. It's made using two simple identical panels-a front panel and a back panel-making it beginner friendly yet incredibly chic. The open back design adds a unique and elegant touch, making the top look modern and trend worthy. Plus, the mesh pattern gives it a breathable, lightweight feel that's ideal for summer weather.
Learn how to Crochet This Stunning Open Back Top - Free Pattern
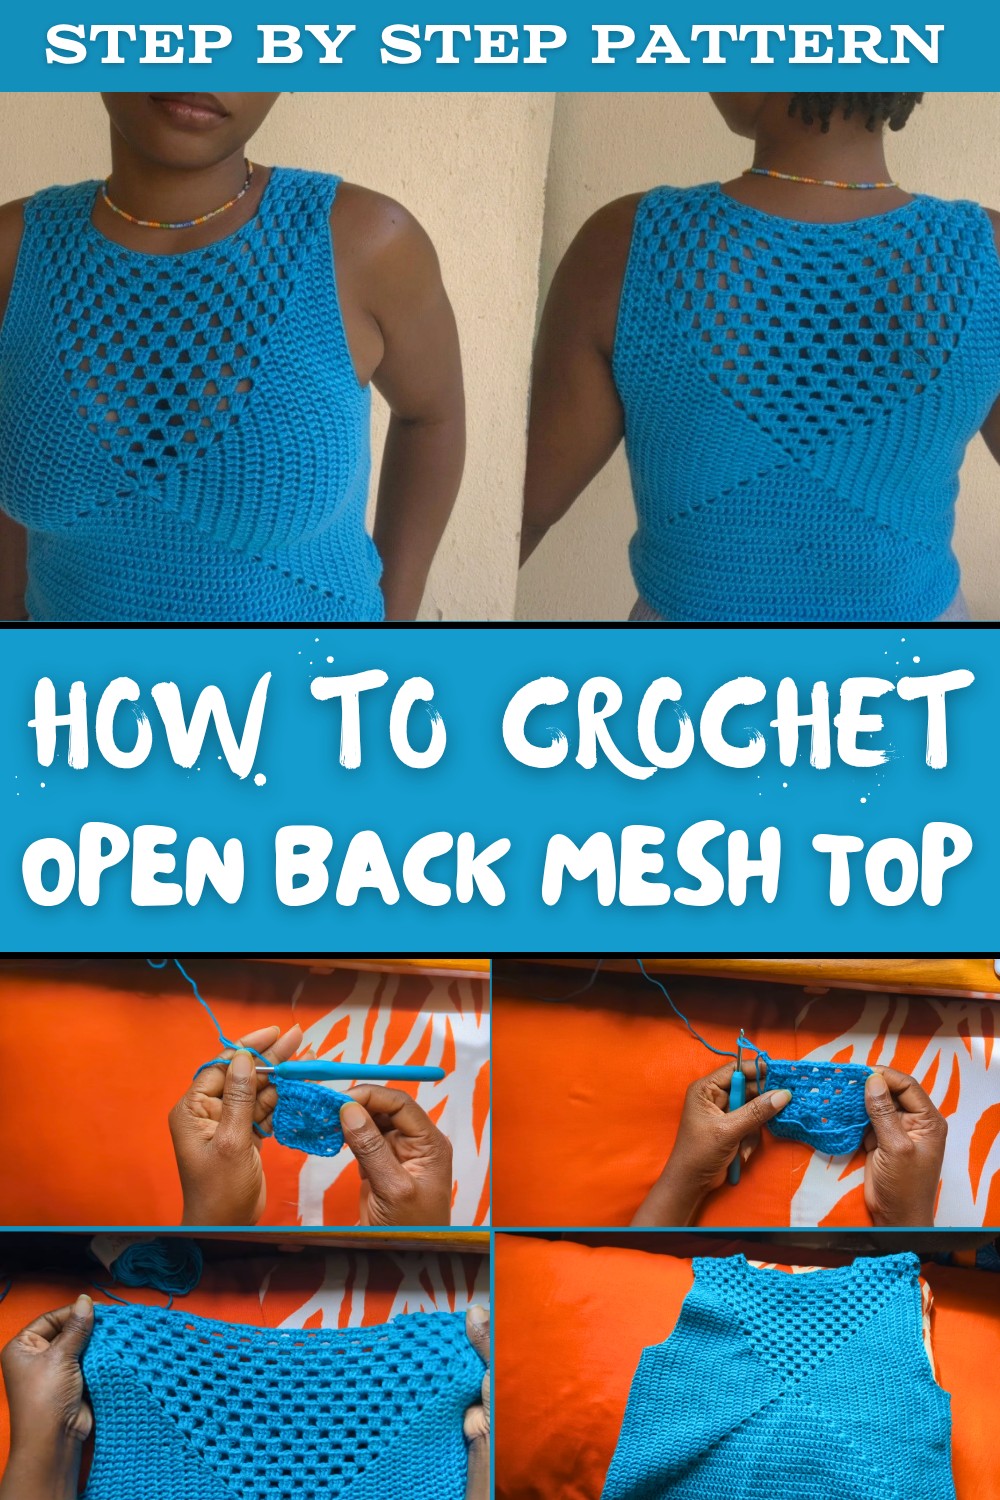
Another exciting feature is its customizable fit. Whether you want a snug, body hugging look or a relaxed, loose size, all it takes is adjusting the number of rows while crocheting. This makes it suitable for everyone, from teens to adults, and works for all shapes and sizes.
All you need are basic materials: a 4mm crochet hook, yarn of your choice, scissors, and stitch markers. The pattern uses simple techniques like the granny square stitch, so even beginners can enjoy making this top without getting frustrated. What's even better is the seamless finish thanks to the "join as you go" method, ensuring a polished, professional look.
This crochet top isn't just fashionable; it's also the perfect way to express your creativity. Started with this free pattern today and be ready to turn heads with your gorgeous handmade design. Summer style has never been so fun and easy.
Crochet Mesh Top Pattern
Materials Required
- Yarn:
- Any yarn of choice, ideally lightweight and breathable for comfort in casual wear. Debbie suggests using a silk blend yarn (60% silk, 20% wool, 20% cashmere).
- For alternatives, like acrylic yarn, ensure to use a larger hook size for breathability.
- Hook Size:
- 4mm crochet hook (adjust based on yarn thickness).
- Additional Items:
- Tape measure.
- Stitch markers or safety pins.
- Pair of scissors (or shears).
Measurements
- Bust Measurement:
- Wrap the tape measure around the bust. Note the measurement (Debbie's example: 35 inches total).
- Divide the measurement into half to determine the width of each panel (e.g., 35 ÷ 2 = 17.5 inches per panel).
- Fit Adjustments:
- Tight Fit: Subtract 1-2 inches from the bust measurement.
- Loose Fit: Add 1-2 inches to the bust measurement.
Special Techniques
- Magic Ring:
Create the starting loop for the granny squares.- Option 1: Chain four, slip stitch into the first chain to form a circle.
- Option 2: Use a magic loop technique for an adjustable start.
- Joining Squares Method:
Use the "join as you go" method for a seamless finish between panels. - Stacked Double Crochet:
A substitute for chaining three at row beginnings.- Insert hook, yarn over and pull through to form a single crochet.
- Insert hook into the side loop of the single crochet, yarn over, pull through, and complete a second single crochet on top of the first.
Pattern Instructions
Step 1: Making Granny Squares
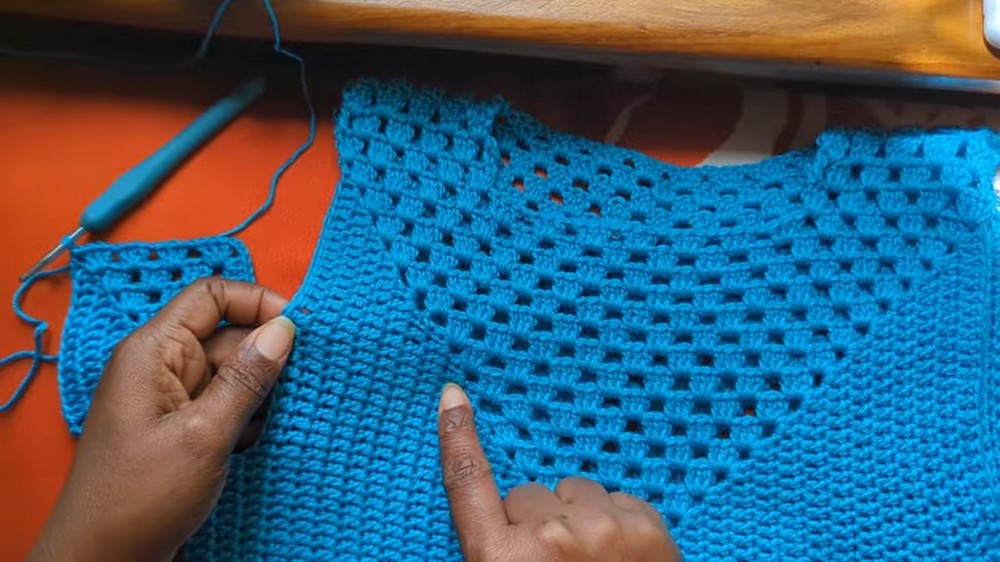
Each panel consists of a large granny square-a solid center transitioning into a mesh pattern towards the edge.
- Creating Row 1 (Center of the Square):
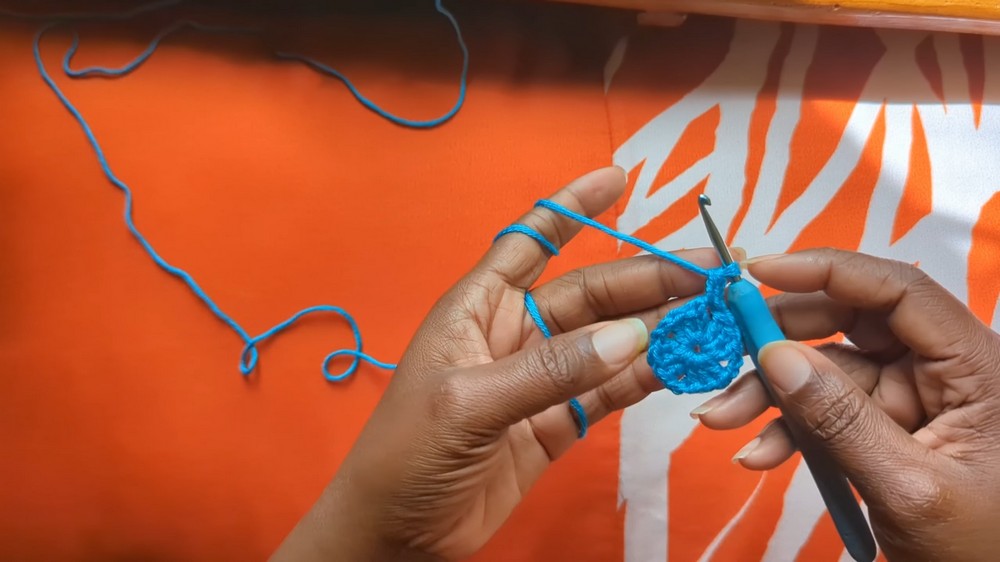
- Start with a magic ring or chain circle.
- Chain 3 (counts as first double crochet), add 2 double crochets into the center.
- Chain 2 (create a corner).
- Repeat 3 double crochet clusters followed by chaining 2 for each corner until the square is completed.
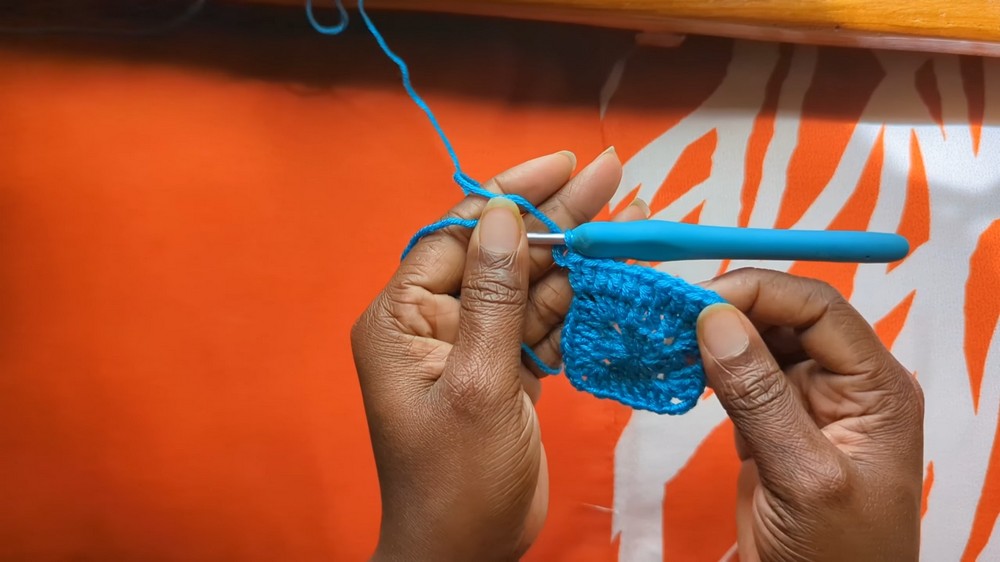
- Row 2:
- Expand the square by working double crochet clusters into the chain spaces, and always chain 2 at each corner.
- Transition to Mesh Style:
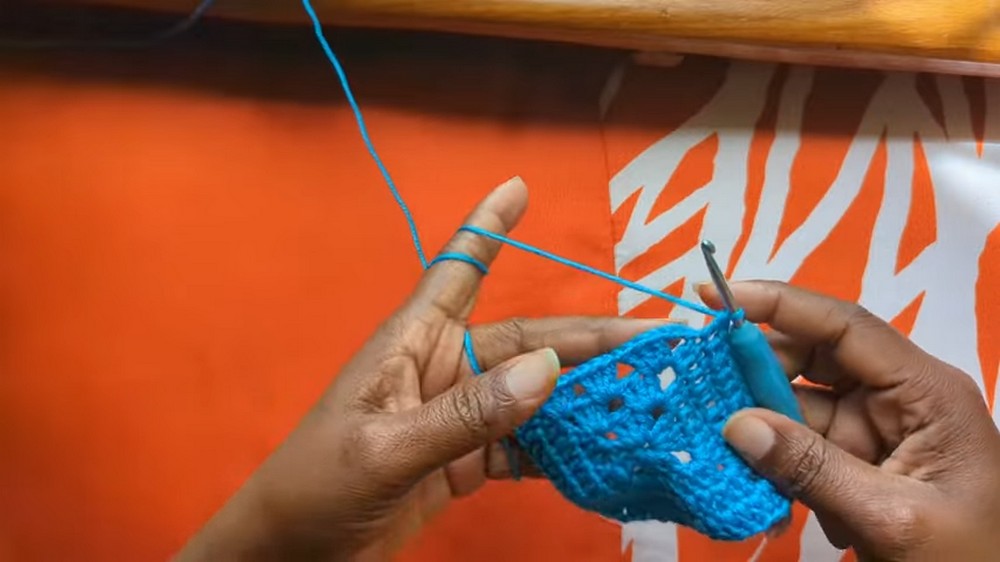
- After completing a few solid rows, transition to a mesh stitch.
- In mesh rows, skip over clusters, chain 1 between clusters to leave open spaces, and work 3 double crochets into chain spaces.
- Repeat:
- Continue alternating solid and mesh patterns until the square is 13-16 inches wide, depending on the bust size. Debbie's example has 16 rows, resulting in dimensions of approximately 13½ inches per square.

Step 2: Neckline and Shoulders
- Front Panel Neckline:
- After completing the main square, flip the work and create rows to define the neckline.
- Count clusters across the row and leave a central gap for the neckline (e.g., Debbie left seven clusters for her neckline).
- On each side, crochet three rows of double crochet clusters to form shoulder sections.
- Back Panel Neckline:
- For the back panel, make a single row of shoulder stitches after completing the main square, leaving the same number of clusters for the back neckline gap as the front panel.
- Joining Necklines:
- Use the "join as you go" method for a seamless connection of front and back panels at the shoulders.

Step 3: Underarm Sections
- Measurements:
- Decide on the number of edge stitches to leave for armhole openings. Debbie suggests leaving 20-23 stitches per side or adjusting based on fitting preference.
- Creating Underarm Rows:
- Starting at the stitch marker, crochet two rows of double crochets following the corner to corner pattern.
- Joining:
- Use the "join as you go" method for attaching the underarm sections of the front and back panels.
- Optionally leave a 1-2 inch slit at the bottom of the underarm seam for movement and flare.

Step 4: Final Joining & Sleeves (Optional)
- Joining Panels:
- Lay the front panel and back panel together, ensuring the right sides are facing outwards.
- Seam the sides using the "join as you go" technique or sewing them together with a darning needle.
- Optional Sleeves:
Crochet additional granny squares for the sleeves and attach them along the armhole edges, maintaining consistency with the mesh pattern.

Finishing the Project
- Edging:
- For a polished finish, add a row of single crochet or slip stitches along the neckline, sleeve, and bottom edges.
- Weaving in Ends:
- Secure all loose ends using a darning needle. Tuck the ends into the wrong side of the fabric for a neat appearance.
Tips for Pattern Maintenance
- Blocking:
After completing the top, block it to even out the stitches and ensure consistent measurements. - Care Instructions:
- Hand wash with cold water and dry flat to maintain elasticity and color vibrancy.
- Avoid bleach and high heat during cleaning.
- Fit Adjustments for Different Sizes:
- To size up or down, increase or decrease the bust measurement and adjust the number of rows in the granny square accordingly.

Final Words
This crochet blue top is ideal for casual or semi formal wear. With only two main panels and minimal shaping, the project is accessible for beginner crocheters yet customizable for experienced ones. If you have questions about the process or require assistance with techniques.