
Simple Free Crochet iPhone Pocket Pattern to Carry Phone Safely
Secure your tech in style with this Free Crochet iPhone Pocket Pattern and make a handy, cute pouch that keeps your phone safe while adding a fun handmade touch.
Carrying your phone in something both stylish and made with love. This crochet pattern creates a beautiful and practical iPhone pocket that is the perfect blend of elegance and functionality. Its snug design keeps your phone safe and secure, while the soft, textured finish makes it a joy to hold and use. The pocket is lightweight, durable, and can be customized in your favorite colors, making it as unique as you are.
Free Crochet iPhone Pocket Pattern for Colorful Gifts
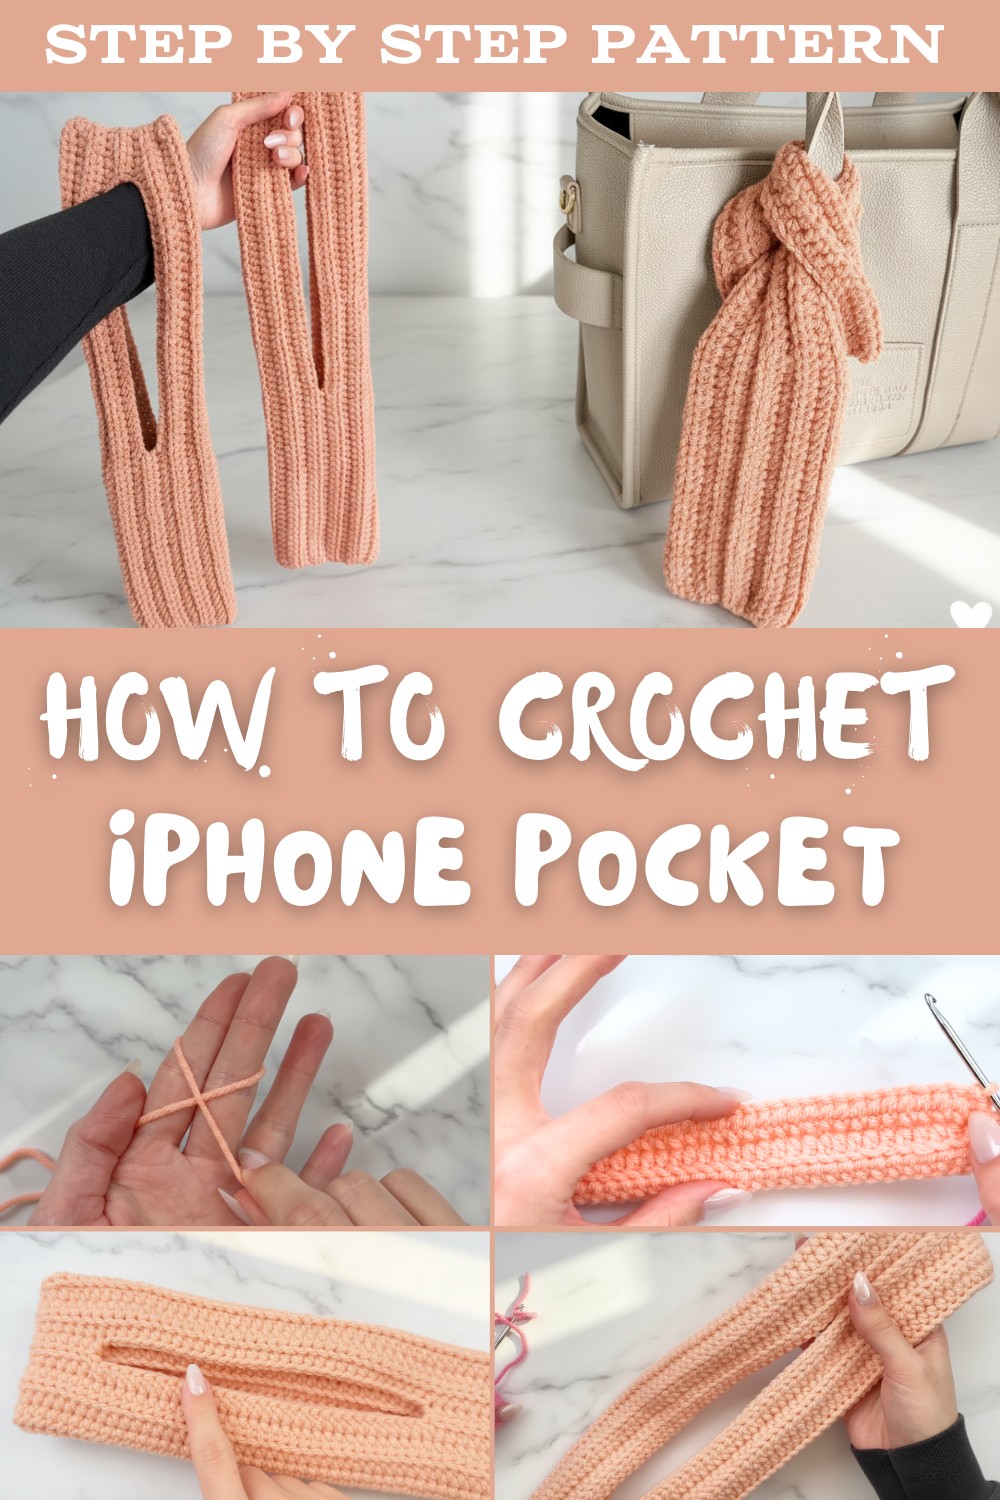
Add a strap to turn it into a crossbody or neck pouch, or keep it simple for sliding into your bag. Whether for everyday use or as a thoughtful handmade gift, this iPhone pocket combines creativity with convenience. It's easy to make, perfect for all skill levels, and brings a touch of charm to your daily life. With this lovely crochet project, your phone stays safe, and your style stays unforgettable.

Viral Crochet Iphone Pocket Pattern
Finished Size
The bag's size may vary depending on your phone dimensions. Based on the tutorial, the finished bag is approximately 7 inches long and 3.5 inches wide. The strap length can be adjusted for handheld or crossbody use.
Materials Needed
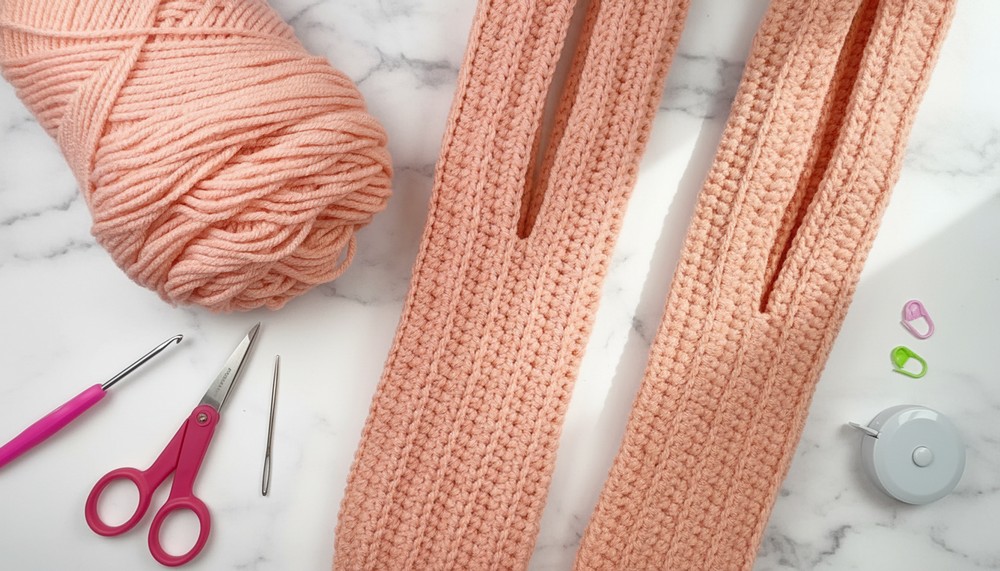
- Yarn:
- Worsted Weight (#4) acrylic or cotton yarn.
- Approximately 175-200 yards for the main body, strap, and sewing edges.
- Hook:
- 3.5 mm crochet hook for consistent stitching.
- Scissors:
- For cutting yarn.
- Measuring Tape:
- To measure length and ensure accuracy.
- Tapestry Needle:
- For sewing and weaving in ends.
- Stitch Markers or Bobby Pins:
- To mark specific sections during assembly.
Gauge
Gauge is essential for achieving accurate dimensions.
- Gauge: 10 half double crochets (hdc) x 8 rows = 4 x 4 inches (10 x 10 cm).
Abbreviations (US Terminology)
- ch = Chain
- hdc = Half Double Crochet
- sl st = Slip Stitch
- st = Stitch
- BLO = Back Loop Only
Special Techniques
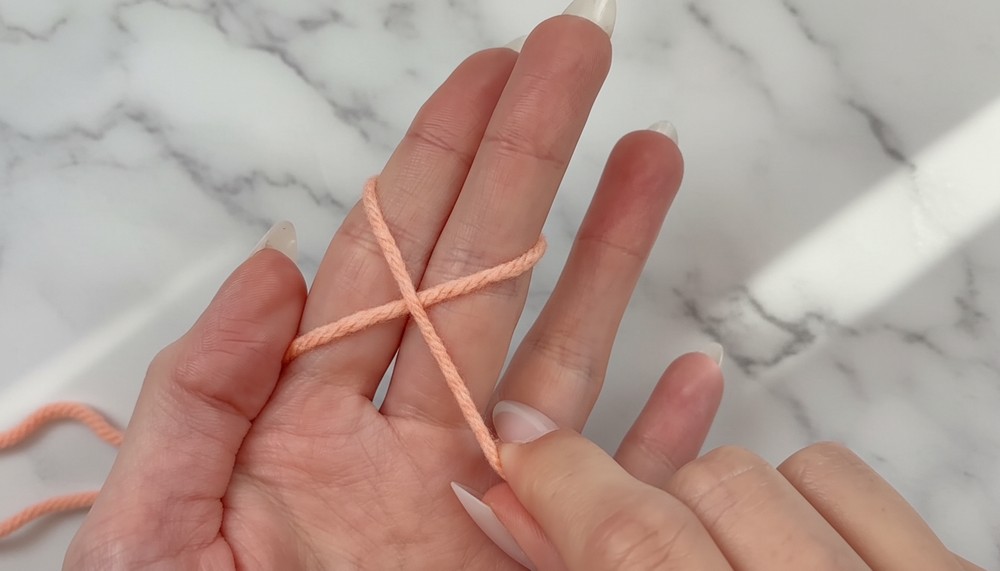
Slip Knot
- Wrap yarn around two fingers to form a loop.
- Cross the working yarn over the tail.
- Insert the hook through the loop, pull up a strand of yarn, and tighten.
Half Double Crochet (hdc)
- Yarn over and insert hook into stitch.
- Yarn over, pull up a loop (three loops on hook).
- Yarn over again and pull through all three loops on the hook.
Back Loop Only (BLO)
Crochet in the back loop of the stitch (the loop furthest away from you) rather than through both loops. This creates a ribbed texture.
Pattern Instructions
Step 1: Creating the Foundation Chain
- Begin with a slip knot and insert your hook.
- Chain: Create a chain approximately 16 inches long. This chain will determine the overall bag length and strap.
- For example, in the tutorial, 75 chains were created for a regular strap and bag body.
- Adjust chain length for shorter/longer bags or straps (e.g., for crossbody bags, increase by 12-16 inches).
Step 2: Row 1 - Half Double Crochet
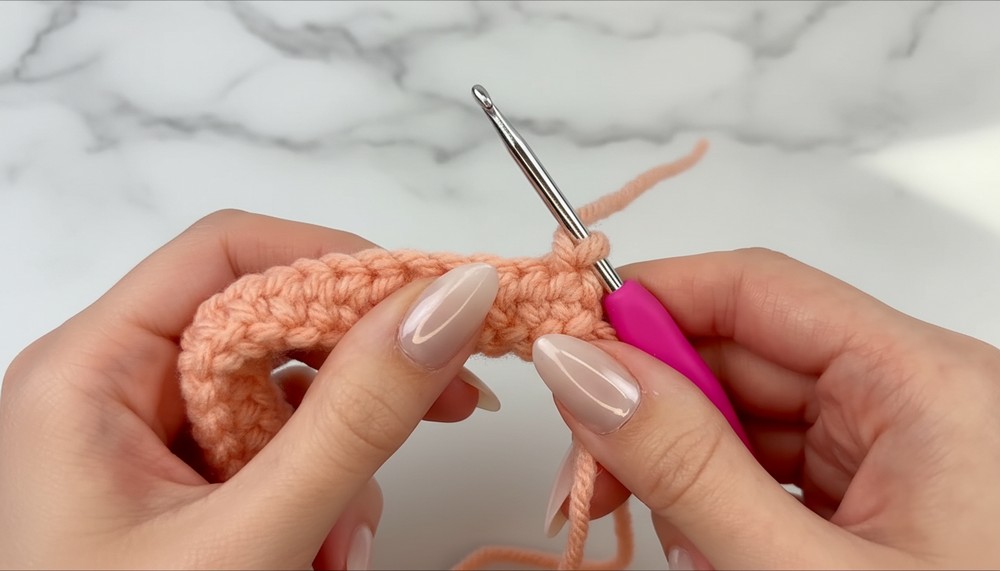
- Begin Row 1:
- Start in the second chain from the hook. Work 1 hdc into this chain.
- Continue working 1 hdc into each chain along the row. (Tip: Insert hook into the top loop for a clean edge)
- At the end of the row, chain 1 and turn your work. This prepares you for the next row.
Step 3: Rows 2-9 - Back Loop Only (BLO)
- Row 2:
- Skip the turning chain. Work 1 hdc into the back loop of each stitch across the row.
- At the end of the row, chain 1 and turn your work.
- Repeat Row 2 for a total of 9 rows, ensuring the edge remains straight. This creates a ribbed texture.
- Adjust Width to Fit Your Phone: Make enough rows until the width matches your phone. For an iPhone 14 Pro Max, 3.5 inches wide required 9 rows.
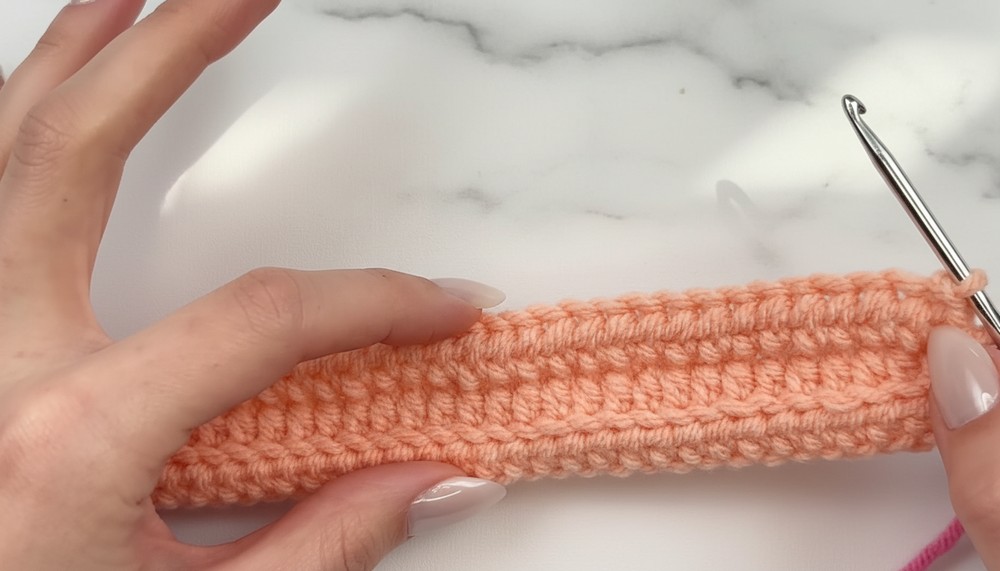

Step 4: Mark Sections for Handle Opening
- Measure your phone's length (e.g., 7 inches for an iPhone 14 Pro Max) and mark with stitch markers or pins where the phone pocket section will lie. This is typically the bottom portion of the bag.
- Mark the strap handle opening: Leave space between the pocket and top closure based on your preference. For example:
- Bottom section for phone = 7 inches, strap = remaining chains off top closure.
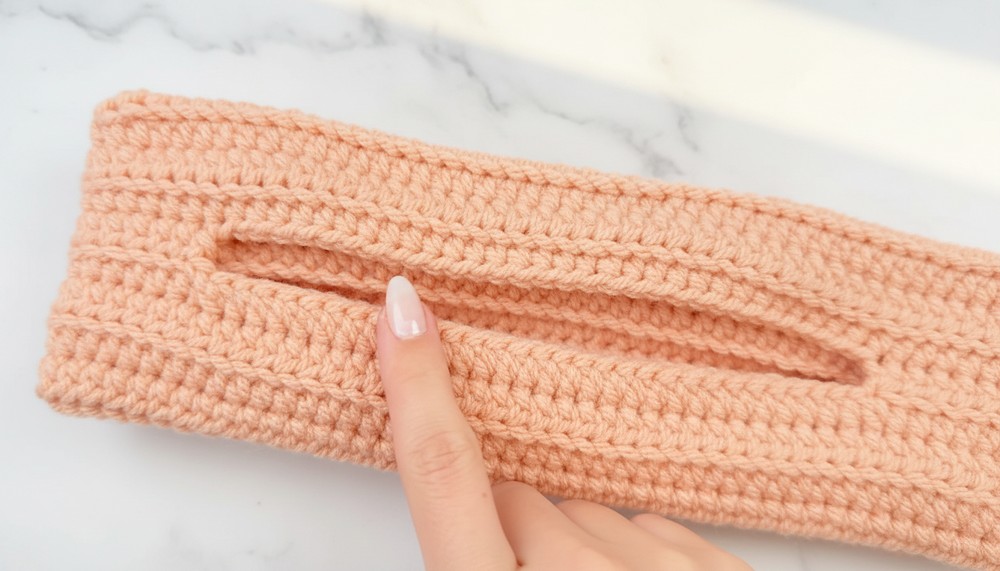
Step 5: Handle Opening
- From the stitch marker marking the bottom, work 1 hdc into each stitch until reaching the next marker.
- Measure the distance between the markers for your handle opening (e.g., 37 stitches).
- Chain the same number (e.g., 37 chains) to create the strap opening.
- Skip the stitches between the markers and continue working 1 hdc into each stitch after the second marker.
Step 6: Mirror Rows for Second Side
- Work 1 hdc into each stitch, continuing back and forth, for the same number of rows as the first side (9 rows for a 3.5-inch-wide bag).
- Ensure both sides are identical by measuring width and row count.
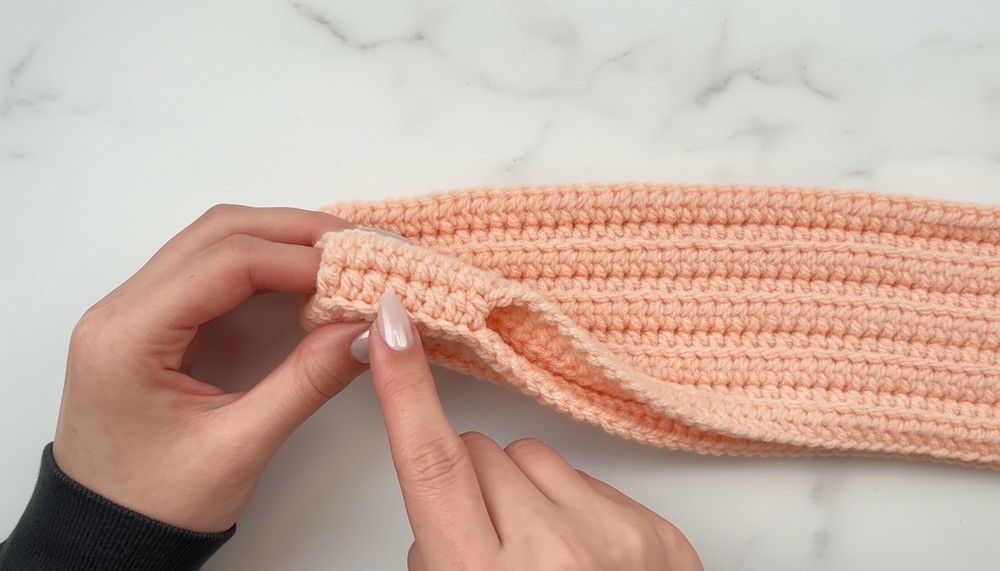
Step 7: Joining Edges
- Fold the bag in half along the length. Ensure the handle is centered.
- Slip Stitch Edges Together:
- Working through the back loop of the final row and front loop of the first row, slip stitch evenly across the edge to close two sides of the phone pocket section. Stop at the phone section opening.
- For the strap opening, work sl st into the facing edge only to prevent closure, creating the handle gap.
- Resume slip stitching both edges together until the row is complete.
- Fasten Off: Chain 1, cut yarn, and pull through the last loop.
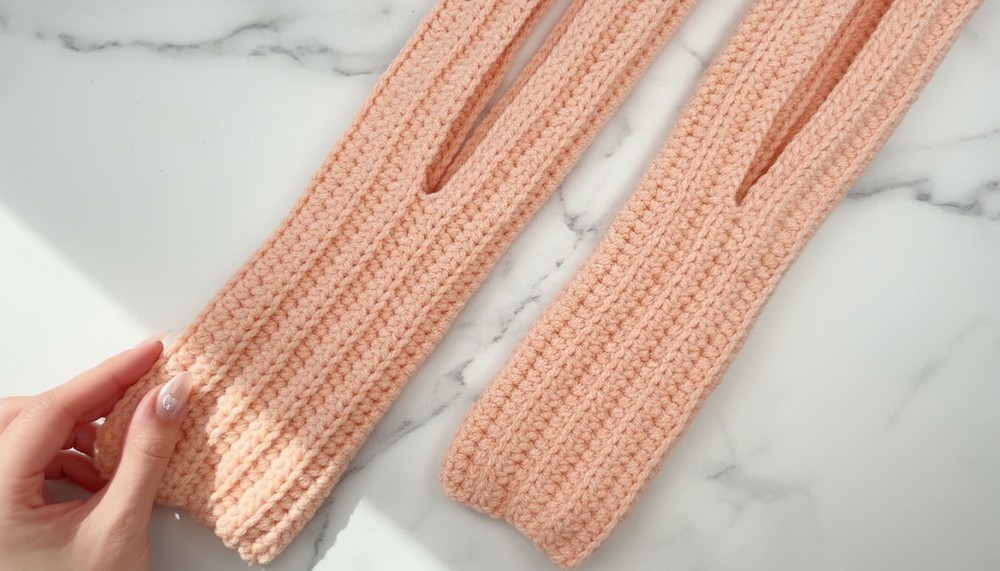
Step 8: Securing Top and Bottom Edges
- Use a tapestry needle and extra yarn to sew the top edge (closure) and bottom edge of the bag securely.
- Ensure the closure aligns neatly and the phone pocket is fully secured.

Customization Options
- Crossbody Bag:
- Extend the chain length for longer straps (e.g., an additional 12-16 inches).
- Adjust Width/Height for Phones:
- Increase width for wider phones by adding rows.
- Add rows or chains for longer devices.
- Decorative Embellishments:
- Add buttons, embroidery, or appliqués for a personalized touch.
Final Touches
- Weave in Loose Ends: Use your tapestry needle to tuck in yarn tails neatly within the stitches.
- Lightly block your crochet piece if needed for shape refinement.

Conclusion and Final Remarks
Congratulations on completing your crochet phone pocket bag! This compact and trendy accessory is perfect for everyday use or gifting. With its customizable strap length, compact design, and ribbed texture, your new bag is both functional and stylish.