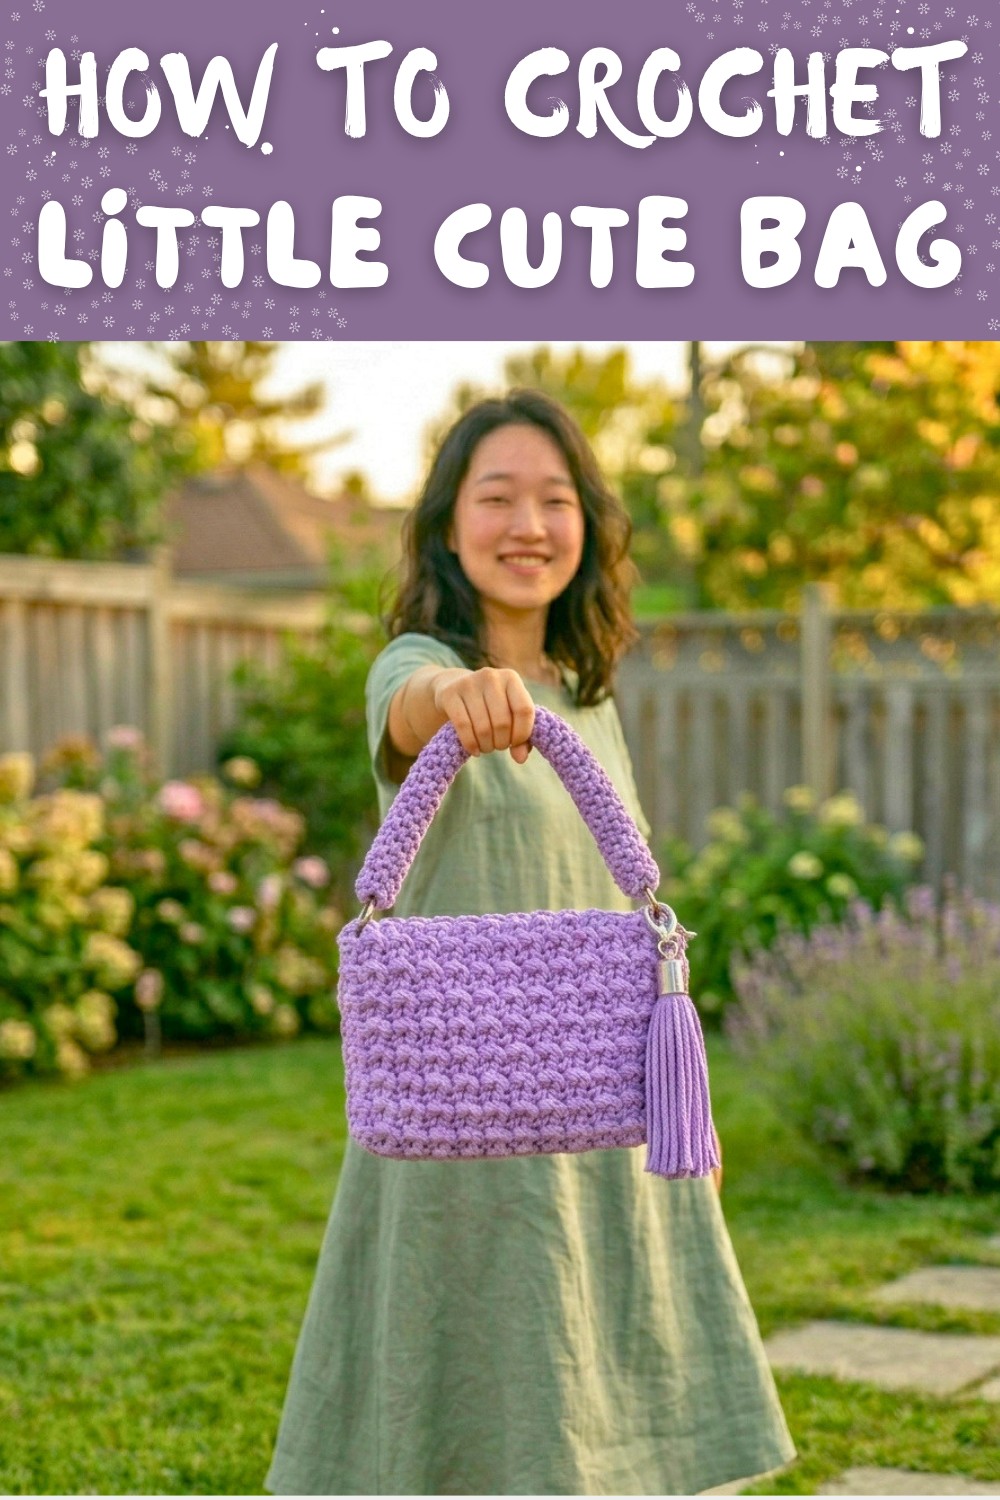
Functional Free Crochet Little Cute Bag Pattern
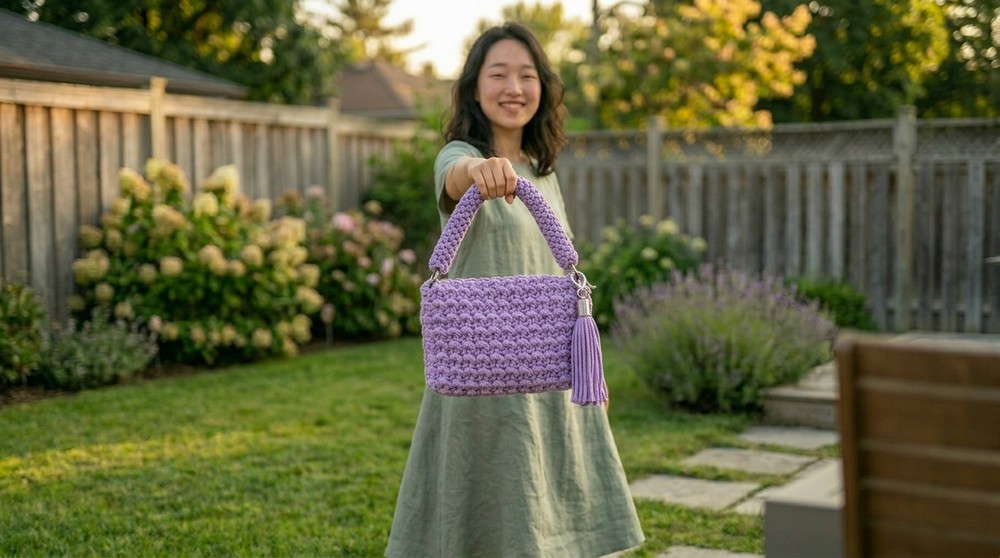
Tiny bag charm shines brightly with this free crochet little cute bag pattern made for playful fashion and fun daily carrying that is simple and easy to try.
Think about making your very own adorable bag that's small, stylish, and super useful - isn't that exciting? With this Free Crochet Little Cute Bag Pattern, you can create a little treasure that's not only fun to make but also perfect for everyday use. This bag isn't just cute; it's a handy accessory that can hold all your daily essentials, like your phone, keys, wallet, or even a few small makeup items. It's light to carry, durable, and works great for school, shopping, or hanging out with friends. Who wouldn't love that?
Adorable Free Crochet Little Cute Bag Pattern for Everyday Use

What makes this bag extra special is its beautiful texture and fun design. The crochet stitches form a bubbly, elegant look that's soft to touch and very polished. You can even add your twist by choosing your favorite colors to match your outfits or show off your personality. It's fashionable, functional, and adds charm to any casual occasion.
This bag has some unique features that make it even more amazing. It includes cute tassels, a sturdy handle, and a magnetic clasp to keep everything secure and stylish. The tassels add a playful touch, while the clasp makes it easy to open and close. You can even personalize it with a small label or tag for a creative finish that feels extra special.
Using durable macramé cord, this project is fun, quick, and perfect for anyone who loves crochetwork. Whether you make it for yourself or gift it to someone, this little bag will brighten anyone's day and give you the joy of owning a beautiful handmade accessory. So, pick up your yarn and hook - it's time to create something truly delightful.
Crochet Little Cute Bag Pattern
Materials Needed
- Yarn
- Material: MC XL cord (macramé cord recommended)
- Quantity: Approximately 170 meters (ideal for completing the bag, tassel, and strap).
- Example Size: 130m (a single ball of XL wire yarn may provide a good starting base).
- Hook
- 3.75 mm crochet hook (a smaller hook is used to achieve a tighter stitch for a sturdy bag structure).
- Other Tools
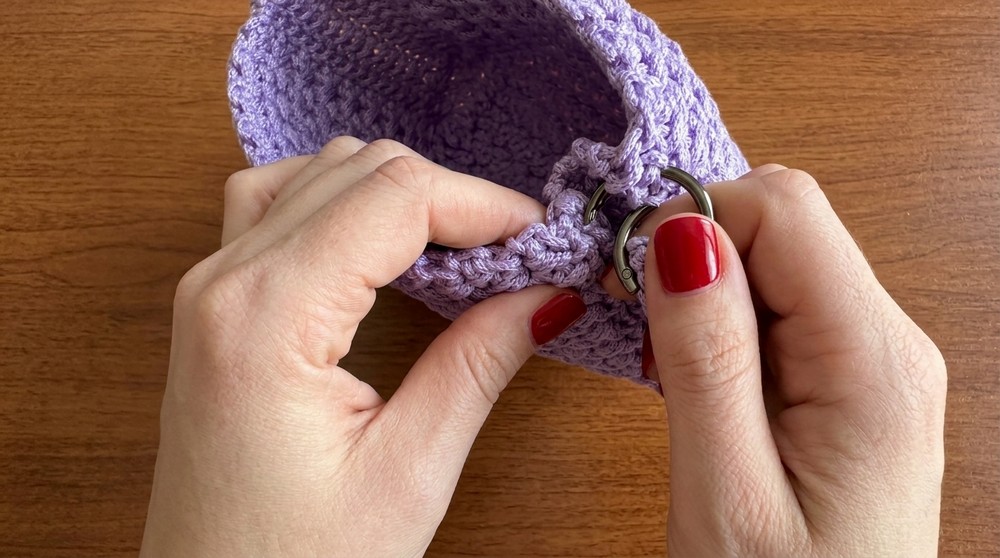
- 2 Ring Loops (used for attaching the handle).
- 2 Screws & Screwdriver (for tassel attachment).
- Magnetic Clasp: A set of 2 magnetic snaps/clasps for the opening/closure.
- 2 Needles: A small sewing needle for attaching the magnetic clasp and a larger tapestry needle for sewing the bag pieces and weaving ends.
- Chain for Tassels: 2 small base chains to attach the tassels to the rings.
- Scissors: For cutting yarn.
- Candle/Lighter: Heat-treat yarn edges after cutting for a clean and sealed finish (works best if using synthetic yarn).
Gauge
- 10 stitches x 10 rows in single crochet = Approx. 5 cm x 5 cm.
- The bag uses tight stitches for better durability. Adjust hook size if your tension is too loose or tight.
Finished Size
- Bag Body: Approx. 24 rows in height and 47 chains in width.
- Shoulder Strap: Approx. 25 cm.
- Tassels: Approx. 5 cm (length can vary by personal preference).
Special Techniques
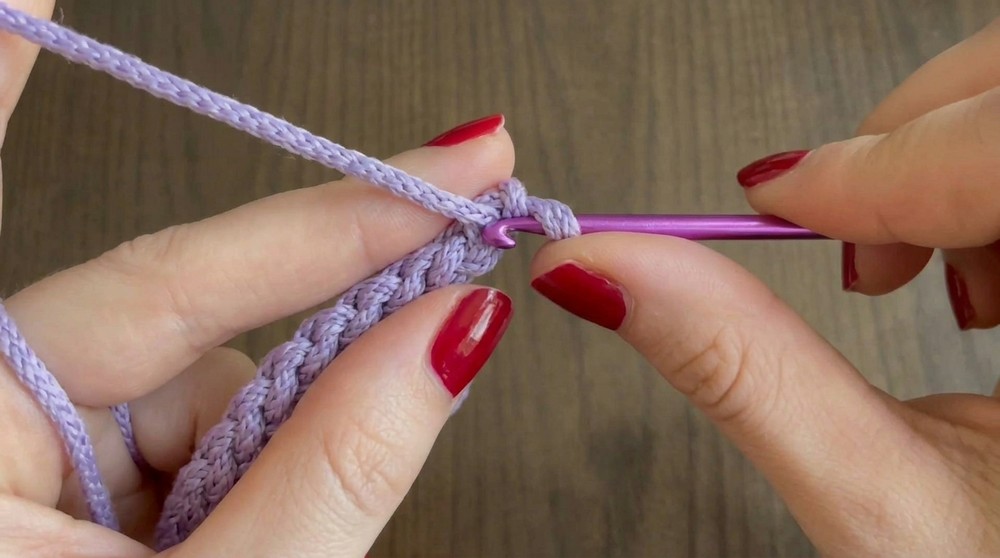
- Single Crochet (SC):
Insert hook, yarn over, pull up a loop. Yarn over and pull through both loops on the hook. - Crossed SC Stitch:
- Skip 1 stitch, SC in the next stitch.
- Return to the skipped stitch, SC into it by crossing over the previous SC.
- Repeat across the row to create a detailed cross pattern.
- Triple Decrease:
Yarn over, insert into the next stitch, pull up a loop. Repeat in the next two stitches. Yarn over and pull through all loops on the hook to accomplish 1 triple decrease. - Slip Stitch (SL ST):
Insert hook, yarn over, and pull through the stitch and the loop on the hook. - Heat Treating Tassels (Optional):
If using synthetic yarns, lightly singe the cut edges of yarn to prevent fraying. Hold the yarn above a flame and roll it for a sealed edge.
Pattern Instructions
PART 1: BAG BODY
- Foundation Chains:
- Start with 47 chains. Ensure not to tension the chain too tightly.
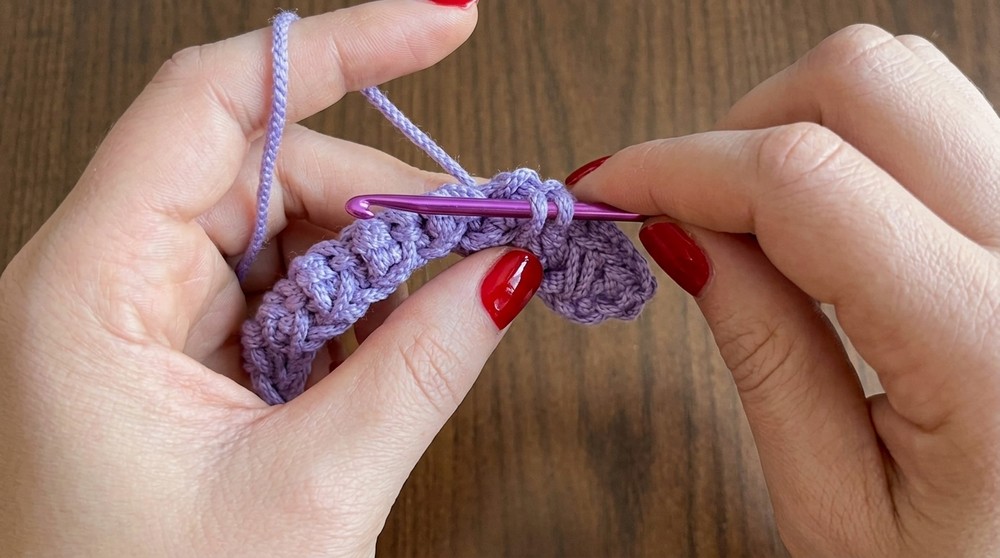
- Row 1:
- Skip the first chain. SC in the back loop of the second chain from the hook.
- Crossed SC Stitch: Skip 1 stitch, SC in the next. Then return to the skipped chain and SC into it.
- Repeat the Crossed SC Stitch across the entire row. The row will end with 1 SC in the last chain.
- CH 1, turn.
- Row 2:
- Start with 1 SC in the very first stitch.
- Follow the same Crossed SC Stitch pattern as Row 1 (skip 1, SC in the next, then return to the skipped stitch and SC).
- End with 1 SC in the last stitch.
- CH 1, turn.
- Continue Rows 3 to 24:
- Repeat the Row 2 instructions until you have 24 rows in total.
- The stitch pattern will create a bubble like texture across the body of the bag.
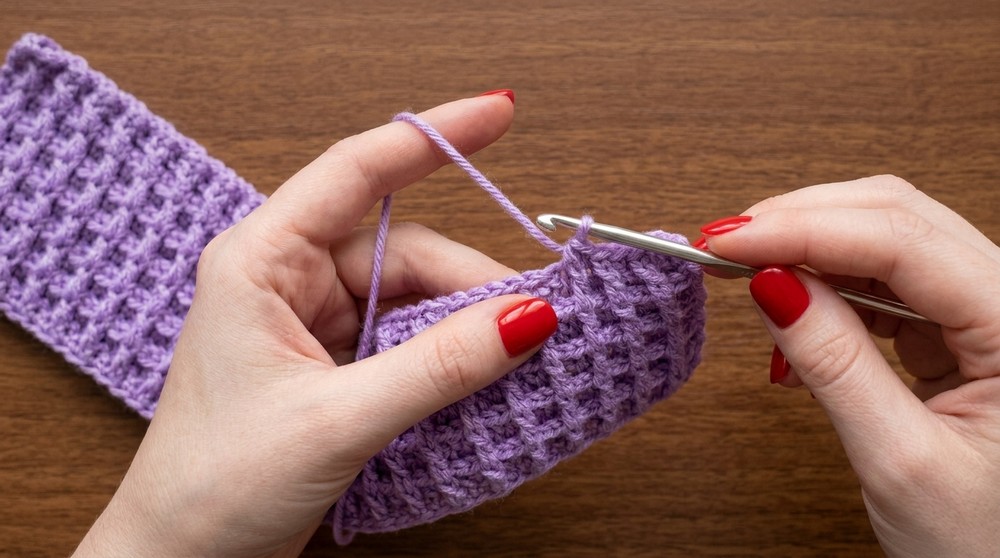
PART 2: SIDE PANELS
For each side panel:
- Edge Rows:
- Without cutting the yarn after completing the last row, turn and begin 17 SC down one edge of the rectangle. SC into the back loops for a neater edge.
- At the bottom of the edge, work a triple decrease followed by 6 SC.
- Work another triple decrease, then SC across the remainder of the row. CH 1, turn.
- Remaining Edge Rounds:
- Work your way back up the edge in similar fashion: SC in each stitch, with decreases along the curves as specified in the tutorial.
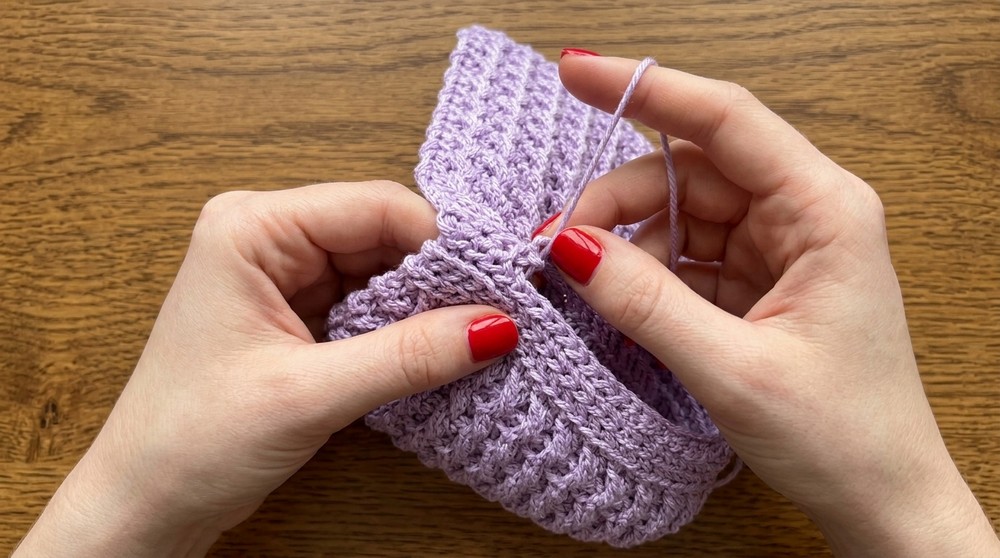
- Sewing the Side:
- Once both side panels are crocheted, use a tapestry needle to sew them to the edges of the body. Only pick up the back loops on either piece for a seamless join.
PART 3: HANDLE
- Foundation Chain:
- CH 7. Join to the first chain with a SL ST to form a loop.
- Rounds:
- SC into the back loops only of each chain (7 total SC). Continue working around in a spiral.
- Keep working by taking only the back loop of each stitch. The strap will gradually lengthen into a tube like handle.
- Length:
- Continue until the strap measures approx. 25 cm (or adjust for your desired length).
- Attachment:
- Insert each strap end into the rings on either side of the bag's top edge, securing them with extra stitching.
PART 4: TASSELS
- Create Tassels:
- Wrap yarn 13 times around an object (e.g., a box). Slide it off and twist the bundle.
- Insert this bundle into a screw loop and tighten with a screwdriver.
- Attachment:
- Attach tassel loops to the rings next to the handle using small metal chains.
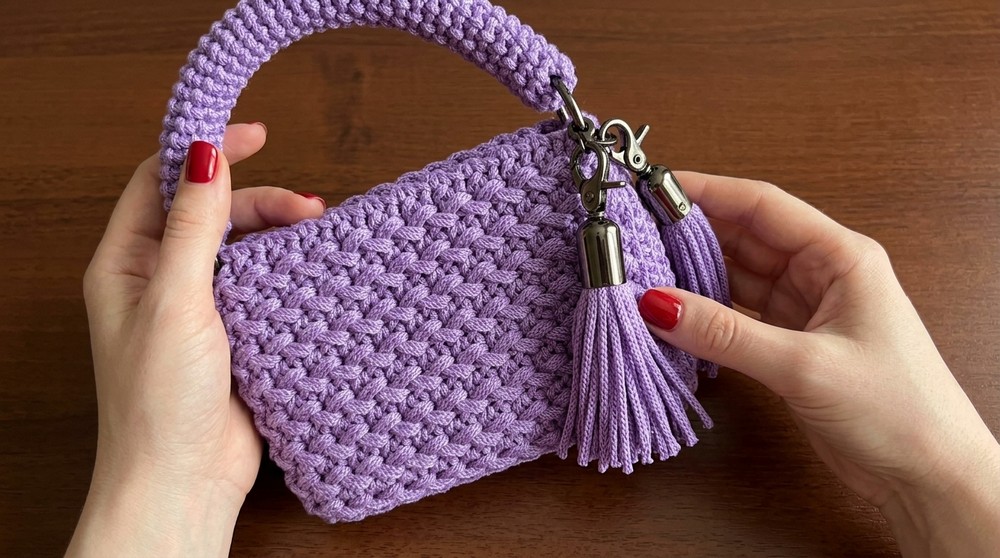
PART 5: FINISHING TOUCHES
- Magnetic Clasp:
- Attach the clasp to the inside of the bag opening, using a needle and thread to firmly sew into position. Ensure placement is centered.
- Label (Optional):
- If you have a tag, sew it near the base center of the bag.
- Trim Yarn Ends:
- Weave in loose ends to complete a polished look.
Tips & Customization Ideas
- Color Changes:
- Try using different colors for the body, sides, and tassels for a visually appealing design.
- Adjust Size:
- To make a larger bag, increase the initial chain count and add additional rows to the body.
- Decorations:
- Embellish with beads, buttons, or additional details for a customized touch.
- Material Options:
- Experiment with different yarn types like cotton or t shirt yarn for varied textures and durability.
Conclusion
By following this detailed pattern, you'll create a beautiful, durable, and practical crochet bag that showcases your skill and adds a personal touch to your accessories. This bag is versatile and can be adjusted to suit your needs, making it a perfect gift or addition to any wardrobe.
Final Remarks
Your completed design will result in a sleek, small handbag featuring a textured body, a sturdy strap, and elegant tassels. Whether you carry it casually or style it up for special occasions, this bag is sure to become a favorite.