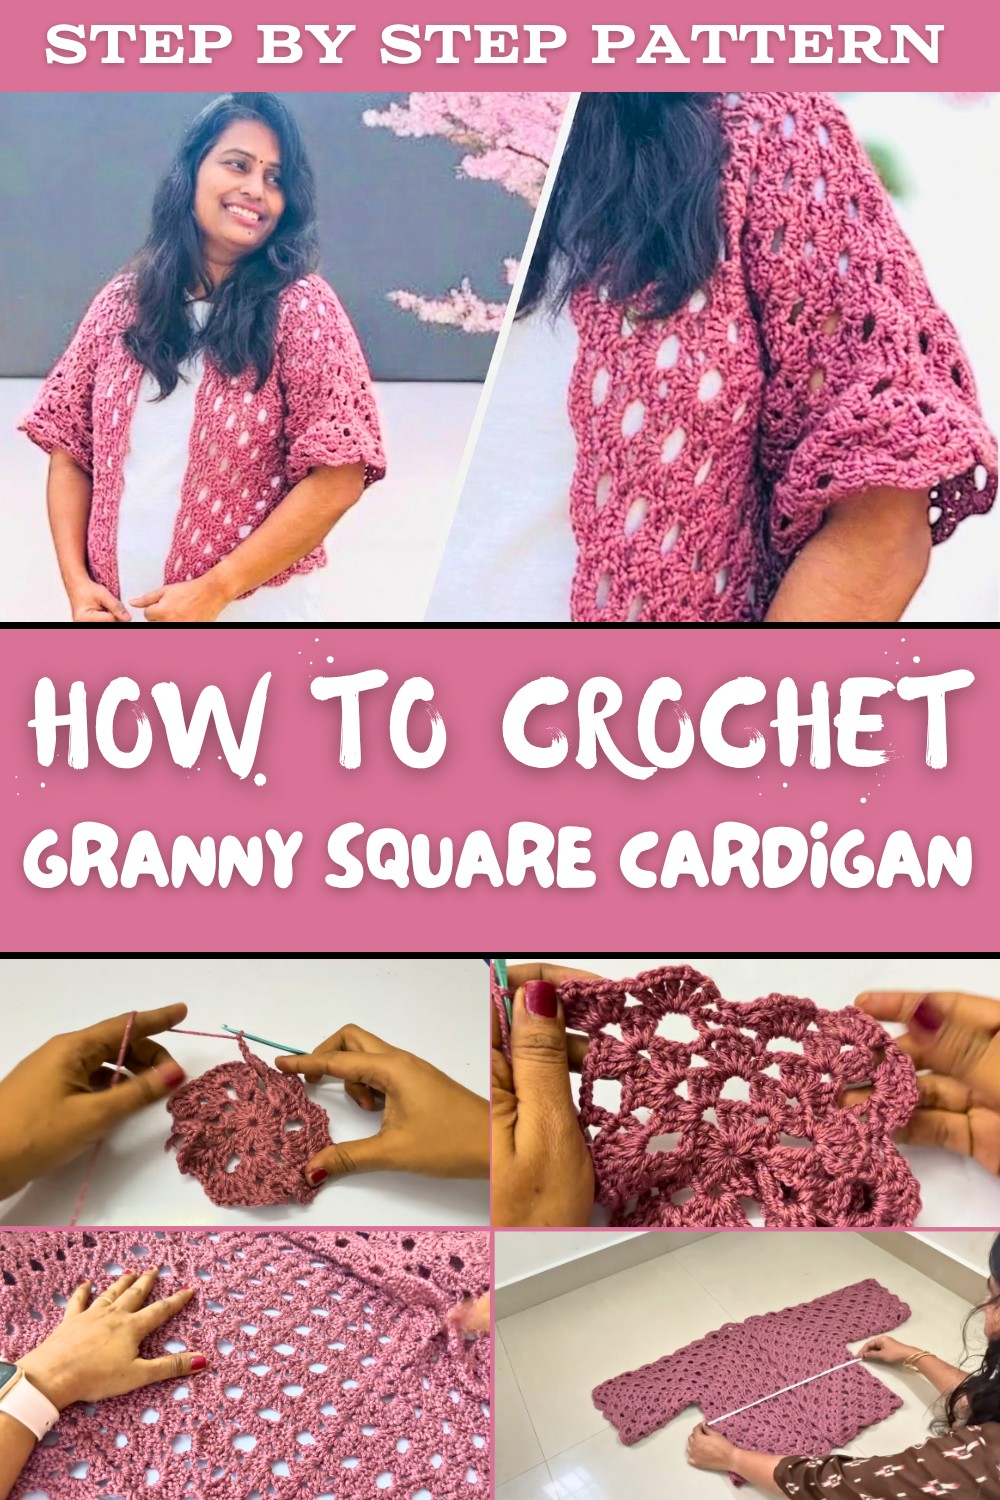
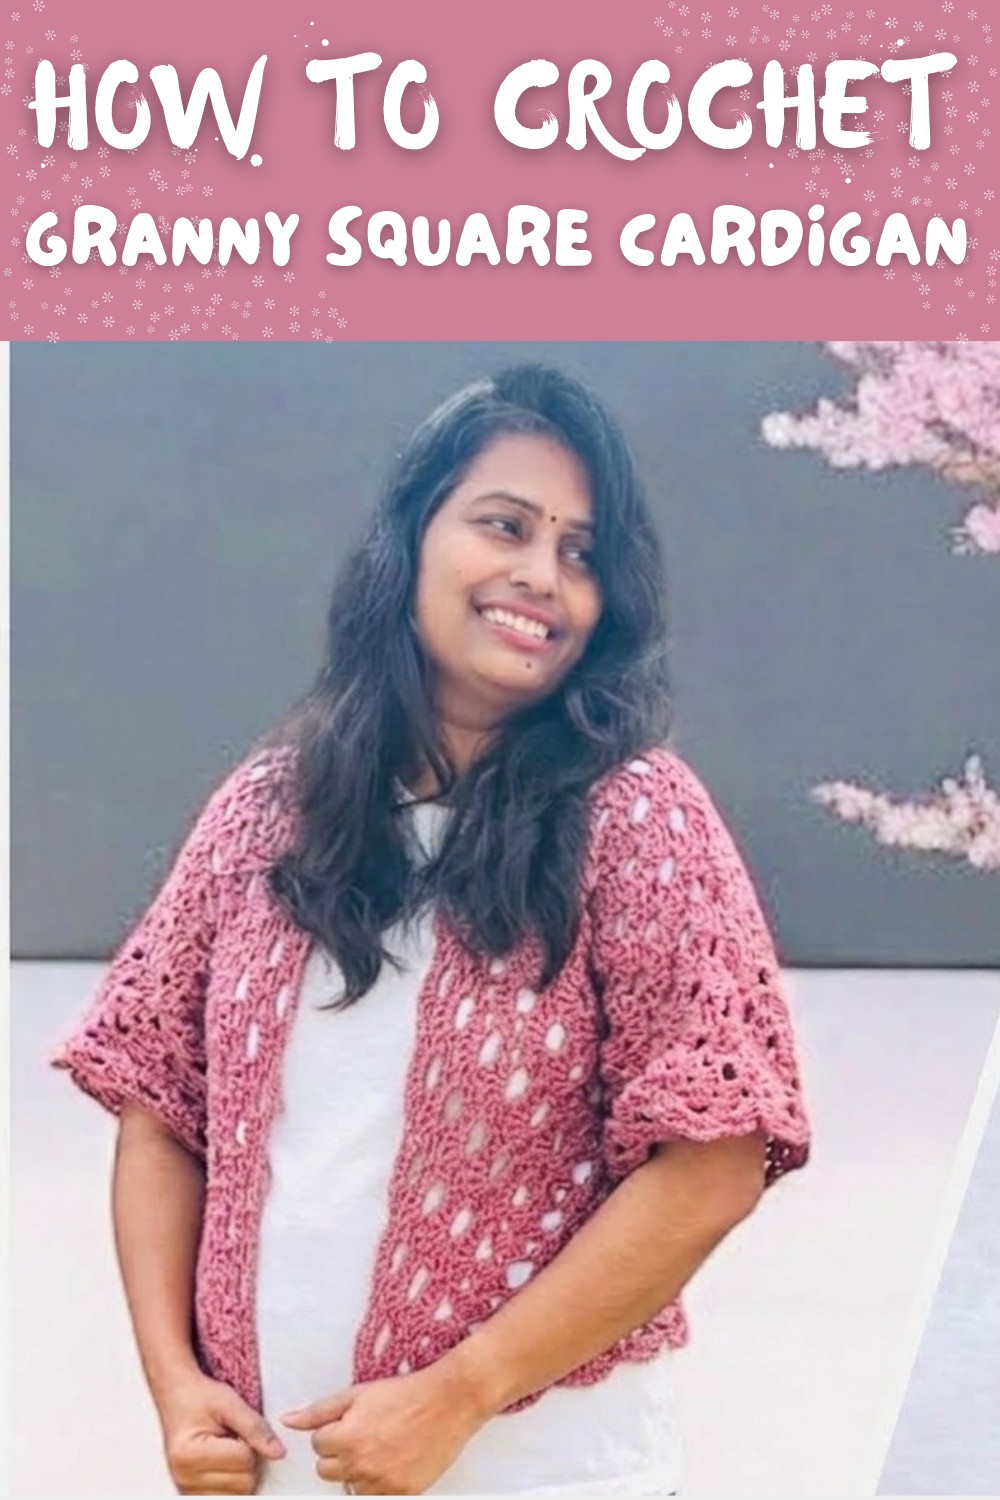
Free Crochet Granny Square Cardigan pattern for Everyday Wear
Upgrade wardrobe favorites with Free Crochet Granny Square Cardigan Pattern featuring colorful motifs and cozy style for every season alike.
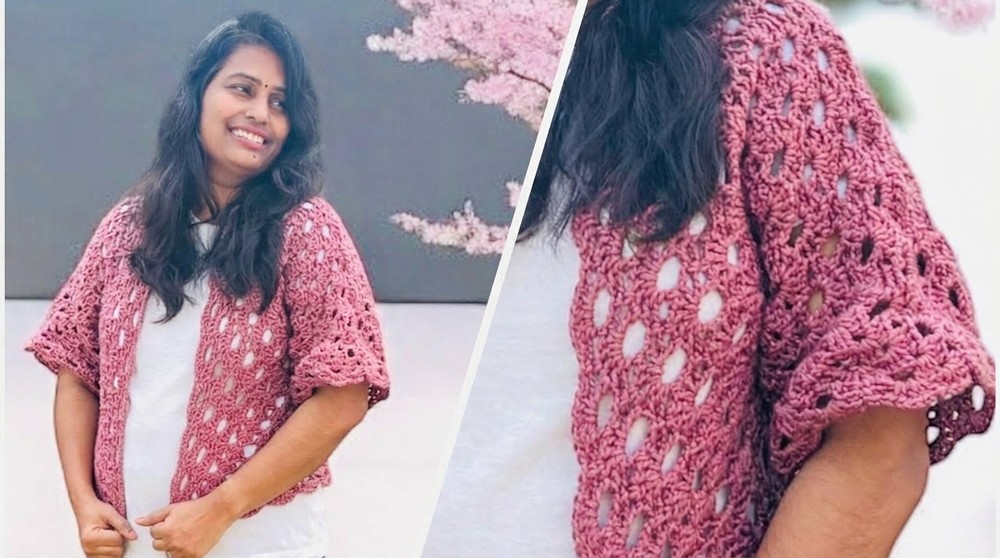
A handmade cardigan can add warmth and charm to any outfit. It is perfect for those cool mornings or evenings when you need a little extra comfort. The crochet granny square cardigan pattern brings a delightful twist to traditional sweaters. It uses classic granny squares that are easy to make and join together to form a cozy and stylish piece.
This cardigan is not only beautiful but very practical. The squares create a breathable fabric that keeps you warm without feeling heavy. It is soft against the skin and stretches gently to fit your body comfortably. You can choose bright colors for a playful look or stick to neutral shades for everyday wear. Pair it with jeans or skirts, or layer it over dresses for a trendy, boho vibe.
Handmade Free Crochet Granny Square Cardigan pattern for Fresh Style
Using the crochet granny square cardigan pattern is great for beginners too. Each square is a small, manageable project that builds your confidence. As you join them, you see your cardigan take shape in a satisfying way. This project encourages creativity because you can mix colors and arrangements, making every cardigan unique.
Beyond style and comfort, this cardigan is also a wonderful gift idea. Handmade garments show care and thoughtfulness. The granny square design adds a touch of nostalgia while staying current with fashion trends. Whether relaxing at home or going out, wearing a granny square cardigan makes you feel cozy and chic at once.
Granny Square Hexagon Crochet Shrug Pattern
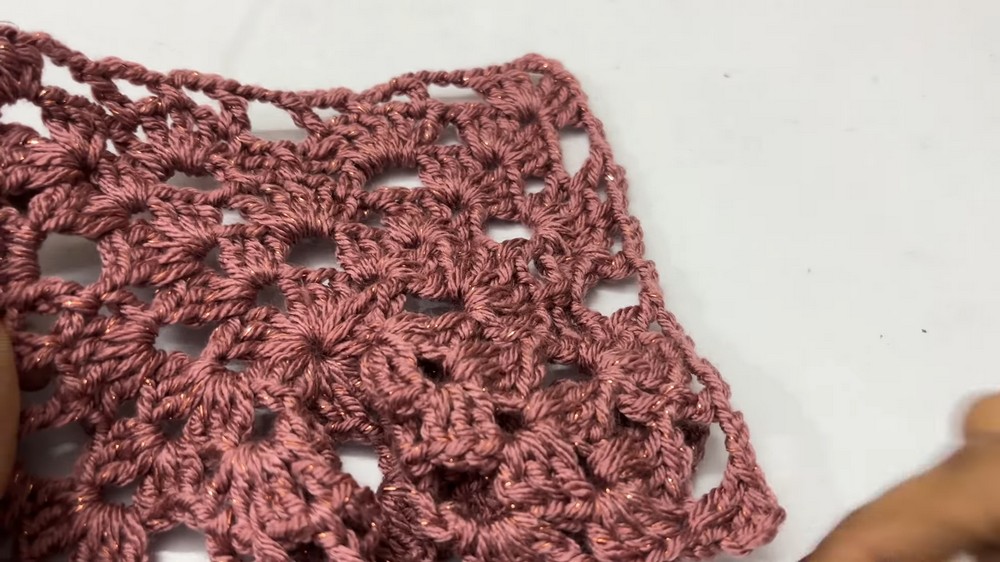
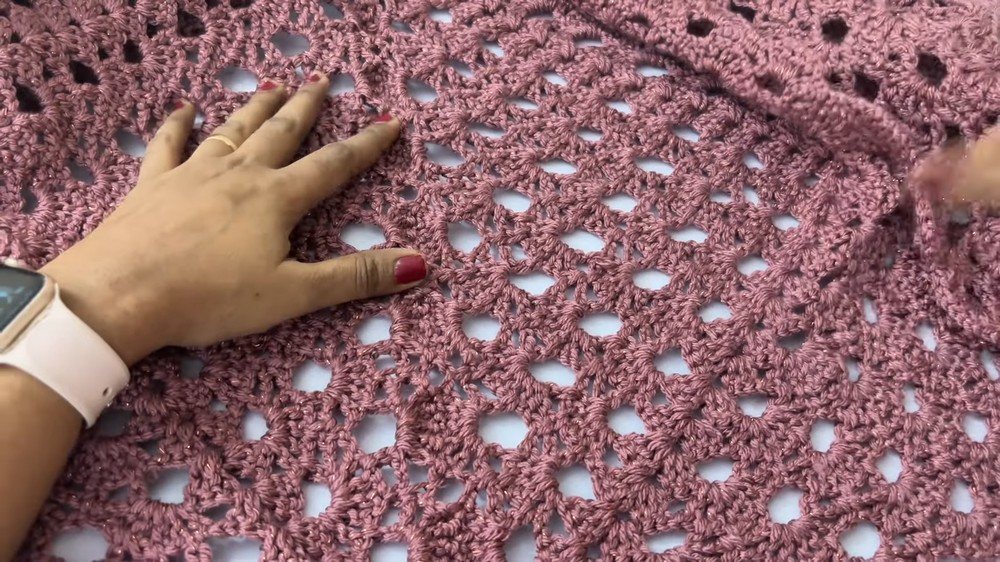
Bring a touch of elegance and comfort to your wardrobe with this beautifully textured granny square hexagon shrug. Designed to be lightweight and airy, it's perfect for summer layering or breezy evenings. Featuring classic shell and fan stitches with a little sparkle yarn for extra charm, this beginner-friendly project creates a flattering silhouette that drapes beautifully on your shoulders.
Before You Begin
- Select medium weight 4-ply yarn, ideally 100% acrylic with a subtle sparkle for shimmer and durability. Approximately 370 grams is required for a standard size shrug.
- Use a 3.5 mm crochet hook to create a slightly denser fabric, emphasizing stitch definition and shaping.
- Prepare stitch markers to help track rounds and joins.
- Have a yarn needle, scissors, and stitch counters handy for finishing and tracking progress.
- Familiarize yourself with hexagon granny construction, shell stitch, fan stitch, and M stitches.
- Accurate measuring for sizing is recommended, but the shrug's flexible granny design adapts to various body shapes.
- Don't skip any instructions-the join and folding steps are essential for perfect fit and visual harmony.
Important Project Details
- Constructed as two large granny hexagons, joined strategically for sleeves and body.
- Pattern alternates between basic granny construction rounds and decorative shell and fan stitch rounds to enhance texture.
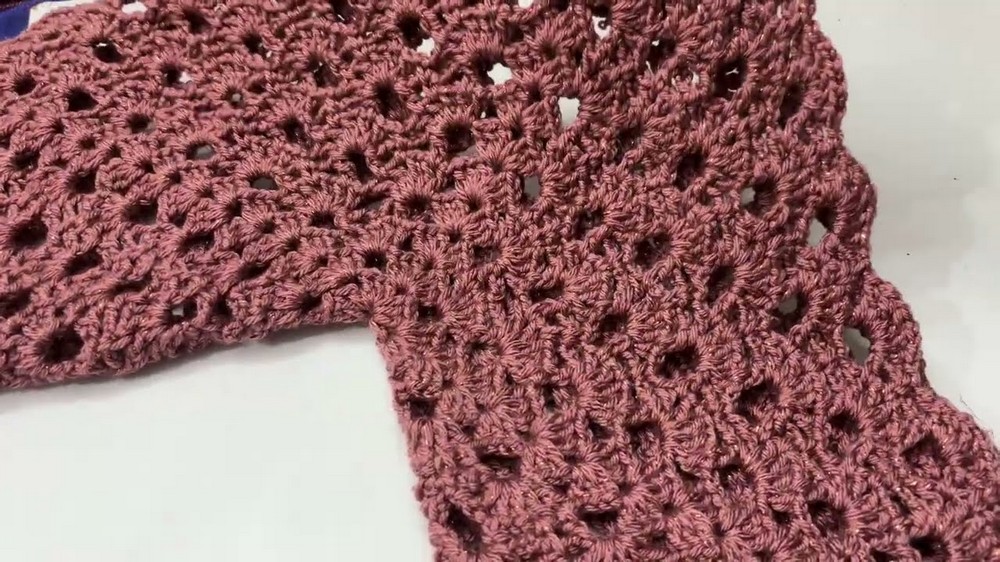
- The shrug is designed to be folded and joined, eliminating finishing seams and creating a naturally draped garment.
- Joining is done by connecting stitches using slip stitches and double crochets instead of sewing, maintaining a seamless look.
- Pattern includes adjustable round counts to customize length and size (kid to double XL).
- Final embellishment rounds enhance the edge with shells and carefully monitored increases for shaping.
Overview of Construction
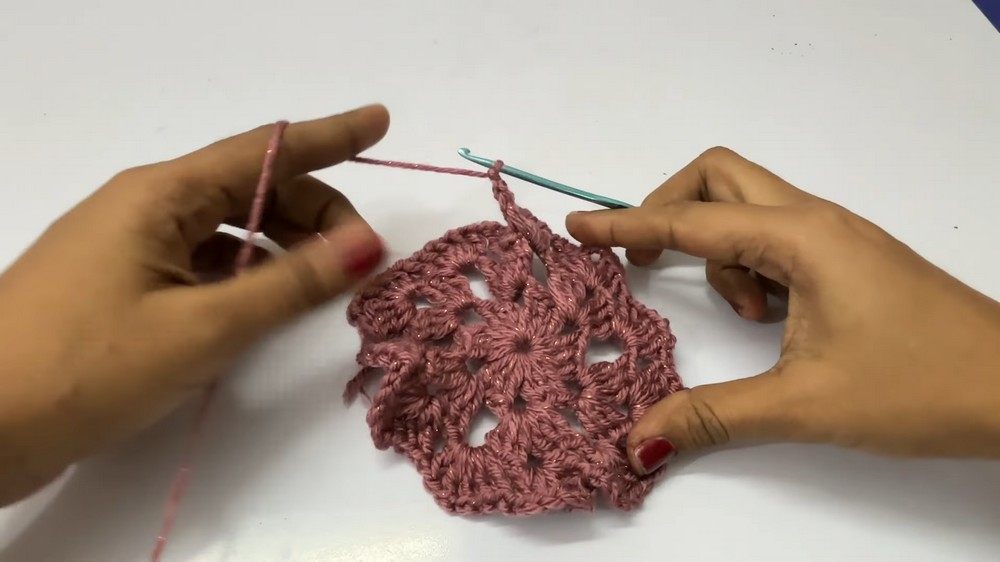
- Begin with a magic ring, working six sets of three double crochets separated by chain-3 spaces to form the hexagon base.
- Build rounds by increasing corner spaces and filling sides with shell or fan stitch patterns-main structural pattern components.
- Construct two identical hexagons-a left and a right side piece-working rounds with slightly different join edge counts to prepare for seamless assembly.
- Join the hexagons at shoulder points and along sides using shell stitch joins to form the shrug shape with armholes.
- Adjust rounds per sizing needs: fewer rounds for smaller sizes, more rounds for larger.
- Finish with additional rounds or a border if desired.
Skill Level
- Suitable for beginner to intermediate crocheters confident with circular patterns, increases, and visual stitch pattern counting.
- Attention to stitch counts and joins is important for a neat finish.
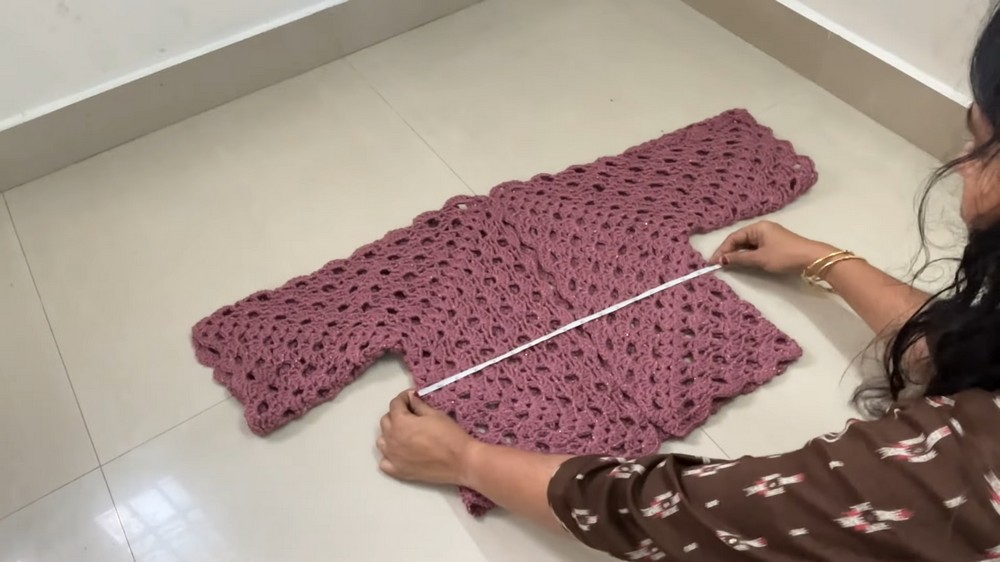
Finished Dimensions
- Approximate width across shoulders: 17 inches (43 cm).
- Shrug length (shoulder to bottom): 17 inches (43 cm).
- Sleeve opening height: 7.5 inches (19 cm).
- Width of the shrug (when laid flat) will vary depending on your tension and number of rounds.
Supplies You Will Need
- 100% Acrylic medium four-ply yarn with slight sparkle (approx. 370 g).
- Crochet hook 3.5 mm (E-4 US).
- Stitch markers (small and unobtrusive).
- Yarn needle for weaving in ends.
- Scissors.
- Optionally: tape measure, blocking mats, and pins.
Sizing and Measurements
| Size | Recommended Number of Rounds per Side | Adjusting Tips |
|---|---|---|
| Kid (approx.) | 8–9 rounds | Reduce rounds for smaller fit. |
| Small–Medium | 16 rounds | Follow base pattern as written. |
| Large–Double XL | 17–19 rounds | Add rounds evenly to increase size. |
- The shrug is easily customized by adding or subtracting rounds.
Gauge Information
- Gauge is flexible due to granny stitch nature but approximate stitch counts per round are:
- 6 clusters for round 1 (one per side) spaced with chain-3 corners.
- Subsequent rounds build via granny clusters with shell and fan stitch embellishments.
- Maintain consistent tension for symmetry.
Stitch Abbreviations
- ch = chain
- dc = double crochet
- sc = single crochet
- sl st = slip stitch
- M stitch = a special stitch set described in pattern (fan-shaped cluster with chain spaces)
- shell stitch = group of three double crochets worked in the same stitch/space
- fan stitch = cluster of five double crochets separated by chain-1
- st = stitch
- rnd/round = round of crochet worked around hexagon
Explanation of Unique Stitches
- Magic Ring: Adjustable loop used to start rounds with no hole in the center.
- Shell Stitch: 3 dc worked into same stitch or space creating a shell shape, commonly used in granny squares.
- Fan Stitch: 5 dc separated by chain-1 stitches worked into the same space creates a larger decorative fan cluster.
- M Stitch: Composite stitch involving dc and chain spaces forming an "M" shape used to increase and texture fabric.
- Joining with Slip Stitch and dc: Attaching two pieces by working slip stitches and dc into corresponding stitches of both sides to create seamless edges instead of sewing.
Complete Crochet Pattern Instructions
Part 1: Hexagon Base - Round 1
- Begin with magic ring.
- Ch 3 (counts as first dc), work 2 dc into ring.
- Ch 3, 3 dc into ring, ch 3 repeat 5 more times for a total of 6 clusters and 6 corner chain-3 spaces.
- Pull magic ring tight.
- Join with a slip stitch to top of starting chain 3.
Part 2: Round 2
- Sl st into next 2 dc, ch 3 (counts as dc), 2 dc in same space (first corner).
- Ch 3, 3 dc in next chain-3 space (corner).
- Ch 3, 3 dc in next space, ch 3, 3 dc in next corner repeat around.
- Join with slip stitch to top of beginning ch 3.
Part 3: Rounds 3 to 4 - Beginning Pattern
- Sl st into corner space, ch 1, sc in same space.
- Ch 3.
- In first side chain-3 space, work 5 dc separated by chain 1 (fan stitch).
- Ch 1, sc in next corner.
- Continue corner with 3 dc, ch 3, 3 dc in corner space.
- Repeat fan stitches along sides and shells on corners.
- Join with slip stitch.
Part 4: Repeat Pattern Rounds (Rows 5 to 17)
- Work alternating rounds of shell stitches on corners and fan stitches on sides.
- Use M stitch pattern to increase fabric width and maintain shape.
- Monitor stitch and round counts carefully; increase fan clusters by rounds for size.
- Finish rounds with chain 3 corners and slip stitch joins.

Part 5: Creating Left and Right Side Pieces
- Work two identical hexagons to create sides of shrug.
- Left piece: crochet up to 17 rounds finishing 4 side rounds (leave 2 rounds unworked for join).
- Right piece: crochet 17 rounds finishing 2 side rounds (leave 4 rounds for join).
- This allows matching edges for joining sleeves and back.
Part 6: Joining the Pieces to Form Shrug
- Fold sides as per shoulder layout: corners aligned for join at neckline and shoulders.
- Join edges using shell stitch join: insert hook into stitches of both sides, pull yarn and work slip stitch or double crochet to connect.
- Continue joining along edges for side seams and sleeve openings using the same method.
- Avoid twisting pieces when joining to ensure smooth drape.
Part 7: Finishing Touches
- Weave in all ends securely with yarn needle.
- Optionally block shrug gently for evenness and stitch definition.
- Add decorative edging or length by continuing pattern rounds at bottom if desired.
Beginner-Friendly Pattern Insight
This shrug is worked from two large six-sided granny patterns, gradually growing with chain-3 corners and decorative fans and shells along edges. The two pieces fold and join seamlessly with matching stitch counts, creating the body and front edges. Using standard stitches and repeating rows makes it easy to follow. Correct counts and joins ensure a perfect fit without complicated sizing.
Assembly and Completion Steps
- Use matching fan and shell stitches to join shoulder and side seams with slip stitch or double crochet joins.
- Take care to align pieces flat with no twisting before joining.
- Securely weave in all yarn ends inside fabric with a needle.
- Block gently if desired to smooth and shape fabric.
Common Challenges and Solutions
- Uneven edges: Maintain consistent stitch count; use stitch markers when increasing rounds.
- Mistimed joins causing mismatched edges: Follow recommended rounds for left and right pieces; fold carefully before joining.
- Twisted shrugs after assembly: Align flat fabric edges carefully, pin if needed.
- Difficulty managing increases: Mark corners and chain spaces clearly to track increases.
Inspiration and Variation Ideas
- Create shrugs for kids by reducing rounds to 8-9; adjust yarn accordingly.
- Use multicolor yarn or alternate colors for each round for a vibrant, modern look.
- Experiment with yarn weights and hook sizes to adjust drape and warmth.
- Add tassels or buttons for embellishment.
- Adapt the hexagon motif into a vest or poncho using joining concepts.