Quick Free Crochet Cowl Neckwarmer Pattern for Busy Days
Stitch up style with a Crochet Cowl Neckwarmer Pattern, a cozy project that adds flair to chilly outfits while keeping looks warm and snug.
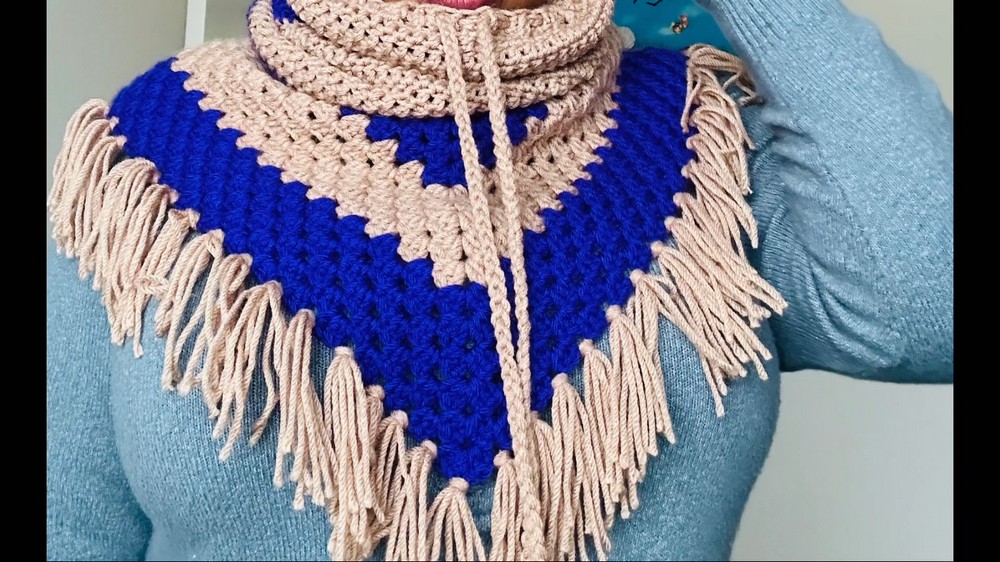
Nothing feels better than wrapping up in a soft, handmade piece that keeps the chill away while still looking stylish. A Crochet Cowl Neckwarmer Pattern is a short, circular scarf designed to sit snugly around the neck, offering warmth without long ends to manage.
Trendy Free Crochet Cowl Neckwarmer Pattern to Try Now

It’s a fun project because it works up quickly and gives plenty of room to play with textured stitches, chunky yarns, or bold color blocks. This piece like scarf is also super practical for everyday wear, especially in cooler weather. For a creative twist, try adding buttons for an adjustable fit or making it reversible for two looks in one, small details that make a simple project feel extra special.
Cowl Neck Warmer Crochet Pattern
Materials
- Yarn:
- Impeccable Yarn by Loops & Threads, or any medium weight (Worsted Size 4 yarn).
- Yardage: Approx. 285 yards.
- Suggested colors: Purple for the body and a contrasting color for trim and details.
- Hook:
- 6mm (J-10) crochet hook.
- Additional Supplies:
- Scissors: For cutting yarn.
- Tape Measure: For sizing accuracy.
- Darning Needle: For weaving in ends and threading the drawstring.
- Optional: Stitch markers for marking corners.
Skill Level
Beginner to Intermediate
Techniques used:
- Magic ring
- Basic stitches (single crochet, double crochet)
- Front and back post double crochet
- Joining rounds
- Adding tassels and fringe
Key Abbreviations (US Terminology)
- Ch = Chain
- Sc = Single Crochet
- Dc = Double Crochet
- Sl st = Slip Stitch
- Rep = Repeat
- FPdc = Front Post Double Crochet
- BPdc = Back Post Double Crochet
- St(s) = Stitch(es)
- YO = Yarn Over
Special Notes
- Sizing: Chains should be in multiples of 6 to maintain design symmetry. Adjust chains to fit your desired size. (The sample measures approximately 20″ circumference).
- Gauge: Not critical, but tight tension is recommended for a warm and structured neck warmer.
- Customization:
- Increase or decrease the length by adding/subtracting rows of double crochet.
- Add optional tassels and fringe for an elegant finish.
- Seamless Construction: Worked in the round from the base upward.
Step-By-Step Instructions
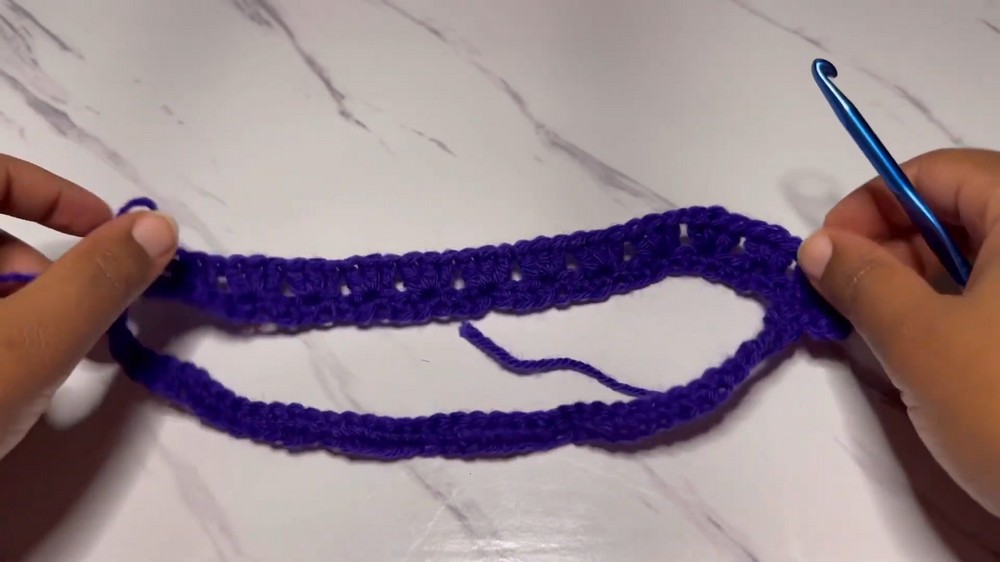
Foundation Chain
- Make a Slip Knot and chain 78 (or any multiple of 6).
- Check that your chain is not twisted, then slip stitch into the first chain to form a loop.
Row 1: Base Round
- Ch 1, work 1 sc into the same stitch as the join.
- Sc in each chain around.
- Join with a sl st into the first sc.
- Result: A single crochet base to provide structure.
Row 2: Starting Clusters
- Ch 1, then in the first stitch:
- Work 3 dc, ch 2, 3 dc (this forms the first corner shell).
- Yarn over, skip 2 stitches, and work 3 dc in the third stitch (this is the first cluster).
- Continue repeating: Skip 2 stitches, 3 dc in the next stitch around the base. Stop when you complete 12 clusters (not counting the corner shell).
- After completing 12 clusters:
- Work the second corner shell (3 dc, ch 2, 3 dc) in the next stitch.
- Continue working 12 clusters. Join with a sl st to the top of the first corner shell.

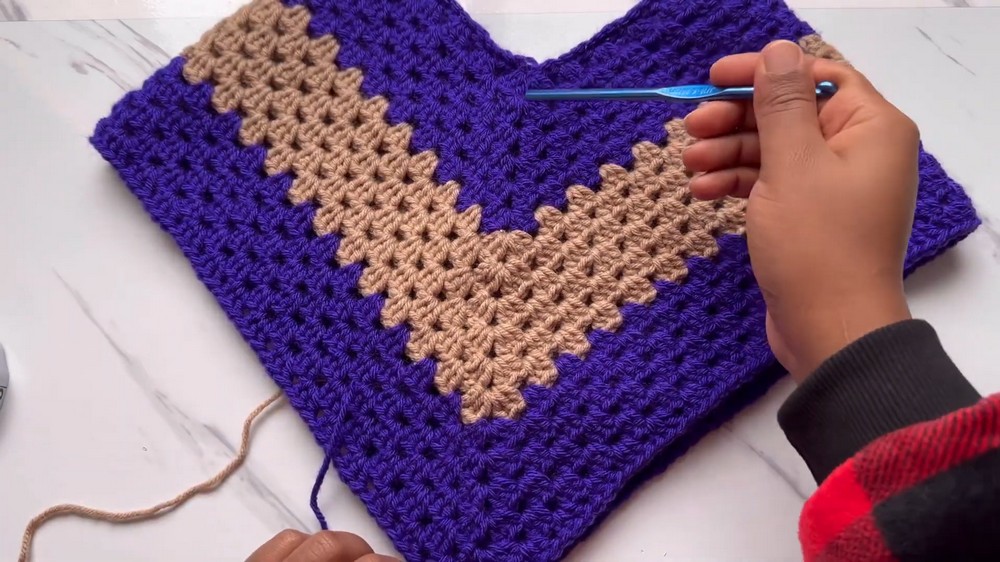
Subsequent Rows: Building the Shape
- Building Rows 3 and Beyond:
- Slip stitch to the ch-2 space of the shell.
- Ch 3, work 2 dc, ch 2, 3 dc into the ch-2 space to begin the corner.
- Yarn over, skip to the next cluster, and work 3 dc clusters in every space between previous clusters.
- At each corner (ch-2 spaces): Work 3 dc, ch 2, 3 dc.
- Continue this pattern to form the V-shape with increasing width at the corners.
- Repeat until you achieve your desired length (approx. 18 rows or 11 inches).
Finishing the Body
- At your last desired row, secure your work:
- Slip stitch across the top edge.
- Cut yarn with an extra-long tail (for weaving).
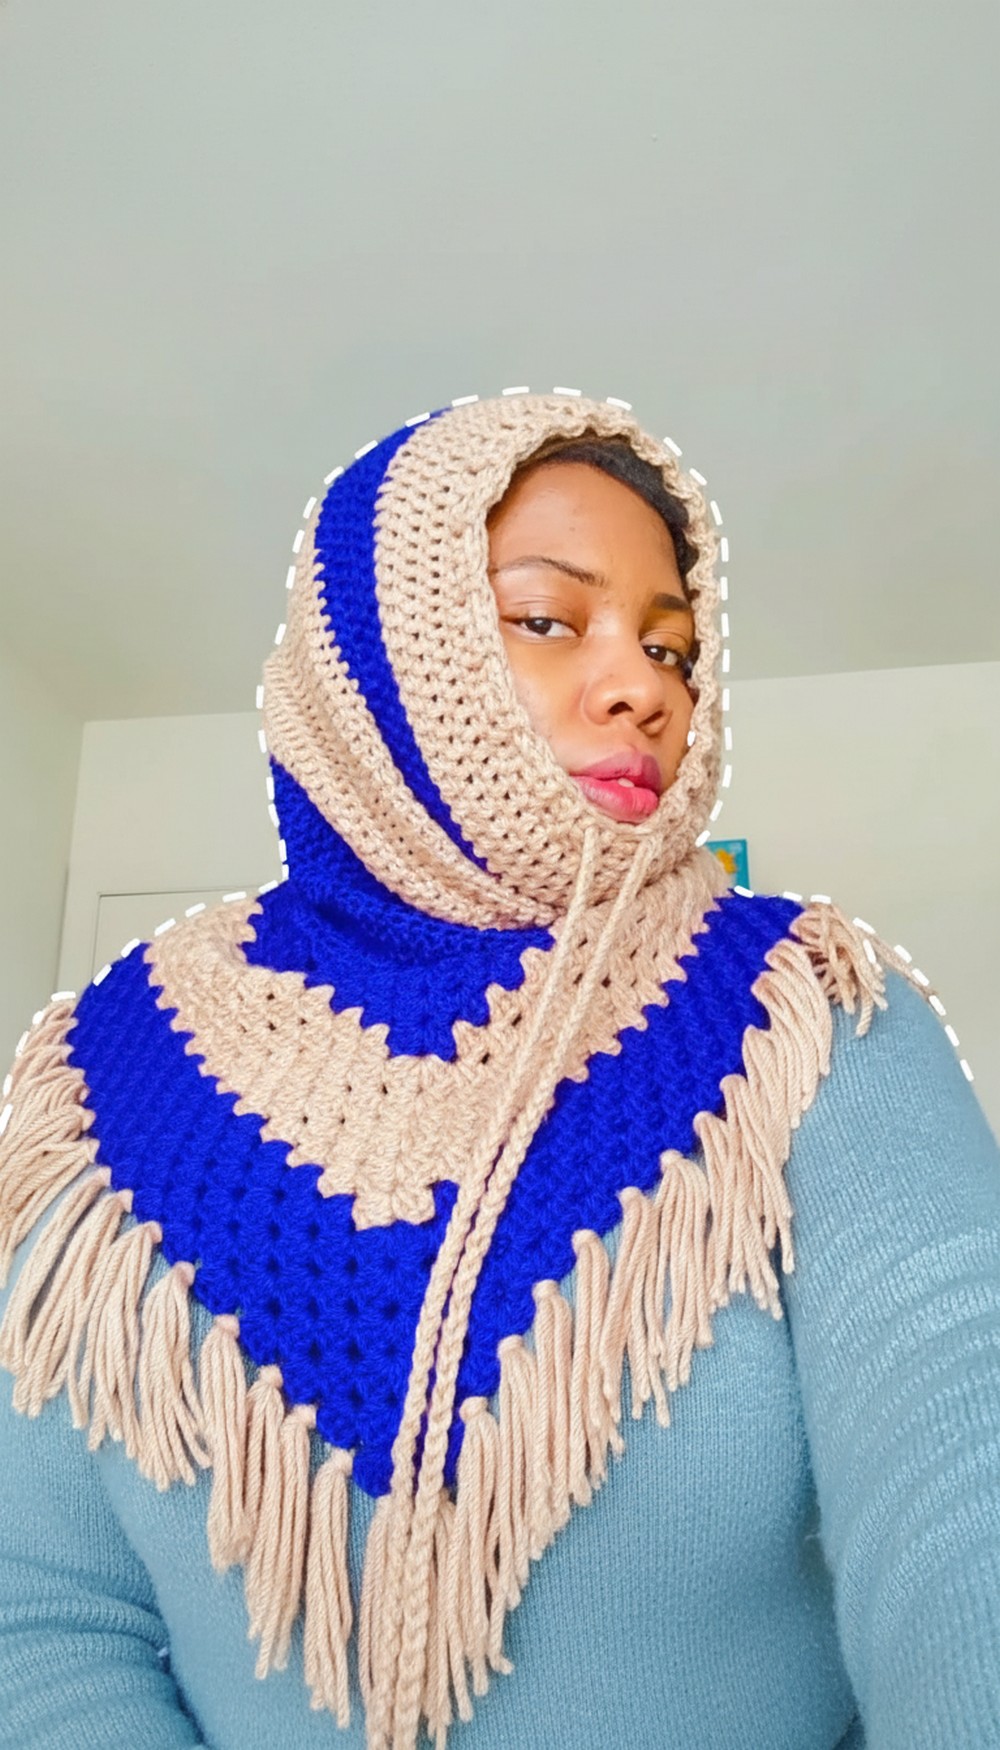
Neck Portion
Switch to working the neck part of the warmer:
- Attach Yarn at the back corner shell (center of the V).
- Row 1: Ch 2, work 1 dc in each stitch around. Join with a sl st to the first dc.
- Rows 2-30: Ch 2, continue working 1 dc in each stitch for as many rows as desired for neck coverage.
- 30 rows create a 15-inch neck section.

Final Edge: Ribbing
- On the last row, switch to ribbing:
- Front and back post double crochet (FPdc/BPdc) rows alternate for texture and stretch.
- Ch 2, then alternate:
- FPdc around the next stitch, BPdc around the following stitch.
- Continue FPdc/BPdc around, creating a ribbed texture.
- Repeat for 1-2 more rows for a finished edge.

Drawstring and Tassels
Drawstring:
- Use double strands of yarn (for a thicker chain), make a simple chain approximately 45 inches long.
- Use a darning needle to weave the drawstring around the top edge of the cowl, threading it between stitches evenly.

Tassels:
- Cut 4-5 strands of yarn, each about 7½ inches long (for each tassel).
- Fold strands in half, loop them onto each end of the drawstring, and knot tightly.
- Trim ends to make tassels even.

Adding Fringe
- Cut fringe strands to about 7½-8 inches each.
- Fold 4 strands together, loop them into every ch-2 space at the base of the cowl, and knot securely. Ensure fringe is evenly distributed.
- Trim fringe evenly for a polished look.
Finishing Steps
- Weave in any loose ends securely using a darning needle.
- Block your neck warmer as needed to shape and smooth out stitches.
Conclusion
Congratulations on completing your Cowl Neck Warmer! This elegant piece is perfect for gifting, layering, or simply keeping yourself warm and stylish in chilly weather. Its versatile design allows for endless customization—experiment with different yarns, colors, and lengths to suit your preferences.

Pattern Corrections
If you encounter stiffness in your piece:
- Use a larger hook size (6.5mm) for softer drape.
- Experiment with lighter, fluffy yarns for added texture.
Tips
- Keep track of cluster counts: Mark corners with stitch markers to ensure proper increases and symmetry.
- Fringe care: Comb or dampen fringe lightly for a tidy, professional finish.
- Drawstring tension: Avoid pulling the drawstring too tightly to maintain the cowl’s drape around the neck.