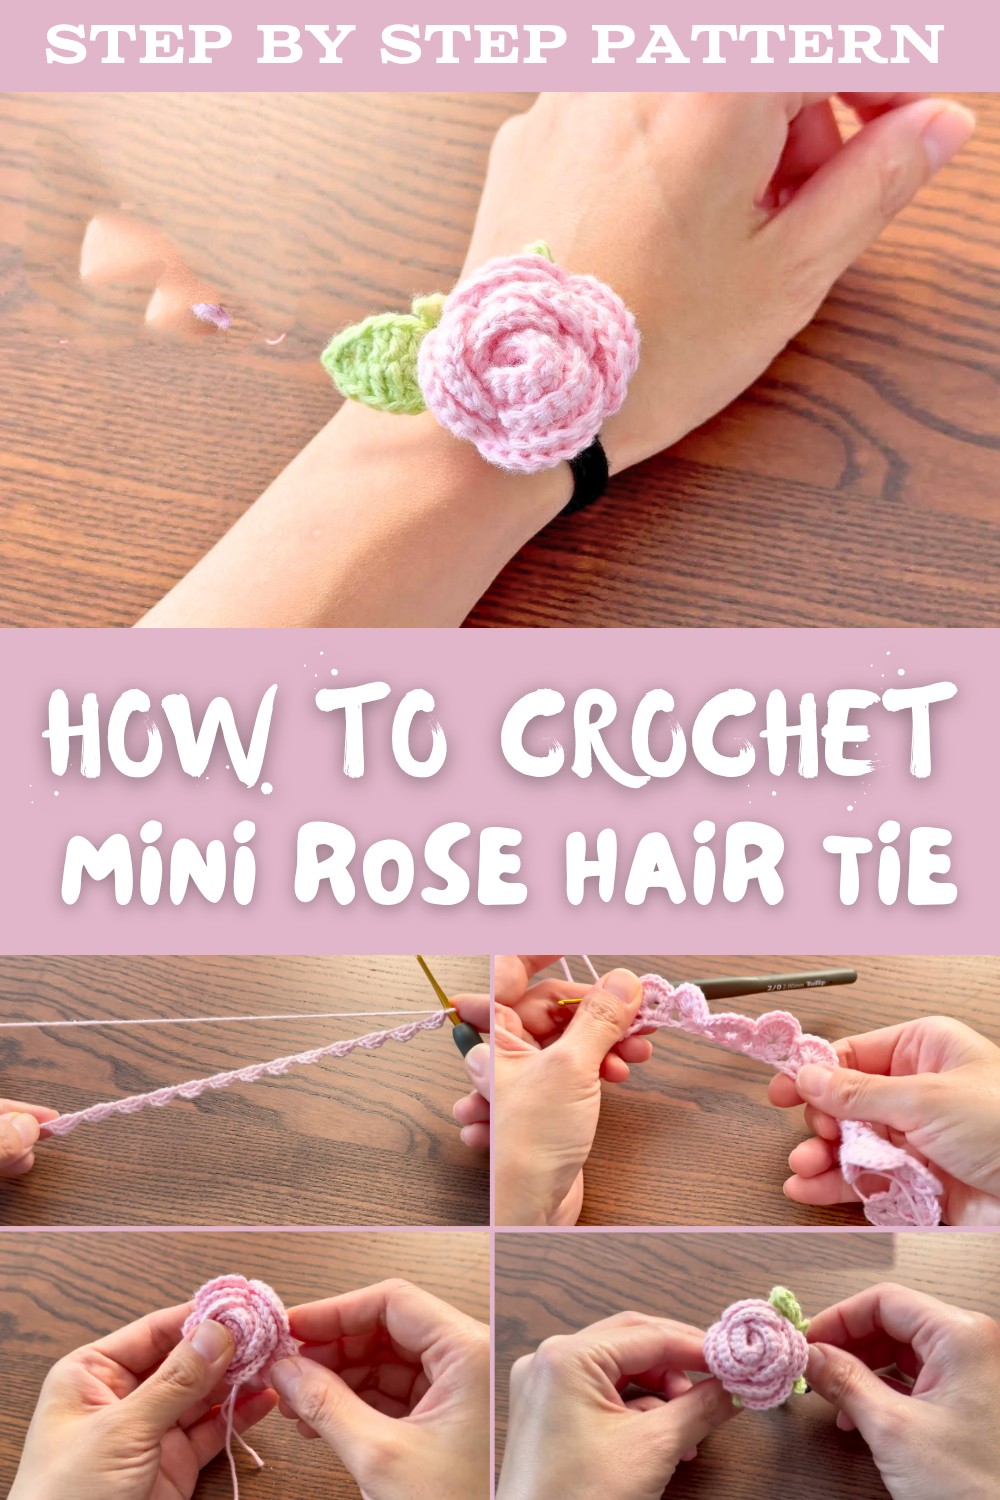
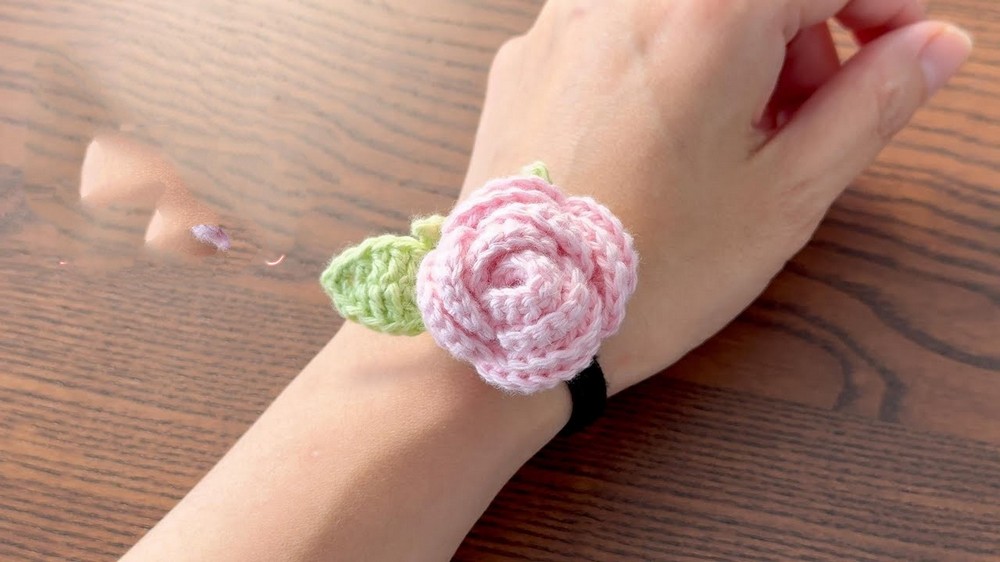
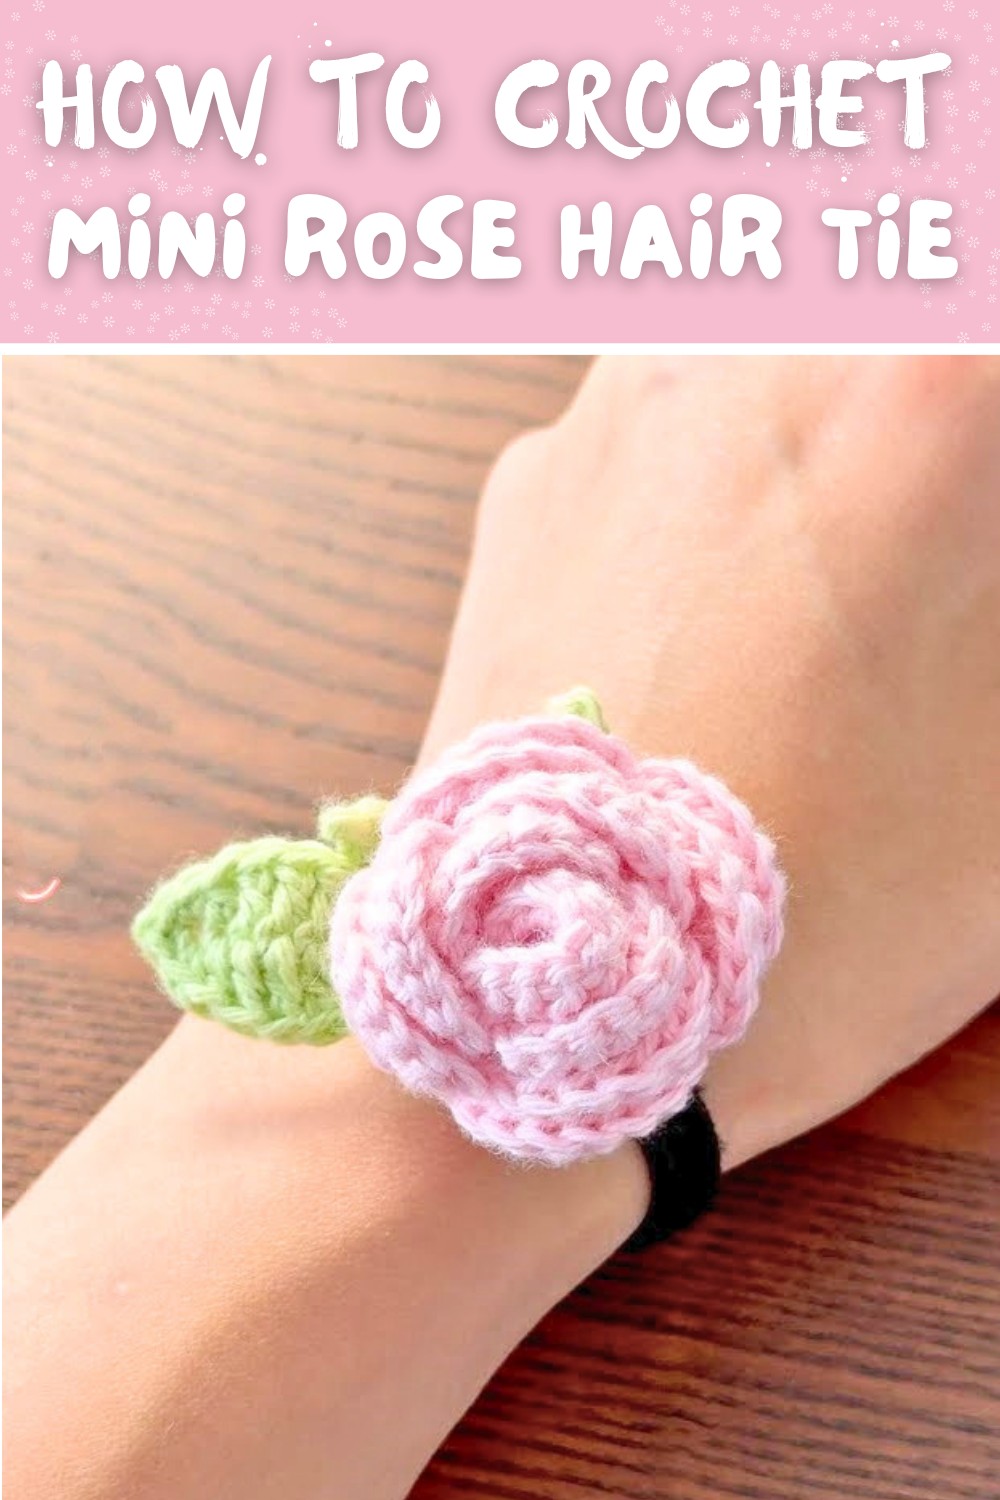
Mini Rose Hair Tie Free Crochet Pattern to Add Style
Generate a lovely mini rose hair tie using this simple crochet pattern, perfect for adding a touch of beauty to your look or creating a heartfelt handmade gift.
Soft petals shaped like a blooming rose make this hair tie a delightful and elegant accessory for any hairstyle. Its neat design adds beauty and charm to ponytails, buns, or braids, transforming a simple look into something special. The lightweight and compact size make it comfortable to wear all day while ensuring it doesn't tug or weigh down your hair.
Crochet Mini Rose Hair Ties: A Quick and Free Pattern to Try
With vibrant colors, it can perfectly match different outfits or bring a cheerful pop of color to your style. The lifelike rose design sets it apart, making it not just a functional hairpiece but also a stylish addition to your collection.
Ideal for casual days or special occasions, it's versatile and full of character. This handmade piece is also a lovely gift idea, showing thoughtfulness through its unique design and cheerful appearance. Whether used daily or kept for something special, it's a wonderful way to add a little elegance and joy to your hairstyle.
Mini Rose Hair Tie Crochet Pattern
Materials Needed
- Yarn: 4ply (fingering weight) 100% cotton yarn (rose color, green for calyx and leaves)
- Crochet Hook: 2mm (US Size B)
- Hair Tie: Thin elastic hair band
- Tapestry Needle: For sewing and finishing touches
- Scissors
Gauge
Gauge is not crucial for this project; however, for reference:
- 10 chains = about 2.5 cm (1 inch)
- One completed rose measures approximately 2-2.5 cm in diameter
Finished Size
- Rose: 2-2.5 cm in diameter
- Leaf length: about 3 cm
- Calyx: Surrounds base of rose
Abbreviations & Special Stitches
| Abbreviation | Meaning |
|---|---|
| ch | Chain |
| sc | Single crochet |
| hdc | Half double crochet |
| dc | Double crochet |
| tr | Treble crochet |
| sl st | Slip stitch |
| st(s) | Stitch(es) |
| sp | Space |
- Magic Ring: See special technique at bottom for step-by-step.
Instructions
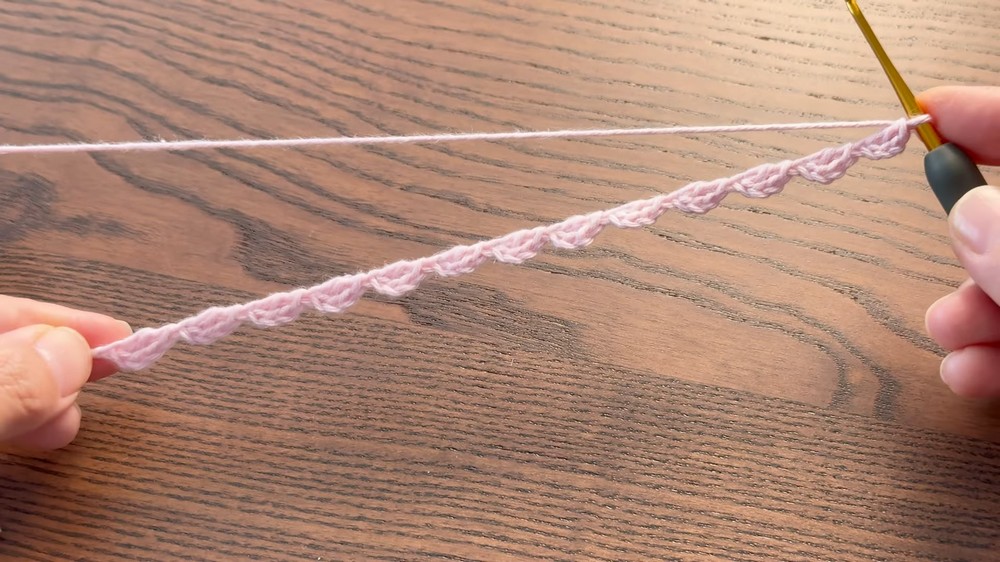
Part 1: Mini Rose
Row 1: Foundation
- Begin with a slip knot.
- Ch4 (forms a small loop).
- Working into the first chain (4th ch from hook), make 1 dc.
- Repeat: [ch4, 1 dc into first ch of this ch4] a total of 12 times (so you have 13 loops in total).
- Each [ch4, 1dc] creates a petal base.
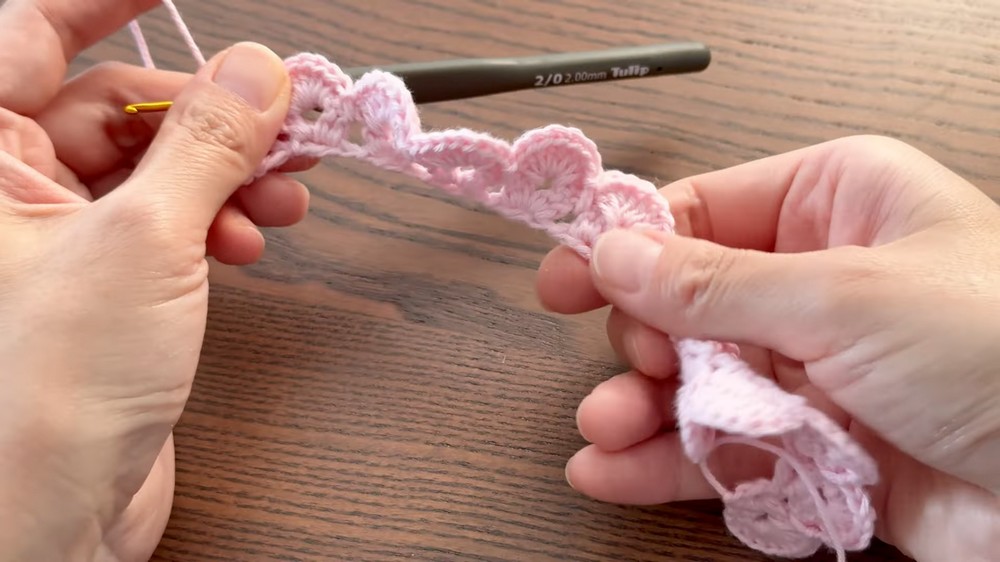
Row 2: Petal Bases
- Ch3, turn.
- In the first ch3 space, work (1dc, ch2, 2dc).
- In each of the next 12 ch3 spaces, make (2dc, ch2, 2dc) in each space.
Row 3: Forming Petals
- Ch1, turn.
- In the first ch2 space, make 8 dc.
- Sl st into the joint/base between spaces.
- Repeat: [8 dc in ch2 sp, sl st to base] for the next 11 spaces (total 12 petals).
- In the last ch2 space, make 13 dc (for a larger central petal).
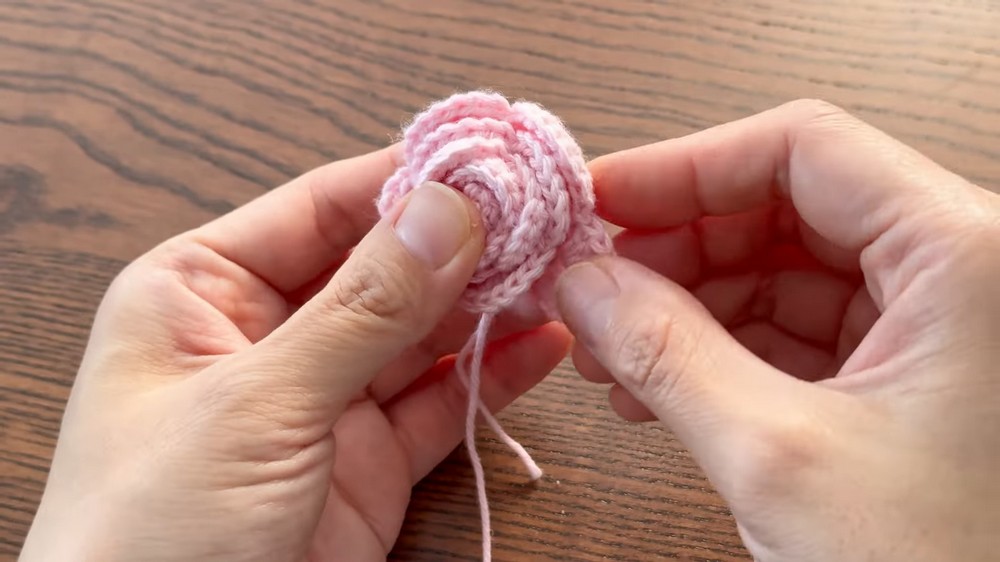
Rose Assembly
- End with ch1, cut the yarn, and leave a long tail for sewing.
- Curl the rose row into a spiral, shaping the petals naturally into a rose form.
- Sew through the base with the yarn tail and tapestry needle to fix the rose shape securely.
- Weave in and hide the loose end.
Part 2: Calyx (Green Part)
- With green yarn, make a magic ring.
- Ch2 (counts as first hdc).
- Make 15 hdc into the ring.
- Pull tight to close the ring.
- Sl st to the first st to join.
- Ch6 (for first calyx point), sl st back into the first ch from hook.
- Into the next 5 ch stitches create:
- 1 sc
- 1 hdc
- 1 dc
- 1 tr (treble)
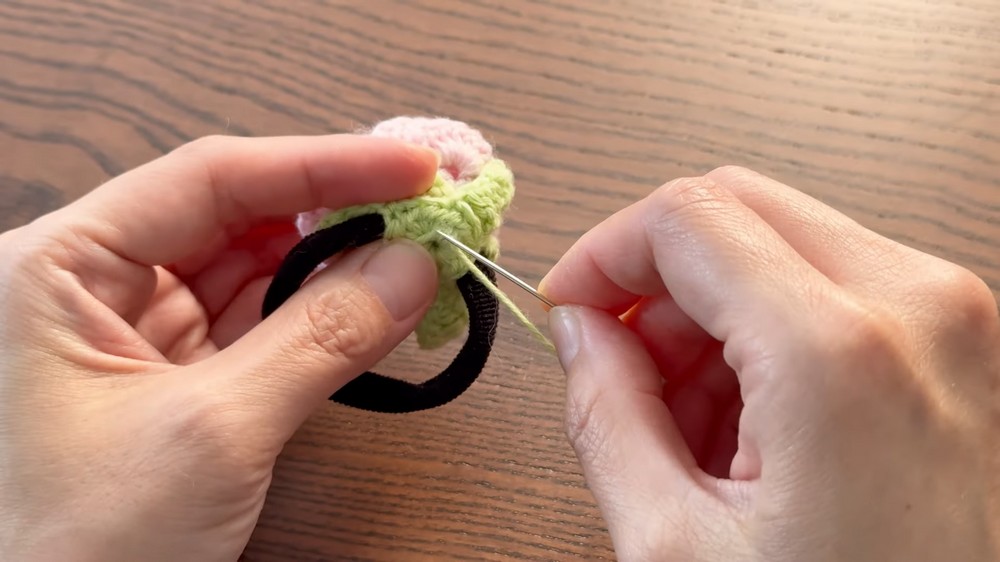
- Place hair tie around calyx base now (before too tight to insert).
- Skip 2 sts on the base ring, sl st to next st (secures the calyx point).
- Repeat [ch6, sl st in 1st ch, 1sc, 1hdc, 1dc, 1tr, skip 2, sl st] 4 more times (5 points total).
- When making last sl st, insert into first st to make the round complete.
- Cut yarn, leave a long tail for sewing.
Part 3: Leaf
- Ch10 with green yarn.
- Work into 2nd ch from hook: sl st.
- In next chs: 1 sc, 1 hdc, 1 dc in next 3 chs (total 3 dcs), 1 hdc, 1 sc.
- In last ch: (sl st, ch1, sl st).
- Turn, work along the other side of the starting chain:
- 1 sc, 1 hdc, 1 dc in next 3 ch, 1 hdc, 1 sc, sl st.
- Repeat the above (you may add up to 6 leaves for a fuller foliage effect).
- Fasten off, leaving a long tail for sewing.
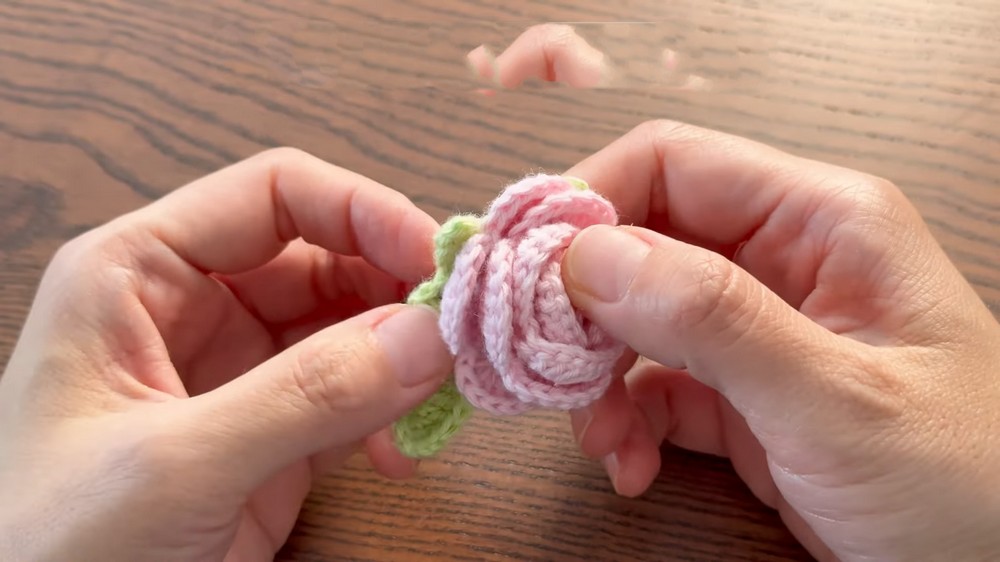
Part 4: Assembly
Attaching the Leaf
- Use the tail to stitch leaf to calyx (position as desired).
- Secure and weave in ends.
Fixing Rose & Calyx Together
- Place the rose securely atop the calyx (with hair tie sandwiched in between).
- Use yarn tail to sew the rose base to calyx. Make sure it is tightly attached for durability.
- Hide and trim any remaining yarn tails inside the flower.
Finishing Touches
- Ensure all ends are sewn in and invisible.
- Shape petals and calyx points neatly.
- Ensure hair tie is firmly incorporated into the back.
Tips and Tricks
- For a slightly larger rose, increase each ch4 group to [ch5, dc] for row 1.
- Vary petal fullness by working more or fewer dc in petal rows.
- For softer petals, use sports weight yarn and slightly larger hook.
- Work with tighter tension for a firmer rose.
Customization Ideas
- Add beads or sequins to the petal edges for sparkle.
- Make multi-color roses by using gradient or variegated yarns.
- Use embroidery thread for miniature roses and earrings.
- Attach two leaves instead of one for a fuller look.
Special Techniques
- Magic Ring: Make a loop with yarn, insert hook, yarn over and pull up a loop, chain 1 to secure. Work required stitches into loop, then pull short tail to close.
Conclusion and Remarks
Your completed Mini Rose Hair Tie should look delicate and intricate, with a spiraled rose anchored by a lush calyx, one or more leafy tendrils, and a strong hair tie at the back. This accessory makes for a charming addition to hairstyles or a thoughtful handmade gift. Experiment with different colors, add extra petals for fullness, and have fun personalizing your rose.
Important:
- Ensure sewing is secure, especially on the hair tie, to withstand repeated use.
- Be mindful of yarn ends sticking out, as they can irritate the scalp.