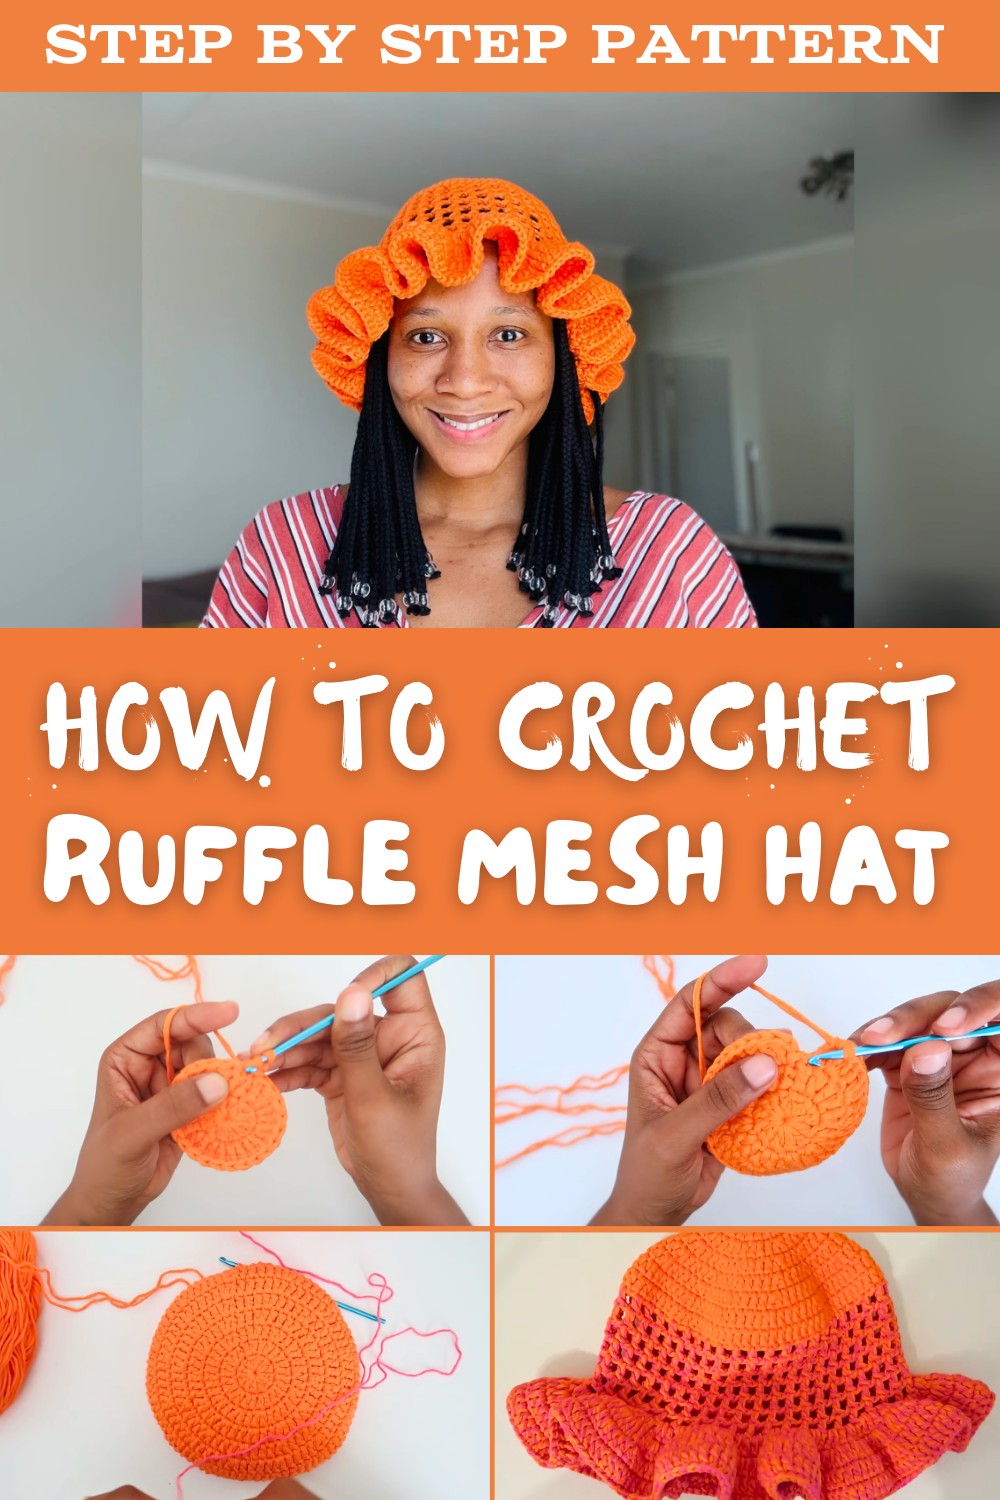
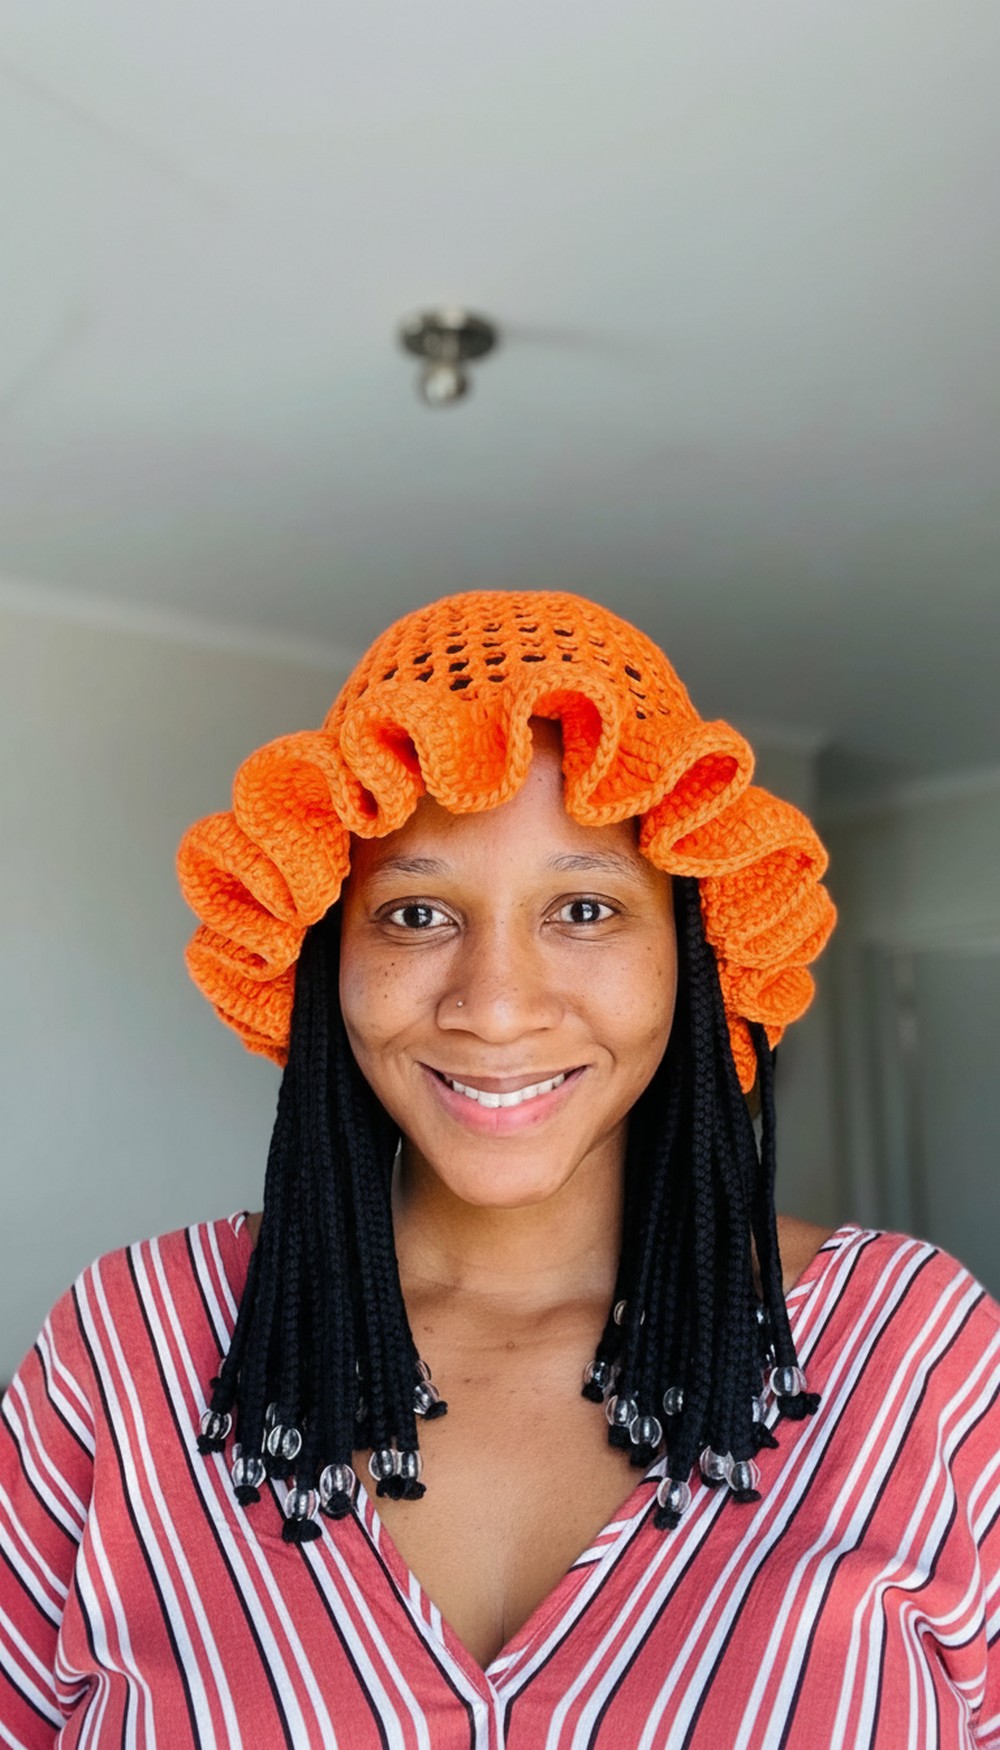
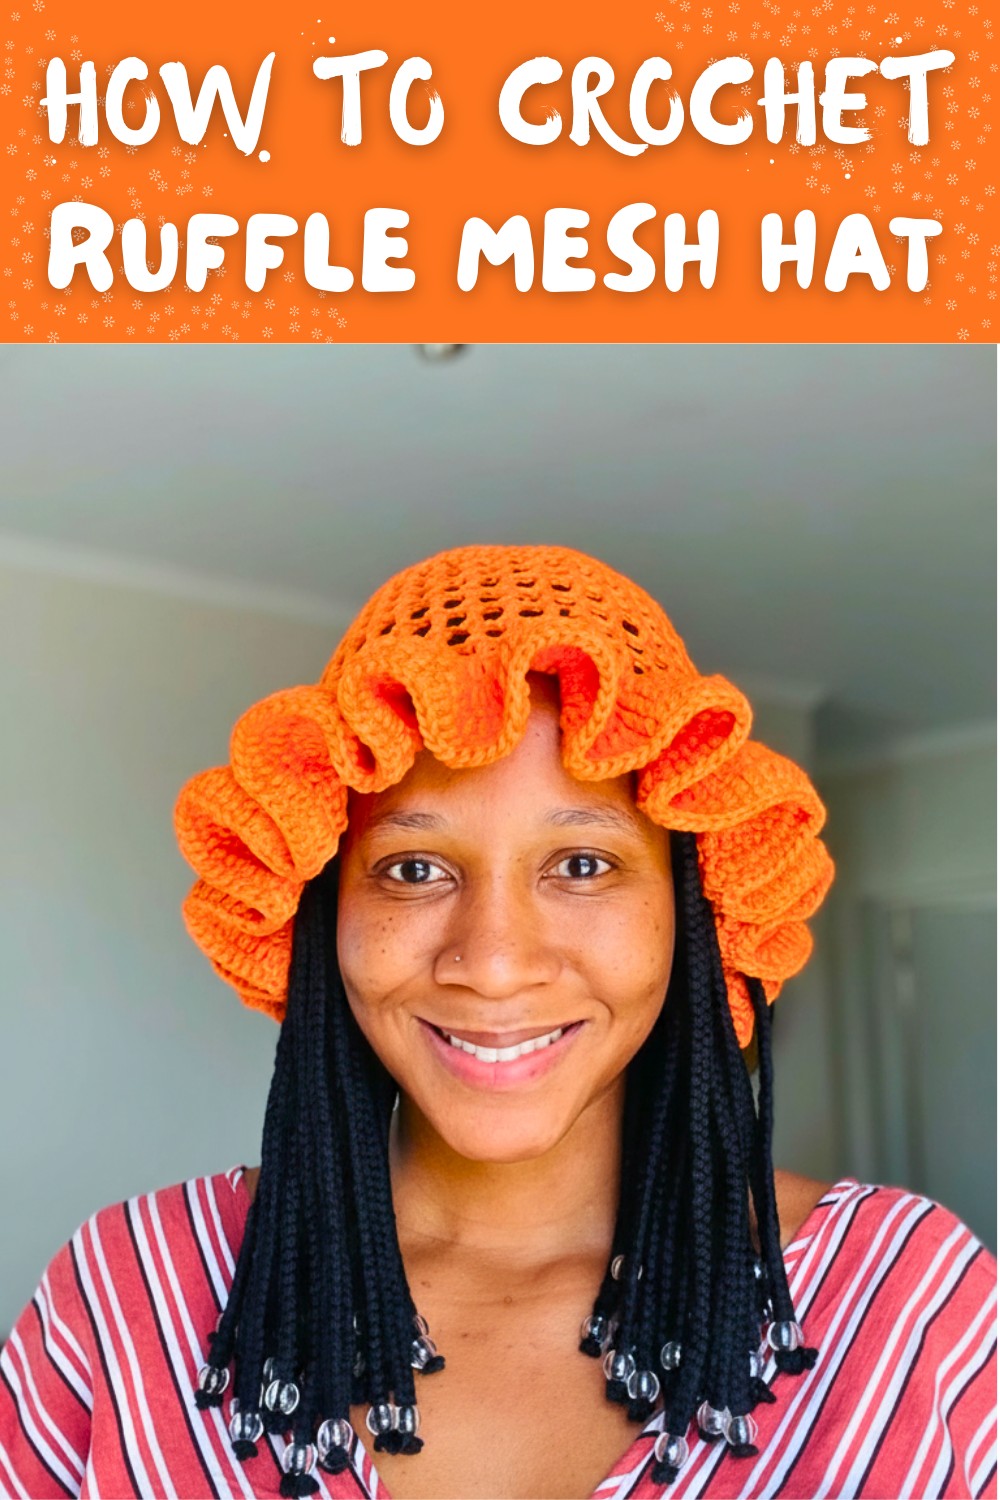
Cute Free Crochet Ruffle Mesh Hat Pattern for Hot Weather Days
Stay cool and stylish this season with a lightweight hat using a FREE Crochet Ruffle Mesh Hat Pattern, perfect for beach days, casual outfits, and gifts.
A simple mesh hat can offer both comfort and style, especially during warm weather when breathability matters most. While adjusting stitch spacing and adding a soft edge detail, a Free Crochet Ruffle Mesh Hat pattern naturally comes together as a lightweight and practical accessory.
Free Crochet Ruffle Mesh Hat Pattern for Effortless Fashion
This hat is ideal for sunny outings, beach days, or casual daily wear, thanks to its airy structure and flexible fit. The mesh design allows airflow, while the ruffled brim gives it a soft, stylish finish that pairs well with summer dresses, casual denim, or relaxed boho looks.
It also helps improve stitch consistency and shaping techniques, making it useful for skill building. Using cotton yarn or light blends ensures comfort, durability, and a neat, wearable result suitable for different occasions.
Crochet Ruffled Sunny Hat - Step-by-Step Pattern
Skill Level
- Intermediate
Materials Needed
Yarn:
- Sparkle Cotton Yarn (85% cotton, 15% polyester).
- 150g total. Each ball weighs 50g.
- Colors: Orange and Pink (or any desired combination).
- Yarn will be doubled (use two strands).
Hook Size:
- 4mm crochet hook (adjust if stitches or gauge differ).
Additional Tools:
- Measuring tape for checking dimensions.
- Pair of scissors for cutting yarn.
- Tapestry needle for weaving ends securely.
Gauge
- Double Crochet (DC): Approx. 4 stitches x 2 rows = 1 inch.
- Check your gauge to ensure correct sizing. Adjust hook size if necessary to match.
Key Abbreviations (US Terminology):
- ch: Chain
- st(s): Stitch(es)
- sl st: Slip Stitch
- DC: Double Crochet
- inc: Increase (work 2 stitches into the same stitch)
- rep: Repeat
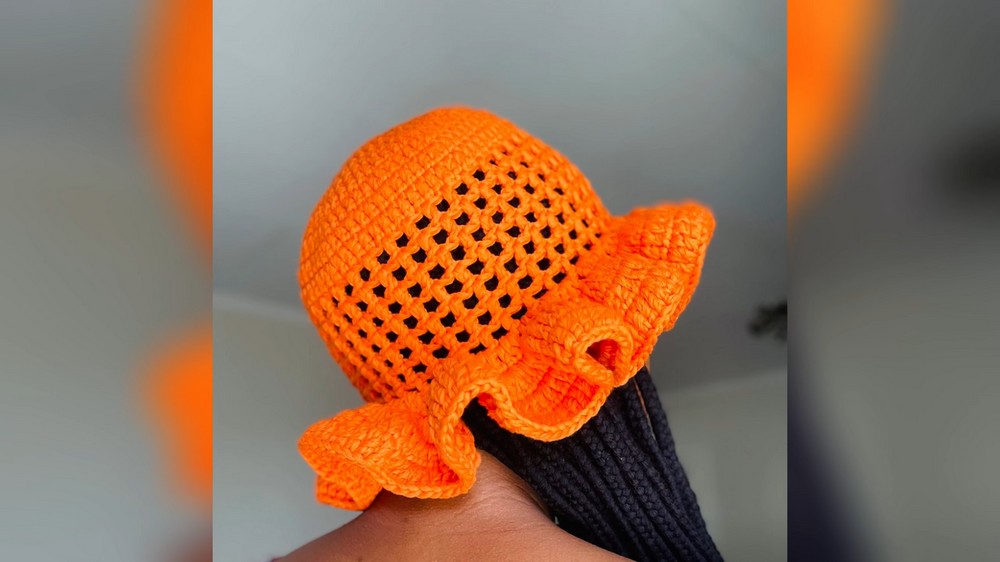
Finished Size
- Crown Diameter: 7 inches
- Body Height: 4 inches
- Brim Width: 2 inches
- Fits standard adult head circumference: 21-23 inches (adjustable).
Special Notes:
- Strand Doubling Technique:
- Either pull two strands from one yarn ball or use two separate yarn balls, pulling one end from each.
- Adjusting Size:
- Crown Diameter: Increase the rounds to make the base wider or reduce them for a smaller fit.
- Brim Width: Add rounds for a longer brim.
- Color Changing:
- To switch colors, taper off one strand and securely attach your next color strand using a preferred knotting method.
Ruffled Sunny Hat Pattern
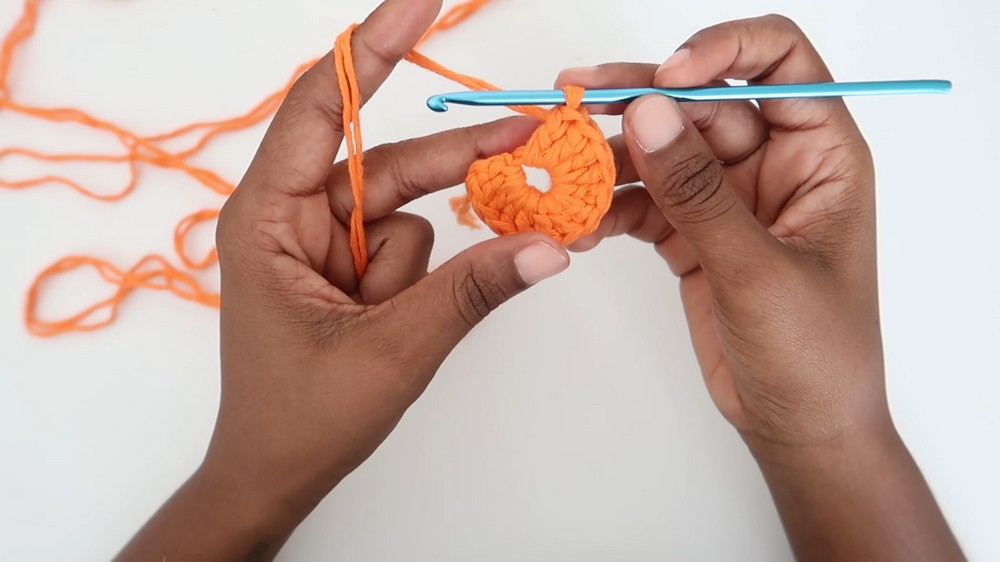
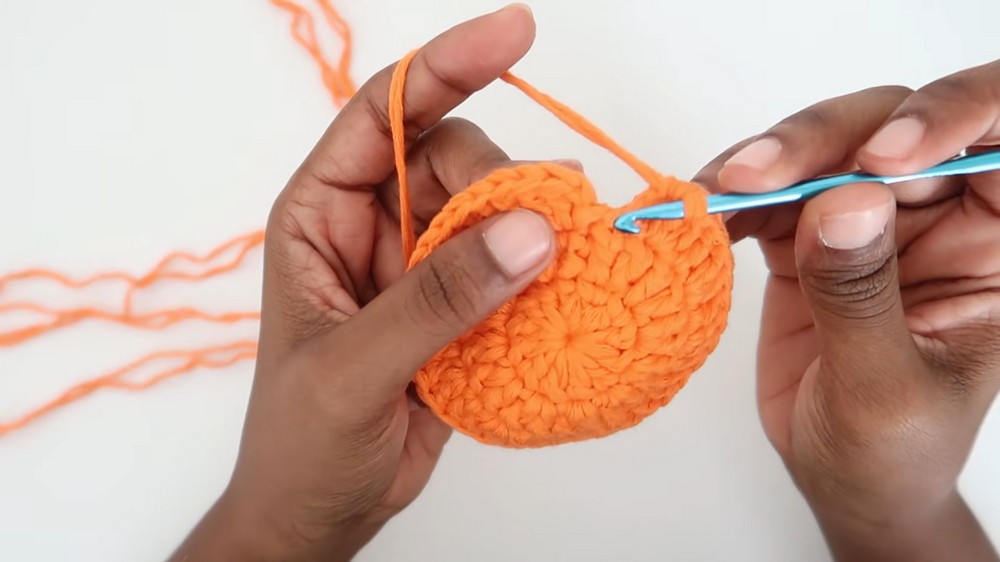
Step 1: Crown (Base)
Round 1:
- Create a magic circle.
- Ch 2 (does not count as a stitch).
- Work 12 DC into the magic circle.
- Close the circle by pulling the strands tight, and sl st into the first DC to secure the round.
- (12 sts)
Round 2:
- Ch 2.
- Work 2 DC into each stitch around (inc in every st).
- Close the round with a sl st into the first DC.
- (24 sts)
Round 3:
- Ch 2.
- (2 DC into the next st [inc], 1 DC into the next st); rep from * to * around.
- Close the round with sl st into the first DC.
- (36 sts)
Round 4:
- Ch 2.
- (2 DC into the next st [inc], 1 DC into each of the next 2 sts); rep from * to * around.
- Close the round with sl st into the first DC.
- (48 sts)
Round 5 and Beyond: Increase Rounds
- Continue the pattern by increasing the number of standalone DCs between increases:
(2 DC into the next st [inc], 1 DC into each of the next 3 sts for Round 5, 4 sts for Round 6, etc.). - Work until the crown diameter reaches 7 inches (~7-8 rounds total).
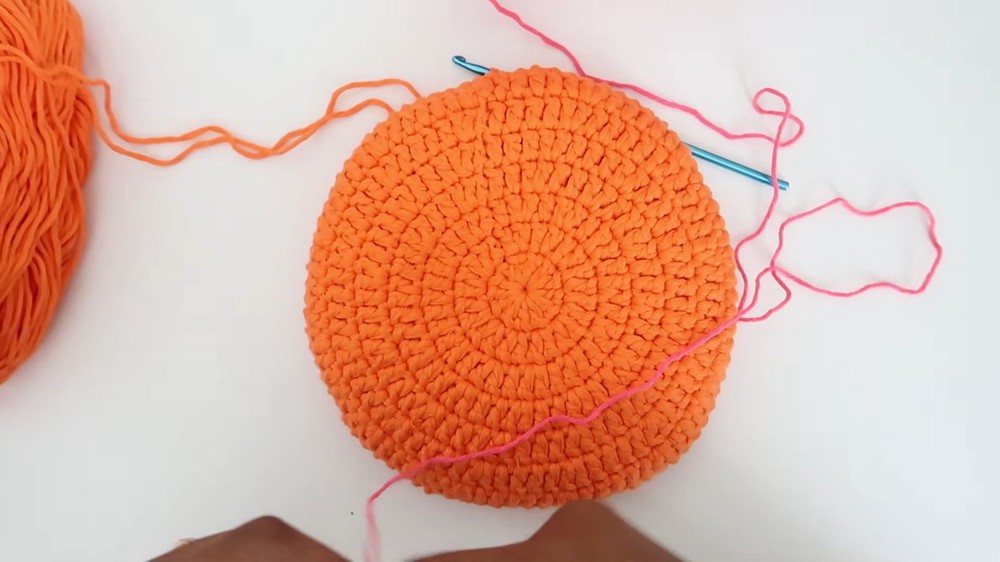
Step 2: Mesh Body
Round 1:
- Ch 2.
- Work 1 DC into each stitch around (no increases).
- Close the round with sl st into the first DC.
Round 2:
- Ch 2.
- Work 1 DC into the same st, then ch 1, Skip 1 st, and DC into the next st.
- (Ch 1, Skip 1 st, DC into the next st); rep from * to * around.
- Close the round with sl st into the first DC.
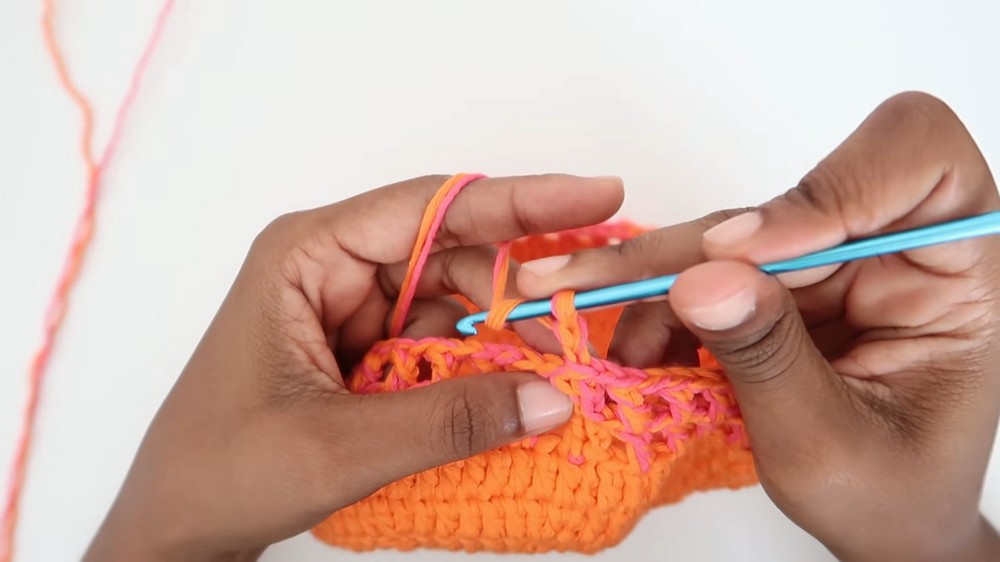
Round 3 - End of Mesh Body:
- Ch 2.
- (DC into the top of the previous DC, ch 1); rep from * to * until the end of the round.
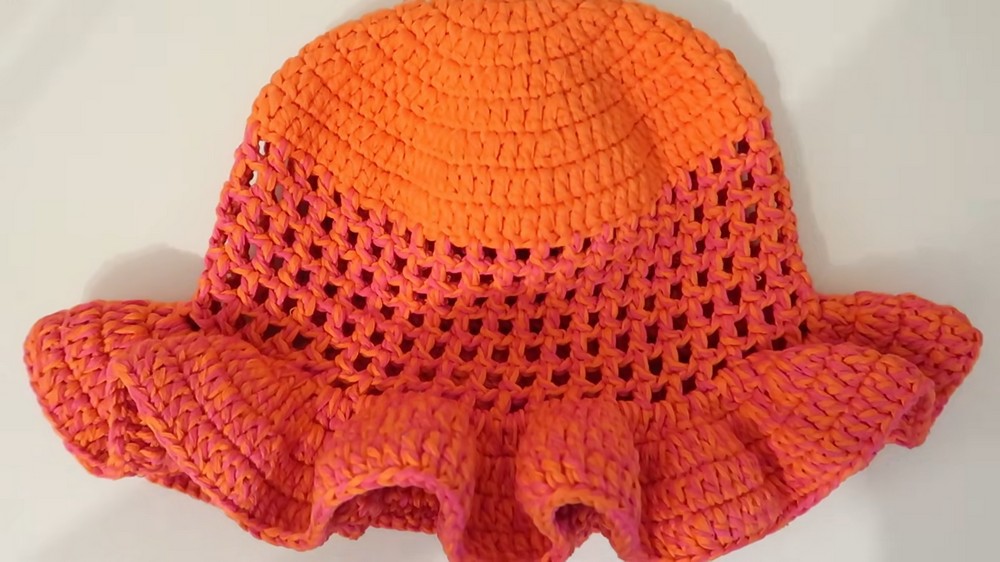
- Repeat this mesh pattern until the body height reaches 4 inches.
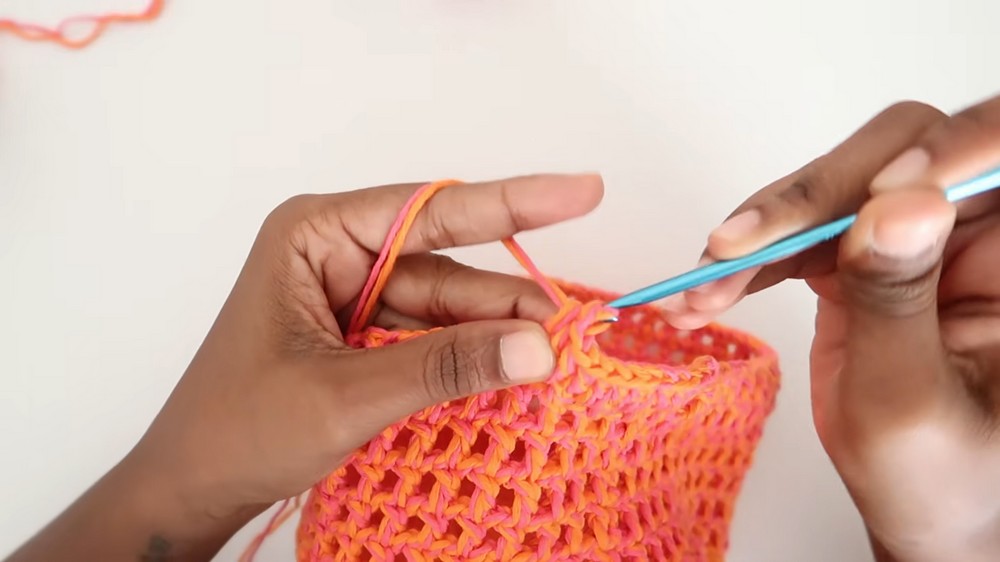
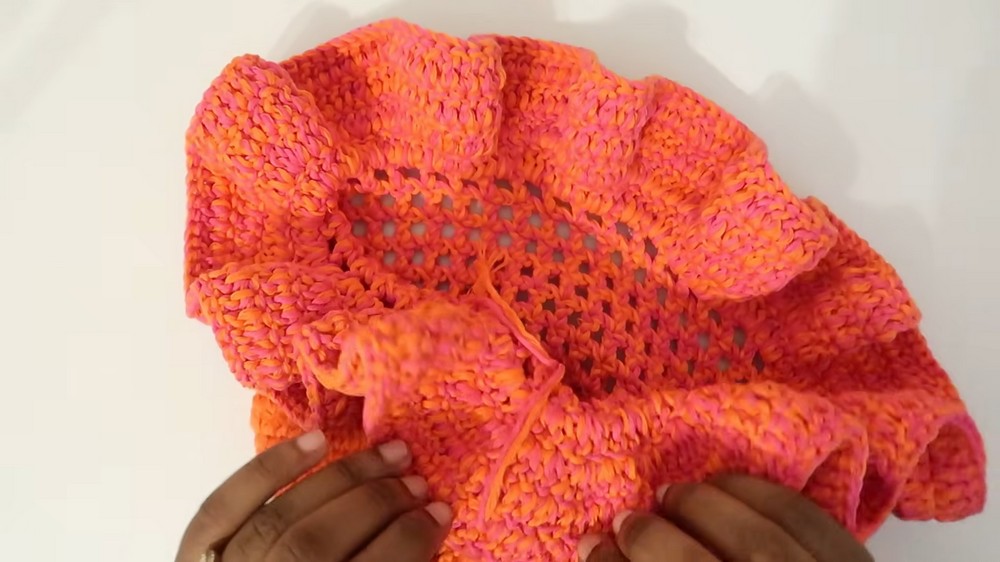
Step 3: Ruffled Brim
Round 1:
- Ch 2.
- (1 DC into the next st, 2 DC into the next ch 1 space [inc]); rep from * to * around.
- Close the round with sl st into the first DC.
Round 2:
- Ch 2.
- (1 DC into the next st, 2 DC into the next st [inc], 3 DC into the next st); rep from * to * around.
- Close the round with sl st into the first DC.
Round 3 - Ruffled Effect:
- Add 2 more rounds of ruffles without further increases:
- Ch 2, work 1 DC into each stitch around.
Step 4: Finishing
Weaving Ends and Securing Top:
- Use a tapestry needle to weave in all loose ends securely.
- Ensure the top of the hat is tightened and closed to prevent unraveling over time.
Blocking:
- For best shape and structure, block the hat by dampening lightly and shaping it over a bowl or hat form until the brim and mesh settle.
Conclusion
Congratulations! Your Ruffled Sunny Hat is complete. This breathable and stylish design, featuring a vibrant brim with elegant ruffles, is perfect for sunny weather. Its lightweight and ventilated mesh body make it comfortable for daily wear, while the ruffles lend a playful and decorative touch.
Pattern Adjustments and Tips
Pattern Corrections:
- If stitch counts or tension feel off, measure the crown diameter repeatedly during the increasing rounds. Adjust hook size for tighter or looser fits.
Customization Options:
- Size Adjustments:
- Decrease crown diameter to 6 inches for smaller heads, or increase it to 8 inches for larger hats.
- Play with Colors:
- Mix additional colors for gradient effects or alternate colors between brim rounds.
Tips for Success:
- Maintain Tension:
- Consistent tension ensures smooth and uniform ruffles.
- Joining Colors:
- To switch colors seamlessly, trim the previous yarn strand and securely attach the new color strand using a preferred knot or blending method.