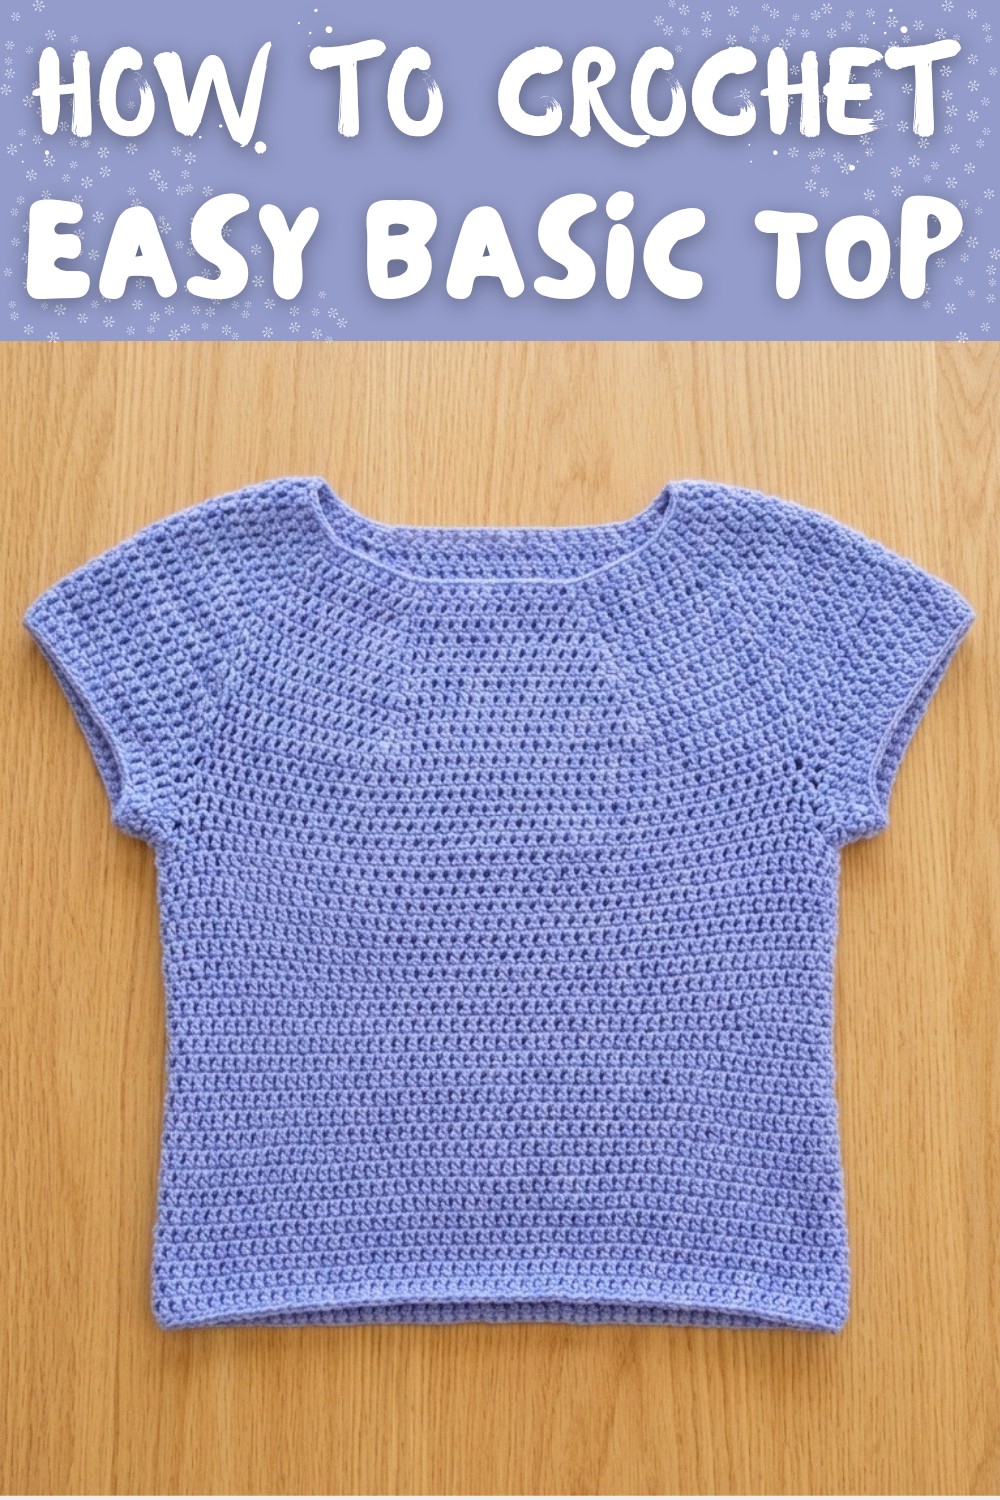
Easy Free Crochet Basic Top Pattern For Casual Style
Boost your casual wardrobe with this free crochet basic top pattern, a flattering fit and a timeless handmade appeal that makes you feel stylish and confident.
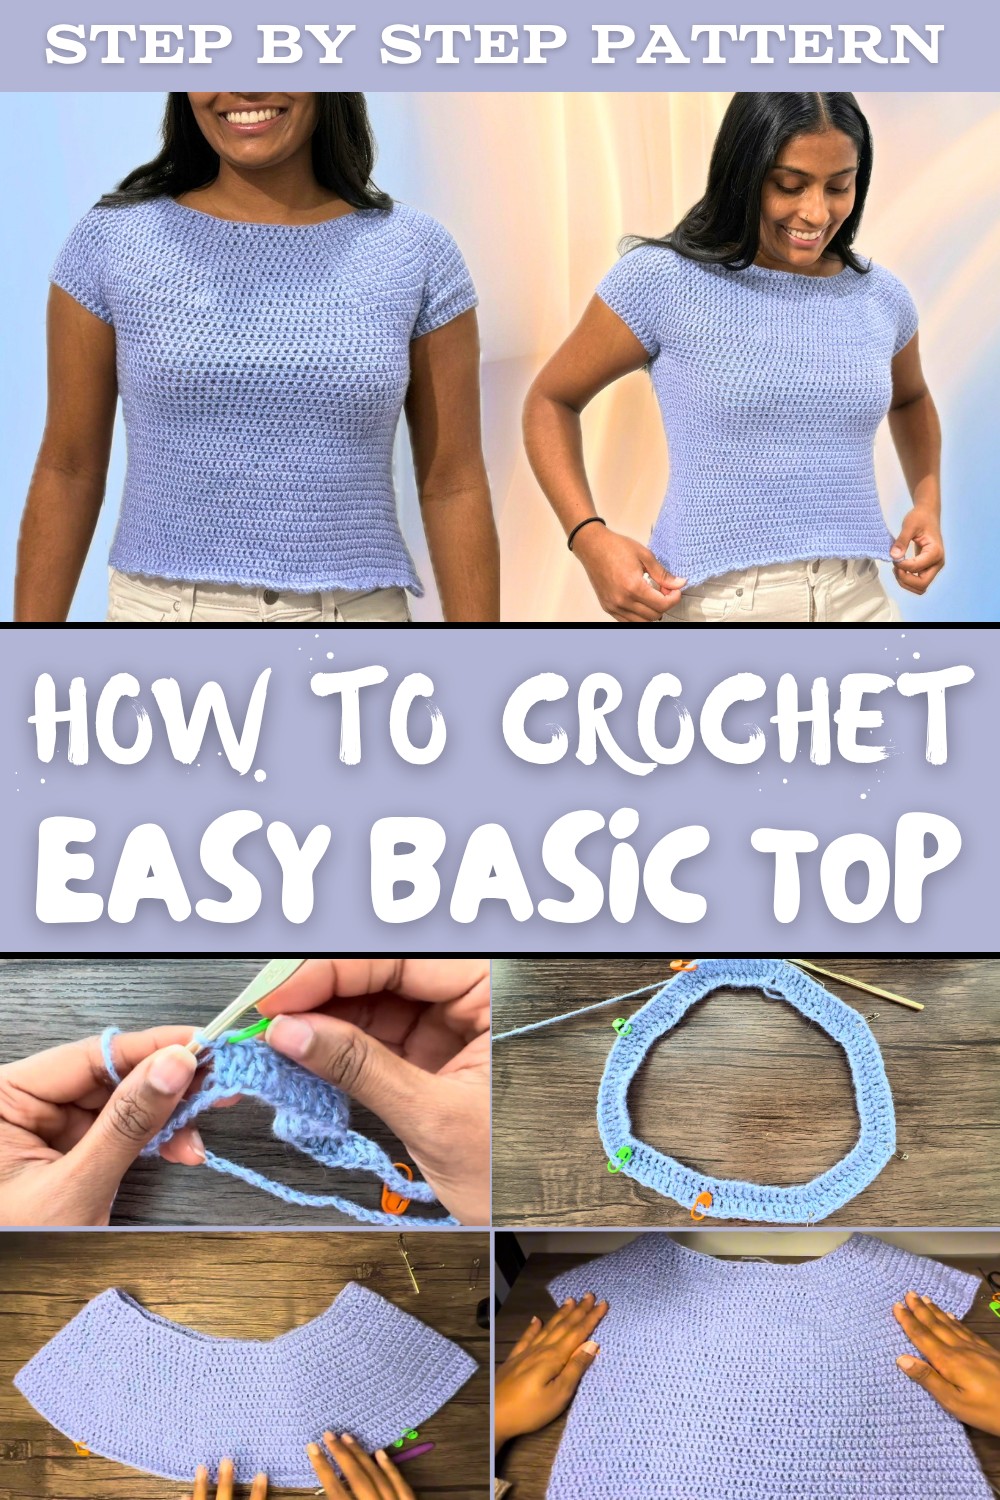
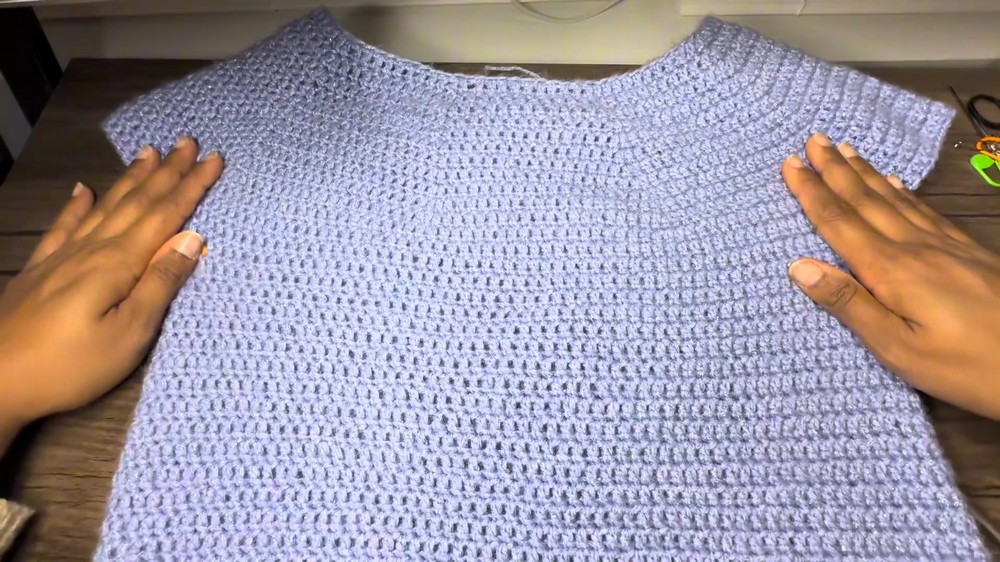
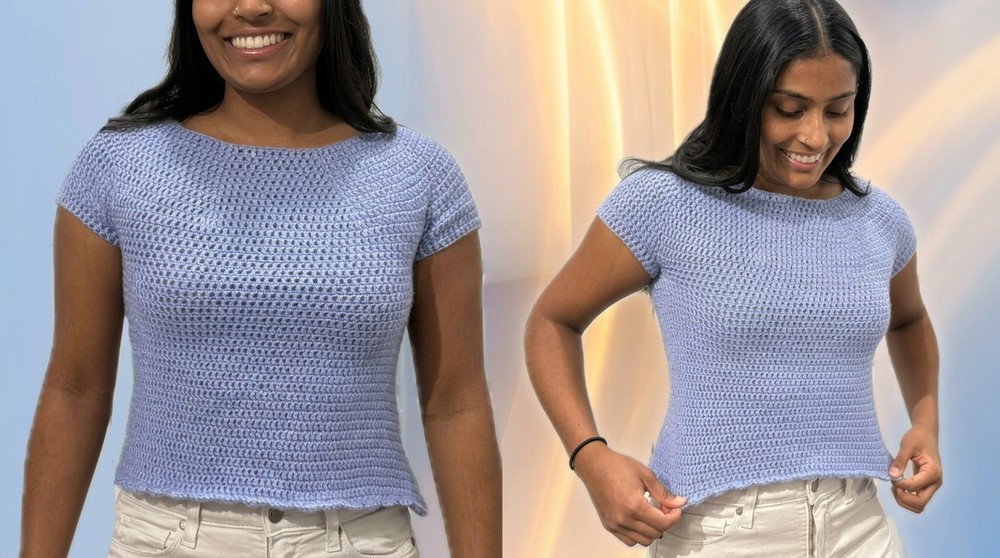
Are you ready to make something simple, stylish, and enjoyable? This crochet project is wonderfully easy and perfect for beginners, requiring no sewing at all. The design is created in one seamless piece, starting from the neckline down, which means there's no complicated assembly. It's a beautiful top designed to be comfortable, lightweight, and perfect for everyday wear. One of the best things about this Free Crochet Basic Top Pattern is its versatility. The yoke design fits gently around your shoulders, making it flattering for all body types.
Crochet a Basic Top in Style with This Free Pattern
The bottom of the top features a scalloped border, adding a delicate and decorative touch that looks both modern and elegant. You can keep it casual for a relaxed look, or dress it up with accessories to wear it on special occasions. This top is made with soft DK weight yarn, which feels light and cozy, making it ideal for layering in any season. You can even adjust the length of the top and sleeves, making it truly customizable for your taste.
What makes this crochet top so special is how seamless and polished it looks when finished. It's not just a project; it's a wearable piece of art that you can make with your own hands.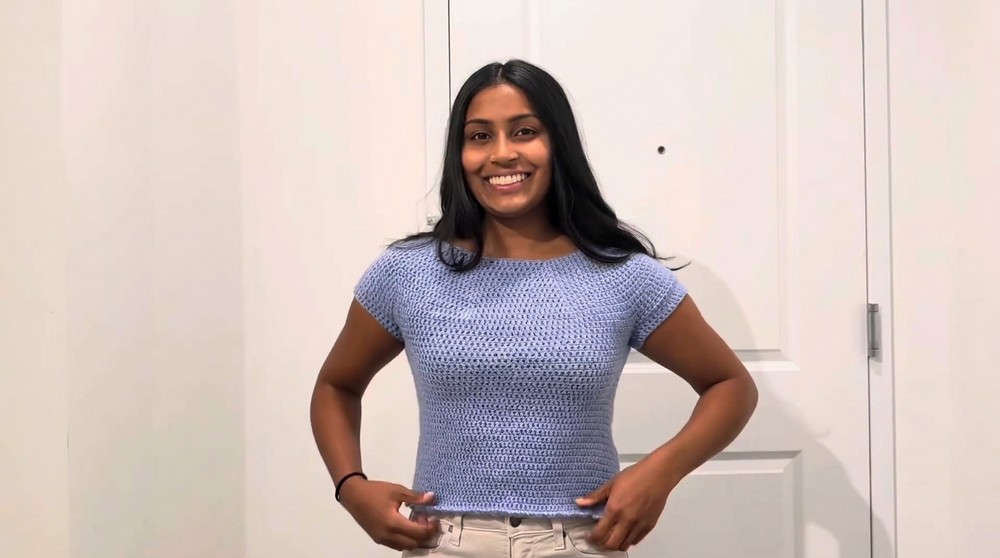
Whether it's for yourself or as a thoughtful handmade gift, this pattern gives you the chance to create something unique and beautiful. It's easy, fun, and a must try for anyone who loves crochet.
Crochet Basic Top Pattern
Finished Size (Approximate, XS)
- Bust circumference: ~30-32 in (76-81 cm)
- Body length (neckline to hem): ~18-20 in (46-51 cm), adjustable
- Sleeve opening: fitted for XS, adjustable in the "Increase Sleeves Width" section.
For adjustments to other sizes, see Customization Tips at the end of the pattern.
Materials
- DK weight yarn: Example used: Rico Creative Fluffily Sparkly DK Weight Yarn (blend: 40% cotton, 30% polyester, 20% acrylic, 10% wool)
Recommended yardage: approximately 220 g (~680 yards/620 meters) - Crochet hooks: 5 mm (US H 8) and 4 mm (US G 6), depending on gauge and preference
- Yarn needle (for weaving in ends)
- 8 stitch markers or safety pins
- Scissors
Gauge
Although the video does not specify gauge, aim for:
17-18 dc × 10 rows = 4 in (10 cm).
Work in the round; adjust hook size for consistency and fit.
Abbreviations (US Terminology)
- ch: chain
- sl st: slip stitch
- sc: single crochet
- dc: double crochet
- INC: increase (2 dc in the same stitch)
- NTC: no turning chain (a technique replacing ch 3 at the start of DC rounds)
- st(s): stitch(es)
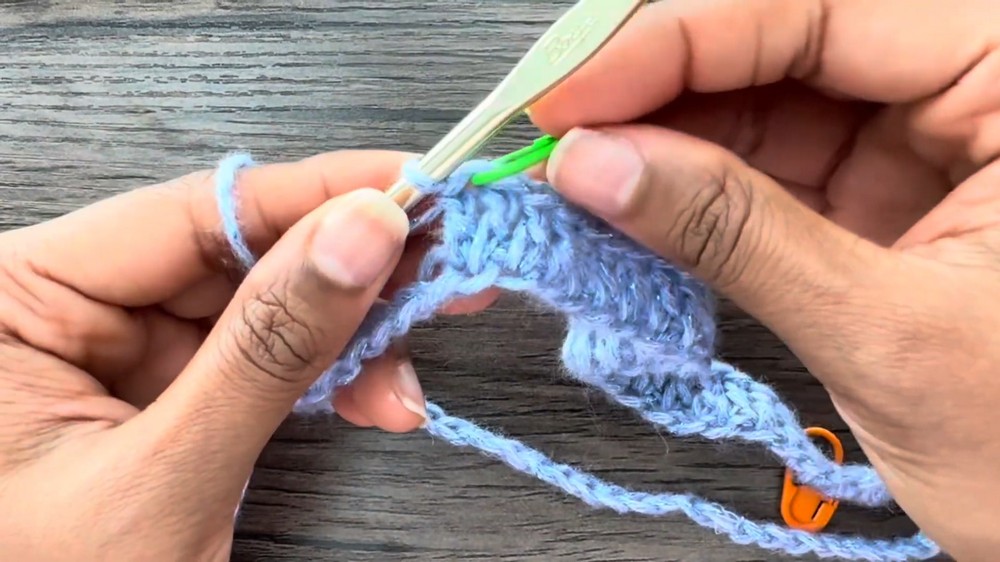
Special Technique: No Turning Chain (NTC)
The no turning chain technique creates a seamless look for double crochet rounds. To work an NTC:
- Pull up a tall loop on your hook (roughly the height of a dc).
- Position the hook beneath the tall loop.
- Yarn over and pull up a loop from beneath the tall loop (2 loops on hook).
- Yarn over and pull through both loops.
This counts as the first dc of the round, eliminating visible seams.
Pattern Overview
The top is worked in one continuous piece:
- Neckline: Start with chains forming a ring.
- Yoke: Create a round yoke with evenly spaced increases.
- Body: Separate sleeves and work the body in joined rounds.
- Borders: Add simple and decorative edges to the hem and sleeves.
- Sleeves: Optional widening or finishing.
Pattern Instructions (XS)
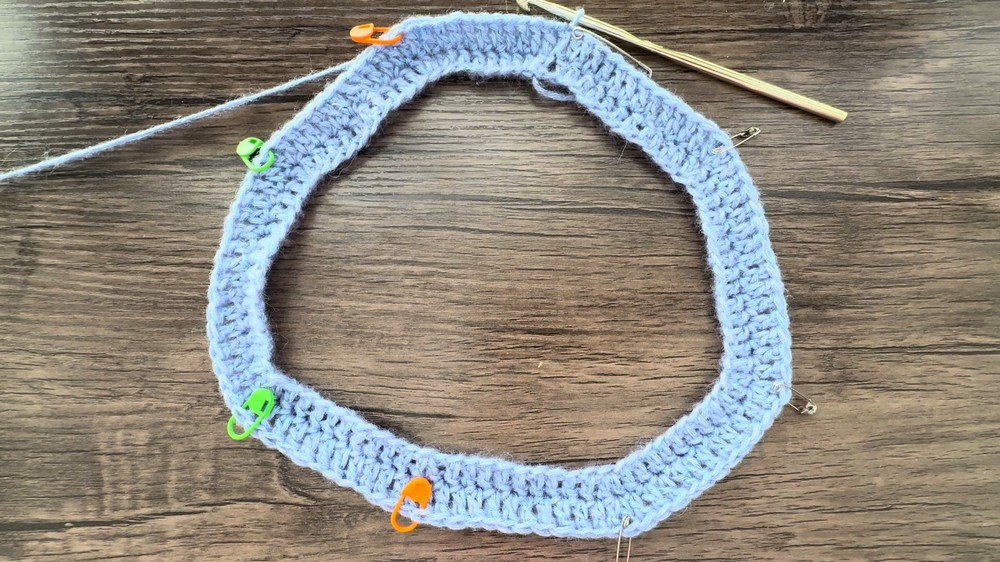
1. Neckline and Yoke Foundation
- Make a slip knot and place it on your hook.
- Chain 88 stitches.
- Sl st to the first chain to form a ring, ensuring the chain is not twisted.
Round 1 (Yoke Foundation):
- Begin with an NTC (counts as first dc).
- Dc in the next 8 chains (total of 9 dc, including the NTC).
- Work INC in the next ch (place marker in the second dc of the INC).
- Dc in the next 9 chains.
- Work INC in the next ch (place marker in the second dc).
- Dc in the next 13 chains, then INC (place marker in the second dc).
- Repeat the following sequence three times:
- Dc in the next 9 chains, INC (place marker in the second dc).
- Dc in the next 13 chains, then INC.
- Dc in the final 9 chains, then work an INC in the last ch.
- Sl st to the top of the NTC.
Stitch count: 96 sts at the end of Round 1.
2. Yoke Increase Rounds
Round 2 (and all subsequent increase rounds):
- Begin with an NTC.
- Dc in each stitch until you reach a marked stitch.
- At each marked stitch:
- Remove the marker, work an INC (2 dc in the same stitch), and place the marker in the second dc of the INC.
- Repeat this pattern all the way around.
- Sl st to the top of the NTC.
For size XS, repeat Round 2 until you have completed 11 yoke rounds. At the end of Round 11, there will be 176 sts.
3. Straight Yoke Rounds (No Increases)
Remove all markers; further increases are unnecessary.
Round 12:
- Begin with an NTC.
- Dc evenly around (1 dc in each stitch).
- Sl st to the top of the NTC.
Rounds 13-15: Repeat Round 12 for a total of 4 straight yoke rounds.
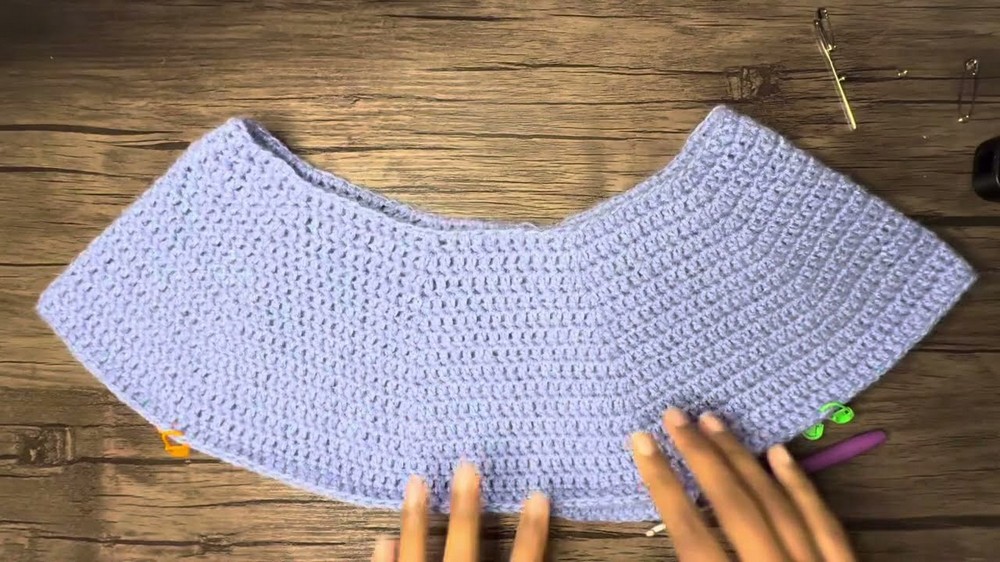
4. Sleeve Separation
With 176 sts, designate the front, back, and sleeves by placing markers at these positions:
- 36th st
- 73rd st
- 124th st
- 161st st
Sleeve Separation Round:
- Begin with an NTC.
- Dc in each stitch until you reach the first marker (36th st).
- Remove the marker, dc in that stitch.
- Skip all sleeve stitches until the next marker (creates the first armhole gap).
- Dc into the next marked stitch.
- Continue dcing across the body until the third marker.
- Remove the marker, dc in that stitch, then skip the second set of sleeve stitches.
- Dc into the final marked stitch, then complete the round with dc stitches.
- Sl st to the top of the NTC.
After this round, the sleeves are held as gaps, and the 104 body stitches form a joined round.
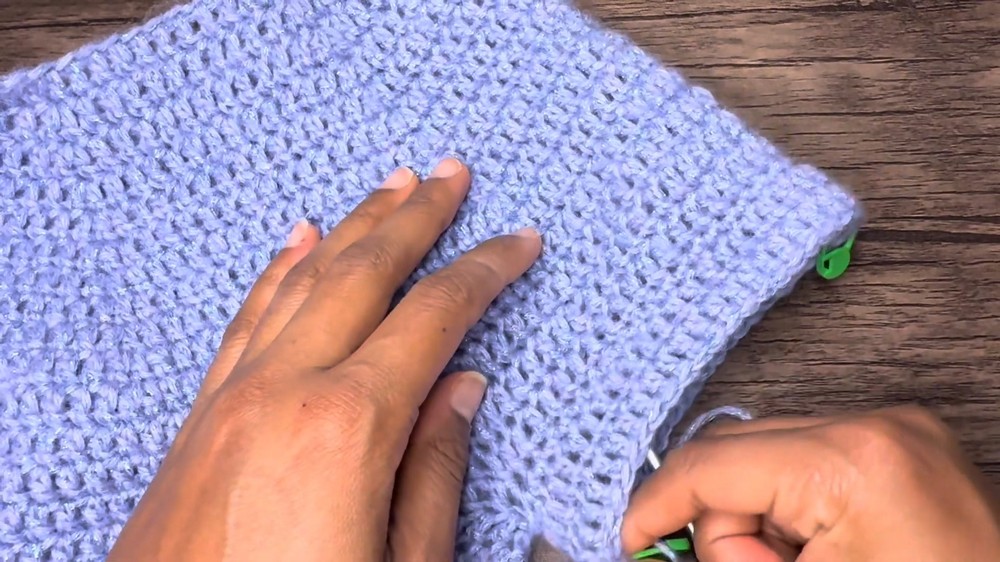
5. Body Rounds
Body Round 1:
- Begin with an NTC.
- Dc evenly around (including dc over sleeve joins).
- Sl st to the top of the NTC.
Body Rounds 2-15 (or to desired length):
Repeat Round 1 as needed for the desired length. Add or subtract rounds for customization.
6. Hem Borders
Single Crochet Border (Round 1):
- Ch 1, sc evenly around.
- Sl st to the initial ch 1.
Scalloped Border (Round 2):
- Skip the first 2 sts, then work 5 dc into the next stitch (creates a scallop).
- Skip the next st, sl st into the next st.
- Repeat the sequence: skip 1 st, 5 dc in the next st; skip 1 st, sl st into the next st.
- Adjust near the end by skipping additional sts as needed for neatness.
- Once complete, fasten off: ch 1, cut yarn, pull through loop to secure.
7. Sleeve Finishing (Optional)
To widen sleeves:
- Attach yarn at the lower corner of the sleeve with a slip knot.
- Ch 1 and sc evenly around the sleeve opening to create a base round. Sl st to the initial ch 1.
Increase Rounds:
- Begin with an NTC.
- Work dc evenly and place an INC (2 dc in 1 st) at the top corner.
- Continue increasing at the same point in following rounds until the desired sleeve width.
Optionally, add a scalloped border as described for the hem.
Tips and Customization Ideas
- Length Adjustments: Add/subtract rounds before borders.
- Other Sizes: Add more yoke increases to achieve your desired upper bust and sleeve fit.
- Wider or Shorter Neckline: Adjust chain count at start. Ensure multiples fit the yoke increase sequence.
- Borders: Choose scallop variations (3 dc instead of 5 for subtle flair).
- Texture Options: Switch between dc, hdc, or extended stitches for body customization.
Conclusion and Final Look
This top down yoke design offers seamless construction, fitted sleeves, and elegant shaping. Its clean DC body flows into a delicate scalloped hem and optional sleeve edges, creating a versatile crochet garment perfect for layering, gifting, or dressing up in bold yarn colors. Adjust size, fit, or detailing as needed to make this project uniquely yours.
With its simple construction and beautiful finish, this project is ideal for beginners exploring wearable crochet.