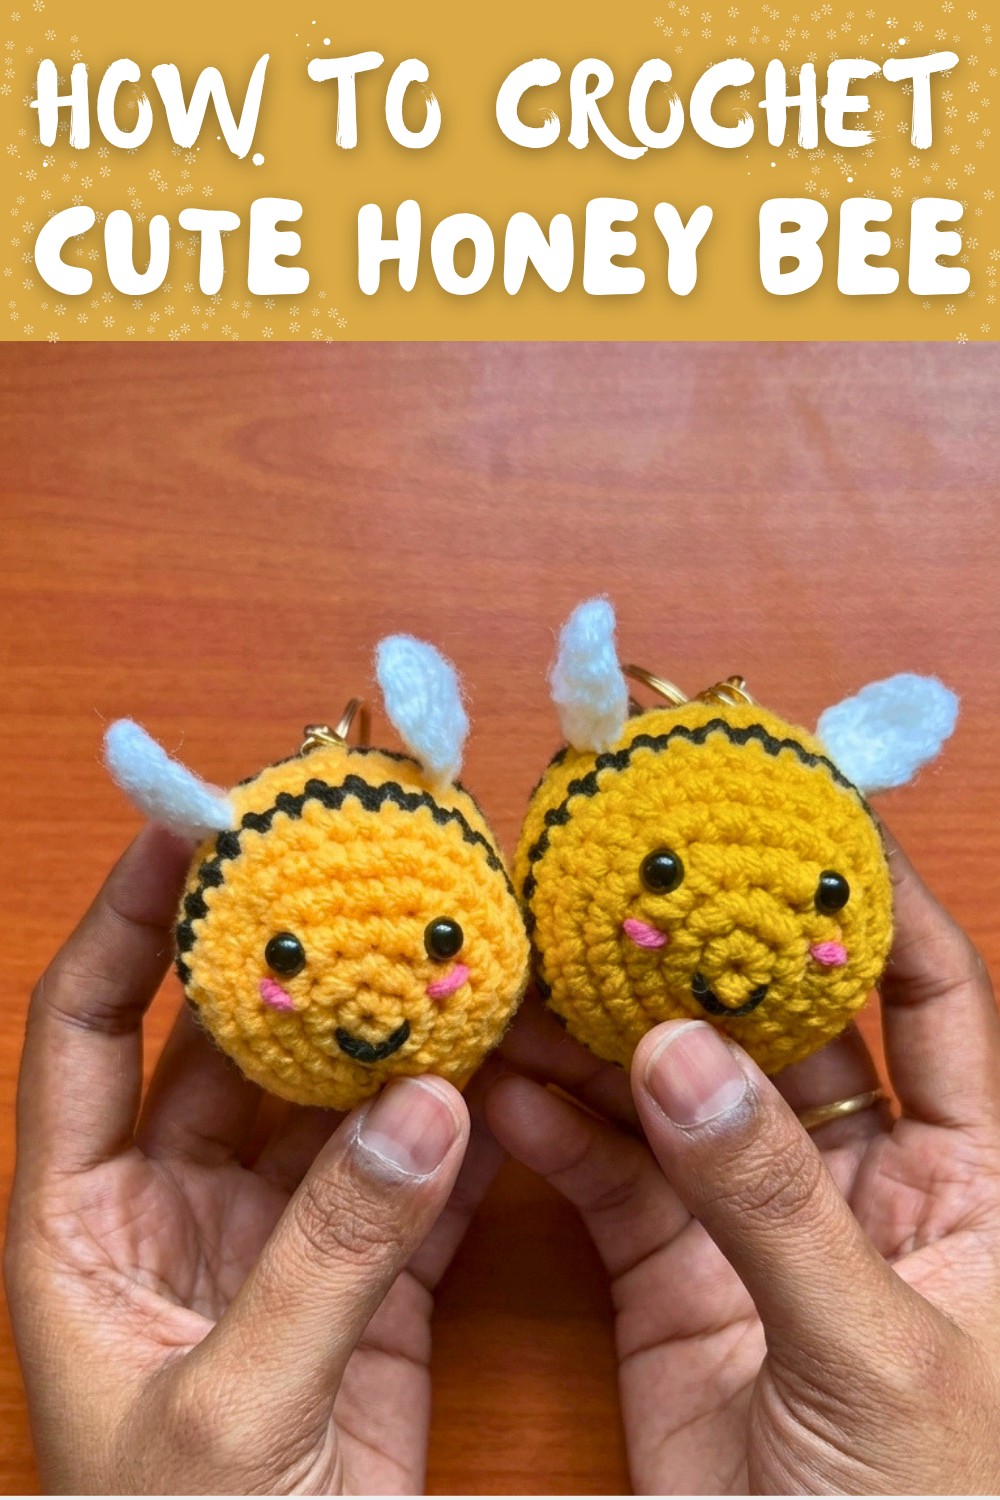
Free Crochet Honey Bee Pattern Everyone Will Buzz Over
Buzz into fun with this free crochet honey bee pattern that's easy to make and perfect for gifts, décor, or just for adding a smile to your day.
Who can say no to a tiny, cheerful honey bee? This fun and simple project is full of charm, with bold stripes, little wings, and a sweet smile. It's quick to make and works up into a cute plush or keyring sized keepsake. This Free Cute Crochet Honey Bee Pattern is a great fit for beginners exploring amigurumi. Experienced crocheters will also love it as a quick and satisfying project. The standard size is perfect for backpacks, keychains, desk buddies, or toys. For a custom touch, adjust the size by using bulkier yarn or a larger hook. It's an easy way to make this adorable bee truly your own!
Adorable Free Crochet Honey Bee Pattern You'll Treasure

Starting with the head and body, which are worked in continuous rounds, this project is a great way to practice clean color changes as you alternate between yellow and black yarn to create those unmistakable bee stripes. The wings are crocheted separately and sewn on at the end, keeping assembly simple and manageable. Choosing a smooth textured yarn helps make the stitches look neat and polished, giving your bee crisp lines and a professional feel.
The inspiration comes from long summer afternoons spent outside, watching bees gather around flowers, a reminder of nature's charm and whimsy. They're fantastic for adding a playful touch to bags, décor, or even as small surprises in goodie bags. Bring your own spin to the design by experimenting with color combinations or by adding extra details like tiny flower accents or cheek blushes. The possibilities are endless.

Cute Crochet Honey Bee Key Ring Pattern
In this pattern, you will learn how to make a cute honey bee key ring. You can also adjust the size to turn it into a small plush toy. It is simple, quick, and great for kids.
Quick Overview
- Work Type: Amigurumi / 3D Crochet
- Construction: Worked in continuous rounds from the front of the head to the back of the body. Wings are made separately and sewn on. Facial details are embroidered.
- Color Use: Alternating yellow or mustard and black stripes for the bee body.
- Assembly:
- Safety eyes added
- Stuffing added before closing
- Wings sewn on top
- Facial features embroidered
- Key ring hardware attached
Notes
- Main stitch: Single Crochet (sc) using standard amigurumi methods.
- Color changes at the end of rounds using slip stitch joins for neat stripes.
- Keep yarn tails inside the body; they act as extra stuffing.
- Adjust stuffing amount for a softer or firmer bee.
Skill Level
Beginner to Advanced Beginner
You should know:
- Magic Circle (mc)
- Single crochet (sc)
- Increases (inc)
- Decreases (dec)
- Basic color changes
Materials
- Yarn:
- Yellow or mustard yarn (main body)
- Black yarn (stripes and mouth)
- White yarn (wings)
- Pink yarn (cheeks)
- Hook: 3.0 mm crochet hook
- Safety Eyes: 2 pieces with backing washers
- Stuffing: Washable fiberfill cotton
- Tools:
- Stitch marker or locking pin
- Yarn / darning needle
- Scissors
- Threading tool (optional)
- Key ring base with jump ring or connector hook
Measurements / Size
- Finished Size: About 2-3 inches long (standard mini key ring size)
- Size will vary depending on yarn thickness and tension.
Stitch Abbreviations
- mc - Magic Circle / Magic Ring
- sc - Single Crochet
- inc - Increase (2 sc in the same stitch)
- dec - Decrease (single crochet 2 stitches together)
- sl st - Slip Stitch
- ch - Chain
- st(s) - Stitch(es)
Special Stitches
Single Crochet Increase (inc)
Work 2 sc into the same stitch to widen the round.
Single Crochet Decrease (dec)
- Insert hook into next stitch, pull up a loop.
- Insert hook into the following stitch, pull up another loop.
- Yarn over and pull through all loops on the hook (turns 2 stitches into 1).
Pattern Instructions
1. Main Body (Head to Tail)
Start with yellow or mustard yarn
1.Round 1:
- mc, work 6 sc into the ring.
- Pull ring tight.
- Join with a sl st to first st. (6 sts)
2.Round 2:
- Ch 1, place stitch marker in first st.
- Inc in every st around.
- Join with a sl st. (12 sts)
3.Round 3:
- Ch 1.
- 1 sc in next st, 1 inc in next st - repeat 6 times.
- Join with a sl st. (18 sts)
4.Round 4:
- Ch 1.
- 1 sc in each of next 2 sts, 1 inc in next st - repeat 6 times.
- Join with a sl st. (24 sts)
5.Round 5:
- Ch 1.
- 1 sc in each of next 3 sts, 1 inc in next st - repeat 6 times.
- Join with a sl st. (30 sts)

6.Round 6:
- Ch 1.
- 1 sc in each of the 30 sts around.
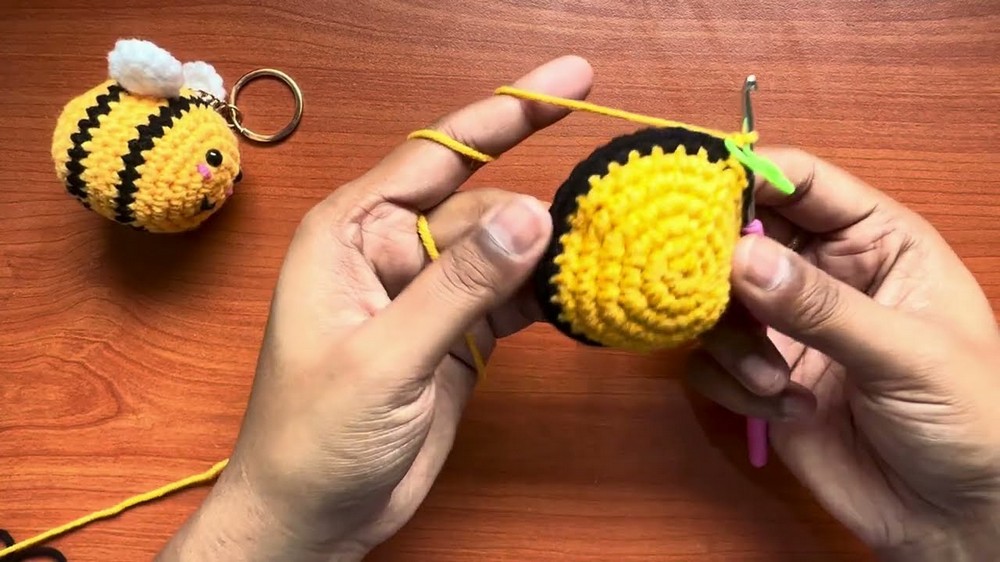
- At the final sl st of Round 6, drop yellow yarn.
- Join with black yarn in that sl st.
- Cut yellow yarn and knot yellow and black tails together securely.
7.Round 7 (Black):
- Ch 1.
- 1 sc in each st around.
- Join with a sl st. (30 sts)
- At the final sl st, switch back to yellow yarn.
- Cut black yarn and knot tails.
8.Rounds 8-10 (Yellow):
- Ch 1.
- 1 sc in each st around for 3 rounds.
- Join with a sl st at the end of each round. (30 sts)
- At the final sl st of Round 10, switch to black yarn.
- Cut yellow yarn and knot tails.
9.Round 11 (Black):
- Ch 1.
- 1 sc in each st around.
- Join with a sl st. (30 sts)
- At the final sl st, switch back to yellow yarn.
- Cut black yarn and tie tails securely.
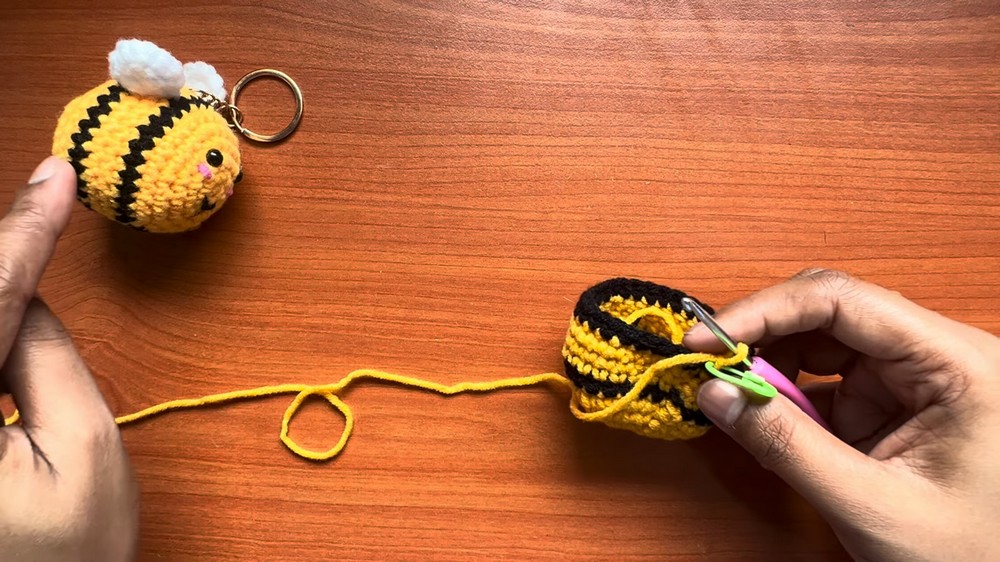
10.Round 12 (Yellow):
- Ch 1.
- 1 sc in each st around.
- Join with a sl st. (30 sts)
11.Round 13:
- Ch 1.
- 1 sc in each of next 3 sts, 1 dec - repeat 6 times.
- Join with a sl st. (24 sts)
12.Round 14:
- Ch 1.
- 1 sc in each of next 2 sts, 1 dec - repeat 6 times.
- Join with a sl st. (18 sts)
2. Eye Placement and Stuffing
Safety Eyes:
- Pause before the body gets too closed.
- Find the center front of the head (yellow section).
- Place eyes between Rounds 3 and 4.
- Leave 3-4 stitches between the eyes.
- Attach washers inside the body and push until locked.
13.Round 15:
- Ch 1.
- 1 sc in next st, 1 dec - repeat 6 times.
- Join with a sl st. (12 sts)
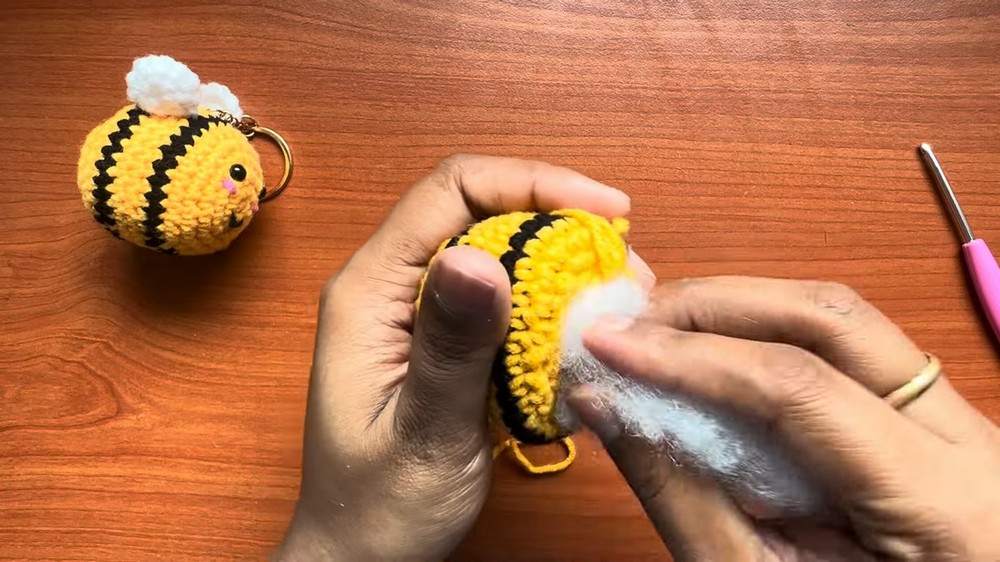
Stuffing:
- Pull out fiberfill and fluff it.
- Stuff the body evenly through the top opening.
- Shape into a round bee body using your fingers.
Round 16:
- Work 1 dec in each stitch around - 6 dec total. (6 sts)
- Fasten off, leaving a tail for closing.
- Thread tail onto a needle, weave through the front loops of the remaining 6 sts, pull tight to close.
- Knot, hide the end inside the body, and trim.
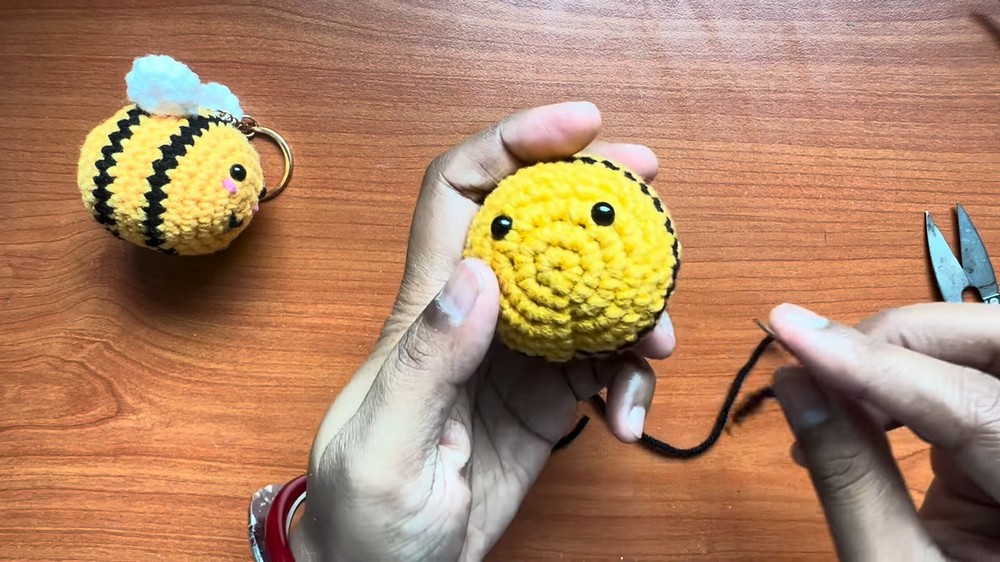
3. Facial Details
Smile (Black Yarn):
- Thread black yarn onto a needle.
- Insert needle from a hidden spot at the back or bottom to the front, slightly below the eyes.
- Form a small "U" shaped smile.
- Bring the needle under the center of the "U" to secure.
- Take the needle back out near the starting point.
- Tie a knot, trim, and push the knot inside the body.
Cheeks (Pink Yarn):
- Thread pink yarn onto a needle.
- Embroider a short horizontal stitch just under each eye.
- Tie off, trim, and hide the ends inside the body.
4. Bee Wings (Make 2)
Use white yarn
Round 1:
- mc, work 6 sc into the ring.
- Pull tight.
- Join with a sl st. (6 sts)
Round 2:
- Inc in every st around.
- Join with a sl st. (12 sts)
- Fasten off, leaving a long tail for sewing.
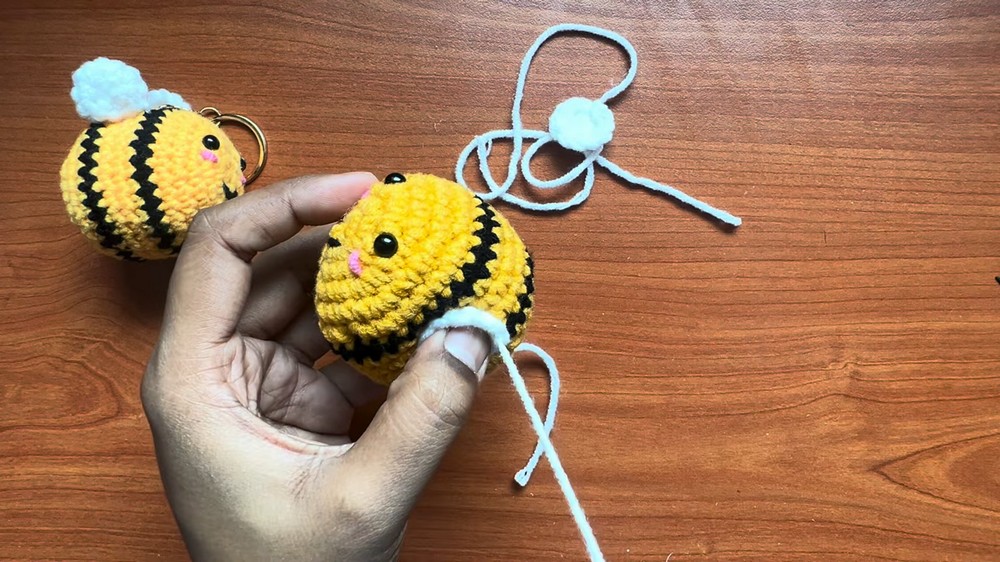
For larger wings, add another round of increases before fastening off.
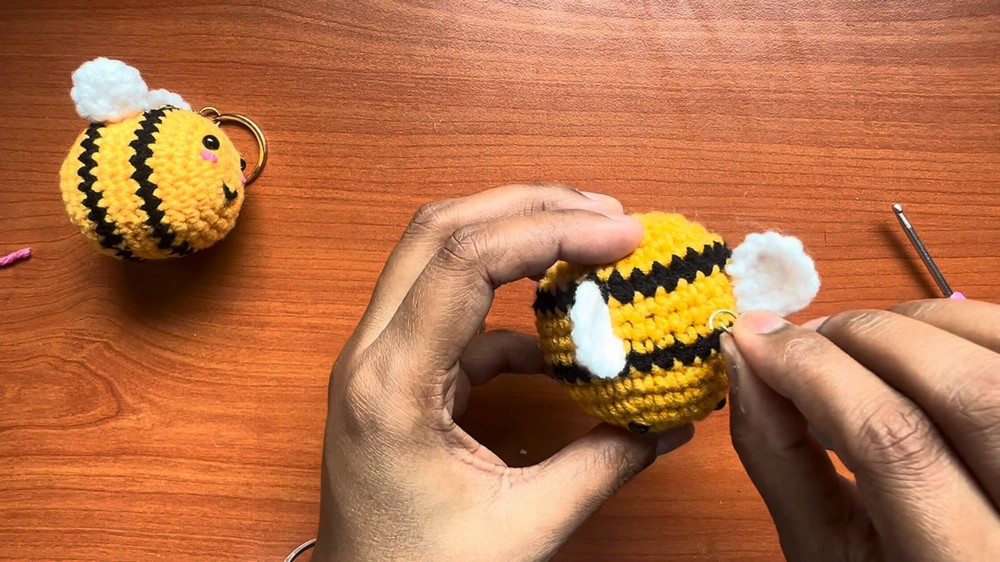
5. Assembly and Key Ring
Attaching the Wings:
- Thread the long tail of one wing onto a needle.
- Place wing on top of the bee's back, centered behind the eyes along the top middle.
- Sew securely to the yellow body.
- Weave in the end through the body and trim.
- Repeat with the second wing next to the first.
Attaching the Key Ring:
- Find the top center of the bee between the two wings.
- Insert a jump ring or metal connector through a few body stitches at this point.
- Attach the key ring to the connector.
- Close the connector firmly with pliers or your fingers.
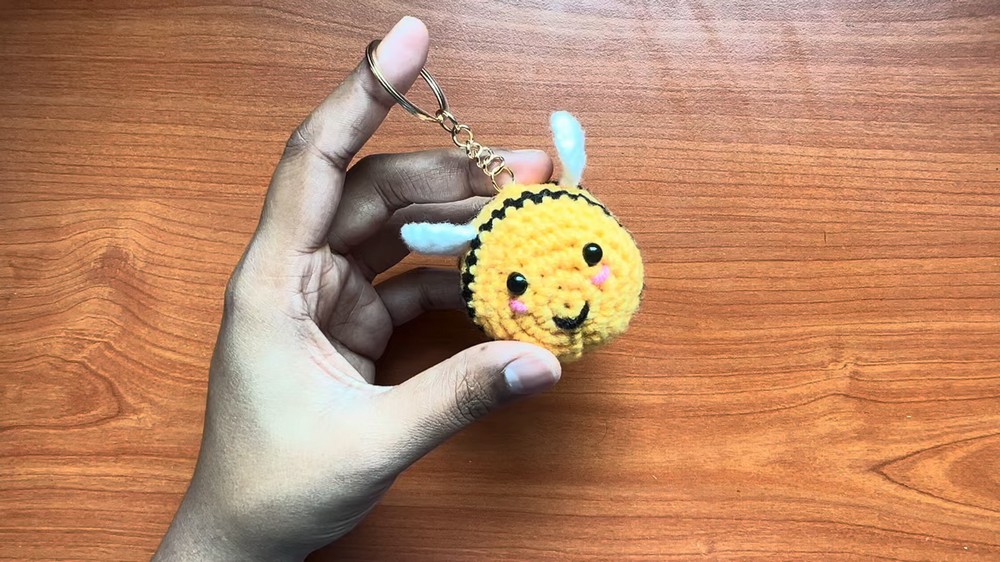
Finished Bee
Your honey bee key ring is now complete. You can:
- Clip it to bags and backpacks
- Use it as a key ring
- Turn it into a small toy for kids
Adjust hook size and yarn weight to make smaller or larger bees for a mini set or a plush.