
Free Crochet Daisy Flower Square Motif Pattern Full of Cheer
Add a splash of happiness to your projects with this playful crochet square featuring a sunny daisy flower at its heart-perfect for brightening any project.
As the season of spring unfolds, it's the perfect time to bring fresh and cheerful designs to life. Imagine creating a beautiful crochet motif that celebrates the vibrant essence of blooming flowers and sunny days. The Free Crochet Daisy Flower Square Motif Pattern offers you just that-a chance to crochet something special that captures the beauty of spring in every stitch. With its bright daisy flower at the center and a clean square border, this motif adds a touch of nature's charm to your projects.
Free Crochet Daisy Flower Square Motif Pattern That Shines

The square motif can be used in countless ways, making it both beautiful and functional. It can become part of a cozy blanket, add style to a cushion cover, or even work as a decorative wall hanging. You can mix and match different colors for the daisy and background to create your unique design. For example, a white daisy with a yellow center and a vibrant green background will remind you of springtime, while choosing pastel colors will give a soft and classic touch.
It starts with a "magic circle", which forms the center of the flower, followed by building delicate daisy petals through a series of simple chain and stitch combinations. The outer square gives the motif a clean and finished look, making it ideal for joining with other motifs to create larger designs.
This pattern isn't just fun to create but also a wonderful way to add a personal touch to your home or gift someone a handmade surprise. Whether used on its own or combined into full projects, the Crochet Daisy Flower Square Motif pattern is a versatile, creative, and meaningful choice for crocheters of all levels.
Crochet Daisy Flower Square Motif Pattern
Finished Size
Depending on your chosen yarn and hook size, the finished decorative piece will measure approximately 4-6 inches in diameter. Be sure to adjust your gauge and tension for consistent results.
Materials Needed
- Yarn: Use light weight or sport weight yarn of your choice. Cotton or acrylic yarn works best for delicate patterns like this.
- Hook: Crochet hook size 2.5 mm to 3 mm (or as recommended for your yarn).
- Scissors: For trimming excess threads.
- Tapestry needle: To weave in ends.
- Stitch markers: Optional, but helpful for identifying specific rounds or stitches.
Gauge
Gauge is not critical for this pattern, but to ensure the final design maintains its delicate proportions, aim for 7-8 stitches per inch when crocheting in half double crochet (hdc). Set up a swatch before beginning the project to check your tension.
Pattern Instructions
Initial Setup
Begin by creating a magic circle. This will form the center foundation of your design.
Round 1: Base Circle
- Into the magic circle, crochet 8 half double crochet (hdc) stitches evenly.
- Join with a slip stitch (sl) to the first hdc to close the round.
- Fasten off, trim the yarn, and pull the tail gently to close the magic circle securely.
Round 2: Petals
- Attach a new color (optional) with a slip knot onto the center of the circle.
- For each petal, repeat the following steps:
- Chain 9 (ch9).
- Skip 2 stitches (sk2) from the center.
- Into the third chain, single crochet (sc), half double crochet (hdc), 3 double crochets (dc), hdc, sc.
- Slip stitch into the next stitch.
- Repeat this sequence for 8 petals around the center to create a circular floral design.

Finishing Round 2
- After completing all 8 petals, slip stitch into the starting point, fasten off, and trim the yarn.
- Use a tapestry needle to hide all loose tails neatly at the back of your work.
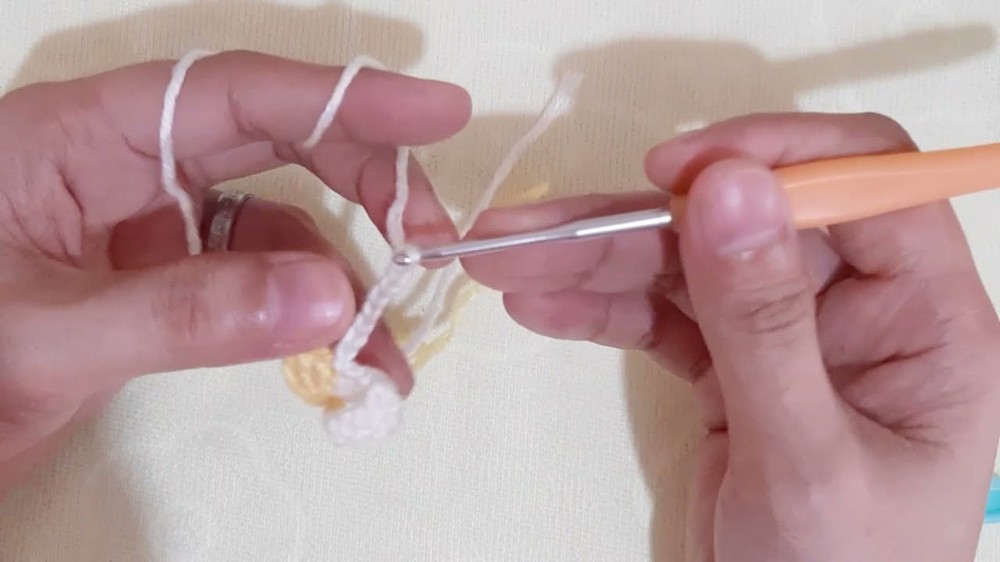
Round 3: Tip Enhancements
- Begin with a slip knot and attach the yarn at the tip of each petal (the farthest chain space of each petal from the center).
- Crochet as follows:
- Into the tip of each petal, 1 single crochet (sc), chain 8 (ch8).
- Repeat this sequence for all 8 petals, creating loops at their tips.
- Join with a slip stitch (sl) and chain 1 to secure.
Round 4: Architectural Layers
For added texture and depth:
- Begin by chaining 7 (ch7).
- Into the next chain space created in Round 3, crochet:
- 1 double crochet (dc), chain 10 (ch10), 1 dc, chain 7.
- Move to the next chain space and repeat:
- 1 single crochet (sc), chain 7 (ch7), 1 sc.
- Continue this sequence, alternating between dc/ch10/dc/ch7 and sc/ch7/sc, for all 4 petals.
- After completing the round, slip stitch (sl) 3 times into the next chain space to finish.
Round 5: Decorative Flourishes
- Attach the yarn into the nearest chain space from Round 4 and crochet:
- (Chain 2) 2 double crochets (2dc), chain 3 (ch3), 2dc.
- Into the next chain space:
- Crochet 4dc, chain 6 (ch6), 4dc.
- Into the next chain space:
- 2dc, ch3, 2dc.
- Repeat this alternating sequence for all chain spaces around.
- Slip stitch 3 times between chain spaces to secure the round.

Round 6: Final Delicate Layer
- Begin by chaining 7 (ch7).
- Skip 4 stitches (sk4) and slip stitch (sl) into the next space.
- Chain 5 (ch5).
- Into the next chain space (from the previous round), crochet:
- 1 double crochet (dc), chain 6 (ch6), 1dc.
- Chain 5 (ch5), skip 1 stitch (sk1), and slip stitch into the next space.
- Repeat the following pattern for all subsequent chain spaces:
- Ch7, sl; ch7, sl; ch7, sl.


Finishing Round 6
- After the final repeat, slip stitch into the starting point and fasten off your yarn.
- Tuck in all remaining tails with a tapestry needle for a clean finish.
Tips for Success
- Maintain consistent tension: Loose or tight stitches can distort the final shape. Practice maintaining steady hand tension for best results.
- Use stitch markers to track the beginning or end of complex rounds.
- Experiment with yarn colors: Create a vibrant contrast by using multiple colors for consecutive rounds to highlight details.
- Block your piece after completing it: Gently shape the design using steam blocking or pin it into place to accentuate the intricate layers and petals.
Customization Ideas
- Use metallic or glossy yarn for a glamorous finish, making the design ideal for festive occasions or decorative projects.
- Add beads or sequins at the tips of each petal or in the center circle to give your work an elegant sparkle.
- Turn it into an accessory: Attach the finished piece to a hair clip, brooch pin, or applique for bags or clothing.
- Adjust size: For a larger or smaller piece, experiment with thicker or thinner yarn, and adjust the hook size accordingly.

Conclusion
This ornate crochet pattern offers a beautiful blend of texture and elegance, making it perfect for both decorative and wearable projects. The detailed steps outline every stage of the process, ensuring clarity for crocheters of all experience levels. Whether using subtle shades or vibrant colors, this design is bound to stand out as a charming handmade masterpiece.
Final Remarks
Upon completing the piece, you'll notice the intricate layers and loops that give the design a delicate, elegant appearance. Whether used as a standalone ornament or customized into a functional accessory, this crochet pattern serves as a delightful introduction-or addition-to your collection of detailed handmade creations.
Always take time to weave in ends carefully for a clean finish and enjoy experimenting with shapes, colors, and embellishments to make the project uniquely yours.