
Fun Free Crochet Halter Top Pattern for Summer Wardrobe Goals
Feel cool and modern with this free crochet halter top pattern, a simple and stylish handmade touch to your favorite warm weather outfits.
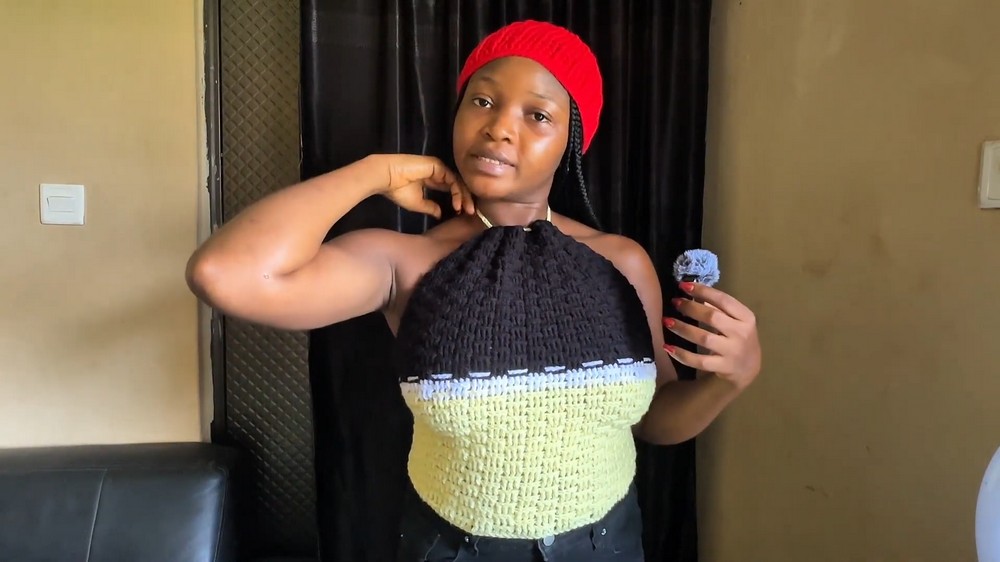
Here is an easy and fun way to add something stylish to your wardrobe-a Halter Top Pattern. This beautiful top is perfect for sunny days, whether you're relaxing at the beach, enjoying a picnic, or going out with friends. Made with three bright colors-yellow, black, and white-it stands out and makes you look trendy and confident. It has an open-back lace-up design that you can adjust to fit perfectly. The straps tie at the shoulders, giving it a lightweight and comfortable feel. This makes it easy to wear all day, and its breathable crochet design keeps you cool even when it's warm outside.
Free Crochet Halter Top Pattern to Add Flair to Your Closet

That's not all-it's also beginner-friendly. This pattern uses simple stitches, like double crochet, and adds a fun texture with front post and back post stitches. You'll love making neat rows of color changes, which are simple to follow and give the top an organized, professional look.
It fits like a dream because of its stretchy design. You can make it any size while keeping it soft and comfortable to wear. Plus, the length and colors can be customized, so it's all about your style.
A sunny day feels so much better when you're wearing something you made yourself. This project is creative, easy, and fun to try. Get your crochet hook and favorite yarn, and make this wonderful halter top to bring beauty and handmade charm to your summer wardrobe.
Crochet Halter Neck Top Pattern
Finished Size
- Bust Circumference: Adjustable (based on individual measurements). Suggested chain length is calculated by measuring your bust circumference minus 5 inches.
- Full Length of Top: Approximately 17 inches (can be lengthened or shortened based on personal preference).
- Underarm Length: Around 10 inches, from the bottom of the crop top to the base of the armhole (customize as needed).
Gauge
- Gauge: 4 double crochets = 1 inch / 2 rows = 1 inch.
- Gauge is essential for proper sizing; ensure your tension matches to avoid sizing errors.
Materials
- Crochet Hook: Size 4.5 mm.
- Yarn: 50g 3-ply yarn (or similar weight). Recommended composition: acrylic for durability. Colors used in this tutorial:
- Main Colors: Black and Yellow (8 inches each).
- Accent Color: White (2 rows, approximately 1.2 inches).
- Scissors: To cut yarn ends.
- Stitch Markers: To mark lace-up points.
- Measuring Tape: For accurate dimensions.
- Tapestry Needle: To weave in loose ends.
Pattern Overview
The halter neck top begins with a chain that measures your desired bust size. The back will feature a lace-up design that allows for flexibility in fit. Front post and back post double crochet (FPDC/BPDC) techniques are alternated to create visual interest and stretch. Holes for the lace-up cords at the back are detailed as you proceed.
Step-by-Step Instructions
Step 1: Taking Measurements
- Measure your bust circumference. Subtract 5 inches from your measurement to ensure a comfortable fit, allowing room for the lace-up back.
- For example, if your bust measurement is 35 inches, subtract 5 inches to arrive at 30 inches.
- Determine your desired full length (e.g., 17 inches) and underarm length (e.g., 10 inches). These measurements will guide your progress as you crochet rows.
Step 2: Foundation Chain and Row 1
- Foundation Chain: Begin by chaining a length that matches your adjusted bust measurement (e.g., 30 inches for a 35-inch bust) using yellow yarn. Wrap the chain around your body to confirm fit before proceeding. Adjust as needed to account for how open you want the back to be.
- Row 1: Chain 1 more and place a double crochet (DC) stitch in the back loop of the third chain. Continue with one DC into each stitch for the entire row.
- To crochet DC: Yarn over, insert hook into the stitch, yarn over again, pull through, yarn over, and pull through two loops twice.
- Turn the work at the end of the row.
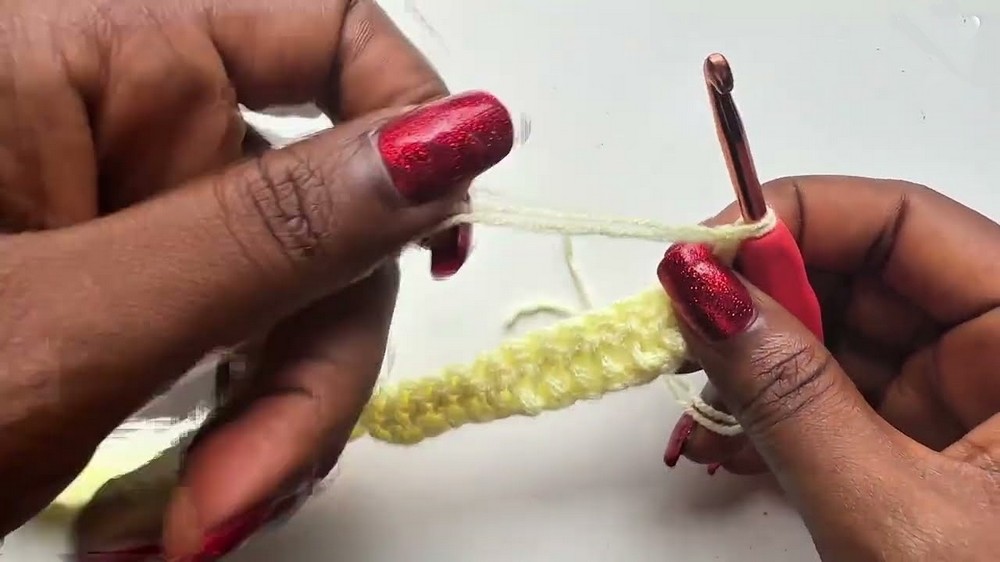
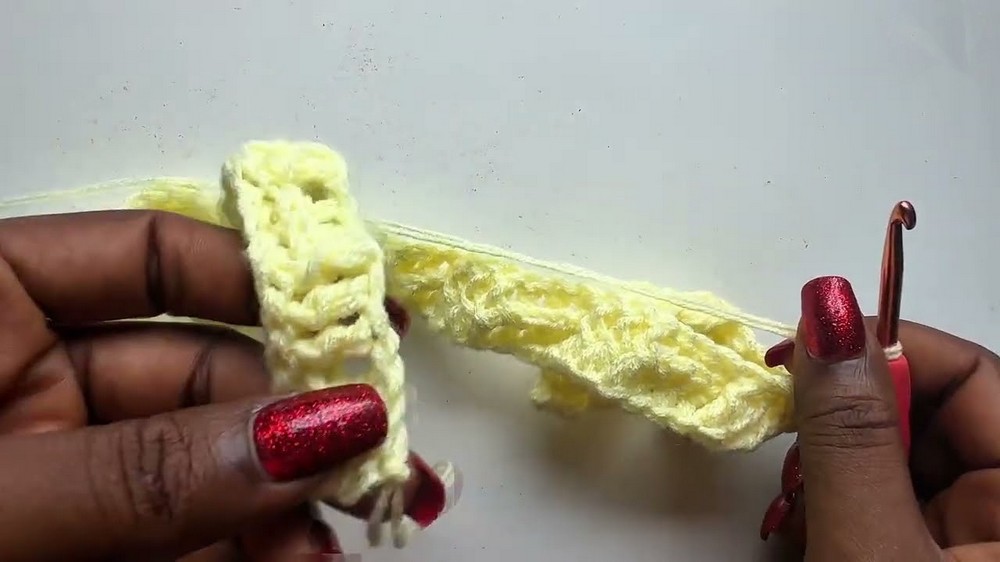
Step 3: Front Post and Back Post Double Crochet
- Row 2: Chain 2 (does not count as a stitch), and turn your work. Alternate between groups of three front post double crochets (FPDC) and three back post double crochets (BPDC) across the row.
- FPDC: Yarn over, insert your hook under the post of the previous row's stitch, pull through, and complete as a regular double crochet.
- BPDC: Yarn over, insert your hook from front to back behind the post of the stitch, yarn over, pull around the post, and complete as a regular double crochet.
- All Even Rows: Continue alternating FPDC and BPDC in groups of three, repeating the pattern across your row (front post followed by back post sections).
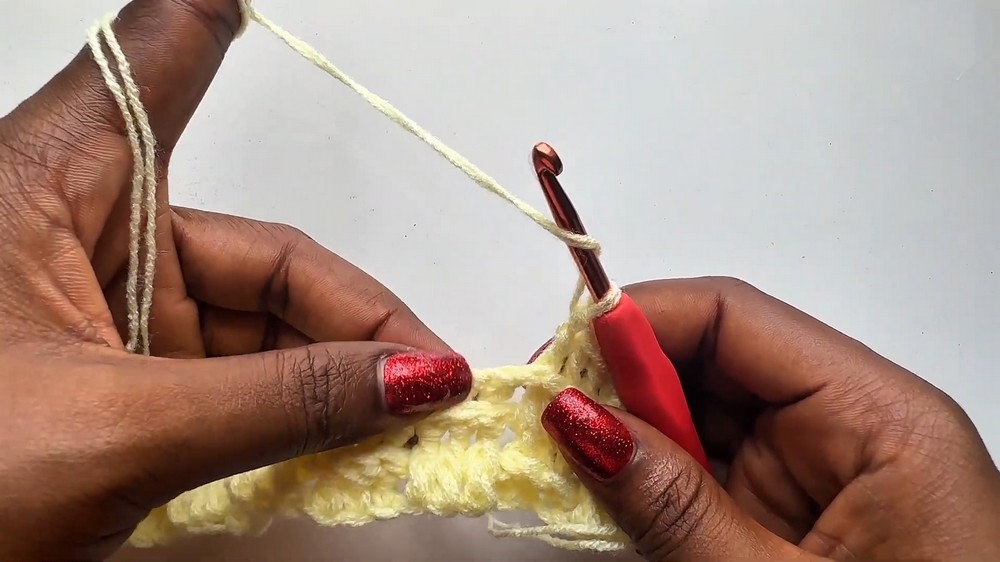
Step 4: Yarn Color Changes
Switch yarn colors as per the following breakdown for a 17-inch top:
- Yellow Color: Crochet rows until the work measures 8 inches.
- White Color: Make 2 rows (approximately 1-1.2 inches).
- Black Color: Crochet rows until the work measures an additional 8 inches (from the end of the white section).

To change colors:
- End your last stitch with the current color by pulling through two loops on the hook.
- Pick up the new color, yarn over, and pull through the two remaining loops. Continue crocheting with the new yarn.
Step 5: Reductions
Once the full body length reaches your underarm measurement (e.g., 10 inches for underarm length):
- Begin reducing at both ends of every row.
- Reduction at Row Start: Yarn over, insert hook into the first stitch, pull up a loop, insert hook into the next stitch, yarn over again, pull through all loops.
- Reduction at Row End: Yarn over, insert hook into the second-to-last stitch, pull up a loop, insert hook into the last stitch, yarn over again, pull through all loops.
- Continue reducing until the top ends at your desired neckline width.

Step 6: Single Crochet Edging
Add a clean finish to the bottom edge:
- Chain 1 at the end of the final black section.
- Place one single crochet into each stitch across the bottom hem.
- To crochet SC: Insert hook, pull up a loop, yarn over, pull through both loops.
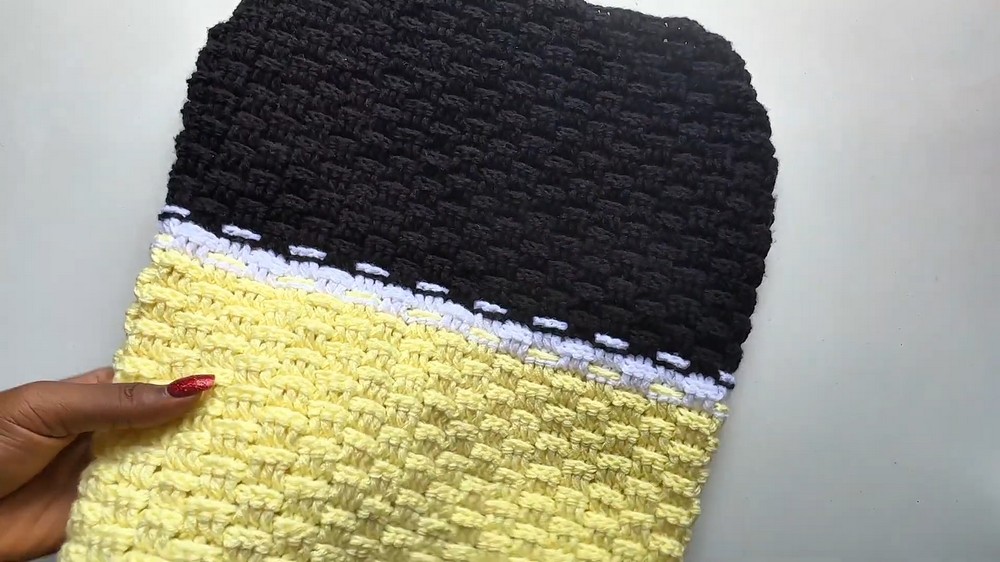
Tip: For increased durability, repeat a second row of SC if preferred before securing yarn ends.
Step 7: Back Lace Panel
For the back lace-up panel:
- Row 1: Begin with two half-double crochets (HDC) per row along the edges where the lace will thread.
- To crochet HDC: Yarn over, insert hook, pull up a loop, yarn over again, pull through all loops.
- Row 2: Repeat Row 1.
- Row 3: Create holes: Chain 1, skip two stitches, and place an HDC in the third stitch. Repeat across to make open spaces for lace threading.
- Row 4: Work two HDC into each hole and one HDC in the regular stitches.

Repeat this panel design on both sides of the back.
Step 8: Lace-Up
- Crochet a rope or chain measuring 150-200 chains (depending on desired length). Create a thicker rope using slip stitches along the chain, worked through the back loops only for stability.
- Thread the laces through the holes in a crisscross pattern for a corset-style back.
Customization Ideas
- Color Blocking: Change the color distribution or alternate rows for a striped look.
- Longer Silhouette: Add more rows to extend the full length below the waistline.
- Thicker Straps: Double the chain size for sturdier lace straps.
- Open Back vs. Tight Fit: Adjust lace tension to create varying styles.
Conclusion
Congratulations on completing your halter neck top. The final garment features a stylish stripe design, a corset-style lace-up back, and a flattering neckline. This versatile project offers opportunities for personalization while practicing foundational crochet techniques like FPDC, BPDC, slip stitches, and half-double crochet rows.

Important Remarks
- Secure all yarn tails by weaving them into the final stitches using a tapestry needle.
- Verify that both back panels have an equal number of stitches and holes to ensure symmetry.
- If the fit feels too wide or loose, continue reductions for a closer fit.
Thank you for following this pattern, Enjoy experimenting with various yarn colors and sizes to make it uniquely yours.