
Vibrant Free Crochet Spiral Sweater Pattern For Fall Fashion
Treat yourself to cozy fashion with this free crochet spiral sweater pattern that delivers comfort and a beautiful spiral look.
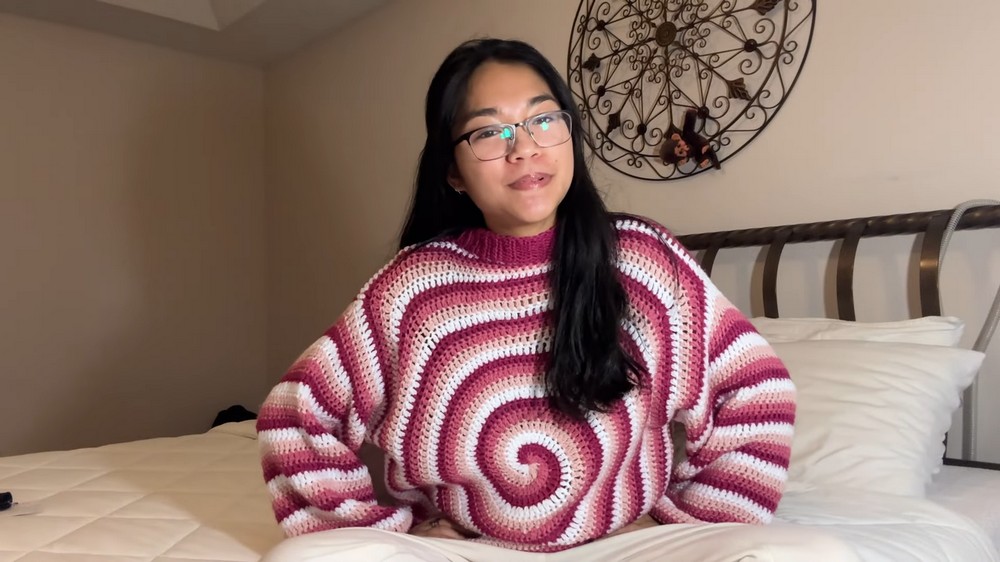
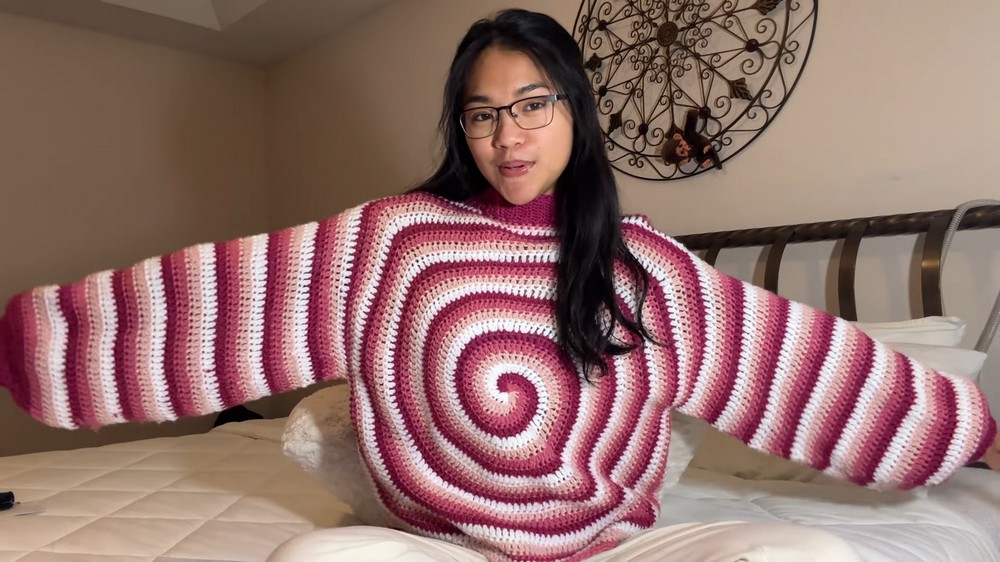
Making your own crochet spiral sweater is like turning yarn into pure magic. This sweater is not just another piece to keep you warm, it's something special. The way the yarn swirls in a mesmerizing spiral gives it a lively and unique appearance that will leave everyone asking, "Where did you find that?" The best part? Anyone can make it, even if you're just starting with crocheting. This sweater has soft, warm, and cozy vibes that feel like a hug on a chilly day. It's made from two panels sewn together, with sleeves and cuffs that are simple to add. The spiral shape makes it stand out from anything else you'll see, and you can use your favorite colors to make it completely your own.
Charming Free Crochet Spiral Sweater Pattern For Daily Comfort

Whether you want something bright and cheerful or calm and elegant, this project gives you the freedom to show off your style. You can customize it to fit people of all ages-kids, teens, or adults. Plus, the turtleneck collar gives it that extra charm, making it perfect for cozying up on winter mornings or stepping out in style. The best part is that you don't need to be an expert in crochet. With just a few basic stitches, a hook, and some colorful yarn, you can bring this sweater to life.
This wonderful spiral sweater lets you enjoy the process of making something beautiful, and once it's done, you'll have an amazing piece to wear or gift to your loved ones. It's more than just a sweater-it's a burst of color, comfort, and joy that you'll feel proud to wear.

Lovely Crochet Spiral Sweater Pattern
Skill Level: Intermediate
This pattern guides you through creating a visually stunning spiral sweater, from forming spiral panels to assembling the final garment. The sweater is a versatile and cozy handmade piece that makes a perfect addition to any wardrobe. Follow these detailed instructions, which are suitable for crocheters familiar with techniques like chaining, slip stitch, single crochet, double crochet, half double crochet, and triple crochet.
Materials
- Yarn:
- Weight: 4 medium weight acrylic yarn.
- Approximate quantity: 4 skeins, 200 g each (adjust based on size). Suggested colors: Dark pink, light pink, rose, and white.
- Crochet Hook: 5mm.
- Extras: Stitch markers, scissors, yarn needle, measuring tape.
- Optional: Steamer for blocking your pieces.
Step by Step Instructions
1. Creating Spiral Panels
You will need two spiral panels: one for the front and one for the back.
Foundation (Row 1)
- Begin with a magic ring.
- Hold the yarn and create a twist to form an "X" over your fingers.
- Slide your hook under the loop and pull the working yarn through, then chain 1 to secure the loop.
- Crochet the first round:
- In the ring, create the following sequence: single crochet (SC), half double crochet (HDC), double crochet (DC), double crochet (DC).
- Repeat this sequence for all four colors in your project. Slip stitch to join the round and close the magic ring.

Increasing the Spiral (Rows 2-20)
Increase rows evenly to form the base of the spiral. Follow the guideline below for a medium sized sweater:
- Row 2: (2DC in the first stitch, 1DC in the next stitch) - repeat across.
- Row 3: (2DC in one stitch, DC in the next 2 stitches).
- Row 4-5: Double crochet normally, adjusting increases as required for size.

Repeat the increase patterns in subsequent rows until the spiral measures your desired diameter:
- Small: 18 inches.
- Medium: 19 inches.
- Large: 22 inches.
- Extra Large: 24 inches.
To measure, use a tape measure across the widest point of the spiral panel. Adjust your rows to fit precise measurements.
2. Tapering the Panels
Once the spiral reaches the size for your chosen sweater, begin shaping the corners to convert the spiral into square panels.
Row 1 of Tapering
- Work increase, triple crochet, increase for the first 3 stitches.
- Divide remaining stitches symmetrically across the row:
- Example: For 43 remaining stitches:
- 8DC, 9HDC, 9SC, 9HDC, 8DC.
- Example: For 43 remaining stitches:

Row 2
- With 48 stitches available (due to increases in Row 1):
- Work: (DC, increase, trip. crochet, increase, DC) in 5 stitches, leaving 43 stitches remaining.
- Repeat symmetry: 8DC, 9HDC, 9SC, 9HDC, 8DC.

Row 3-5
Repeat the tapering sequence as described, accounting for increased stitch counts due to earlier rows. Each corner will form gradually into sharper edges, resulting in square panels.
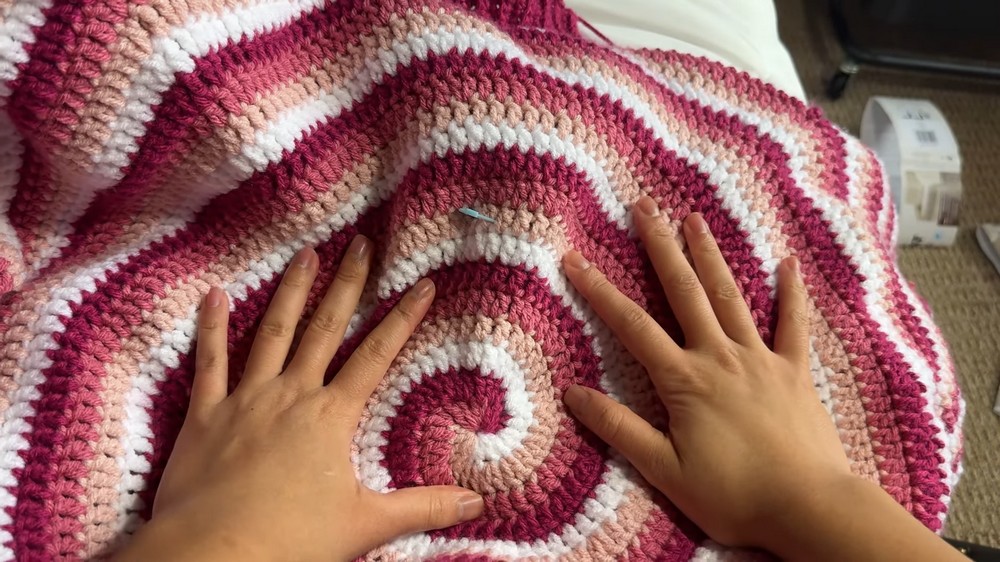
3. Assembling the Panels
After tapering off both panels into squares, sew them together.
Sewing the Sides
- Place panels with the wrong sides facing outward.
- Use stitch markers to align the sides perfectly; add them at 5 to 10 stitch intervals.
- Using a yarn needle and matching yarn, sew seam lines up the sides but leave openings for the armholes.

Sewing the Shoulders
- Allow 15-18 stitches on each side for the neckline.
- Use the same sewing technique to secure the shoulder seams.
After sewing, turn the sweater right side out.
4. Adding Sleeves
Sleeves are crocheted directly into the armhole openings.
Start the Sleeve
- Attach the first color at the armpit for a less visible seam.
- Insert your hook into the edge of the armhole seam and make a slip knot.
- Chain three to represent the starting DC of the row.
- Continue double crochet stitches in each stitch around the armhole edge.
Building Sleeve Length
Continue working rounds of double crochet to build the sleeve. For medium size, create 27 rows or adjust based on your preferred length.
Adding Cuffs
- Attach yarn for the cuff at the bottom edge of the sleeve.
- Chain six (or more for a longer cuff); turn your work.
- Work single crochet in back loops only for a ribbing effect:
- Skip the turning chain, single crochet into the back loops of each chain.
- Slip stitch onto the sleeve edge to attach ribbing after each row.
- Continue ribbing all the way around the sleeve. Sew ribbing ends together using matching yarn.
5. Adding the Collar
The collar ribbing creates a clean edge on the neckline and can easily be adjusted for size (loose, high, or turtleneck styles).
Determine Collar Height
For a turtleneck like collar, work 8 stitches high. Chain nine initially for a turning chain.
Crochet Ribbing
- Attach yarn at the corner of the back panel's neckline.
- Chain nine and work single crochet across, skipping the last chain for turning.
- Slip stitch to attach the ribbing at the neckline after each row.
Repeat this pattern around the neckline, going into the appropriate edges at corner transitions.
6. Finishing
Weaving Ends
Use a yarn needle to weave in and hide any tail ends. Tug the threads gently to prevent distorting stitches.
Blocking
For best results, block the sweater using a steamer. Flatten it out on a dry surface to achieve even tension throughout the panels and sleeves.
Final Words
Congratulations on completing your crochet spiral sweater. This beautifully crocheted piece combines warmth, creativity, and style. Thanks to its customizable size, you can create sweaters for children, adults, or anything in between. The tapered spiral adds depth and texture, making your sweater a showstopper.
Tips for Maintenance
- Washing:
- Hand wash or use the delicate cycle in cold water. Choose a mild detergent suitable for crocheted items.
- Drying:
- Avoid machine drying. Lay flat in its natural shape on a flat surface to preserve elasticity and structure.
- Storage:
- Fold neatly and store in a cool, dry place. Avoid direct sunlight to prevent fading of yarn colors.
- Repairing Snags:
- If your sweater snags, gently pull the loop from the inside to secure it, then use your hook to create a clean finish.
This spiral crochet sweater seamlessly blends functional craftsmanship with artistic flair. Whether worn casually or dressed up, it's guaranteed to be a meaningful and memorable addition to any wardrobe. Share pictures of your completed project with your friends and fellow crafters, and enjoy wearing a sweater you made with your own hands.
