Free Crochet Long Sleeved Top Pattern to Try Now
Wear a cozy, stylish long-sleeved crochet top with this free pattern, perfect for layering during cooler days and personalizing to match your unique style.
A handmade crochet long-sleeved top is a versatile and functional wardrobe piece that offers endless styling possibilities. With a free crochet long-sleeved top pattern, you have the opportunity to personalize every detail to suit your needs and preferences. This lightweight yet cozy garment is perfect for breezy evenings or for layering during the changing seasons. Pair it with high-waisted jeans for a casual day out or layer it over a dress for a chic, bohemian vibe.
Must-Try Free Crochet Long Sleeved Top Pattern for Cozy Days
Using soft, durable yarn ensures lasting comfort while maintaining its elegant structure. Long sleeves allow it to effortlessly transition between cooler and warmer weather, making it a practical choice for year-round wear. The process of creating this top will result in a custom, wearable piece that not only reflects your personal style but also provides comfort and functionality.

Materials
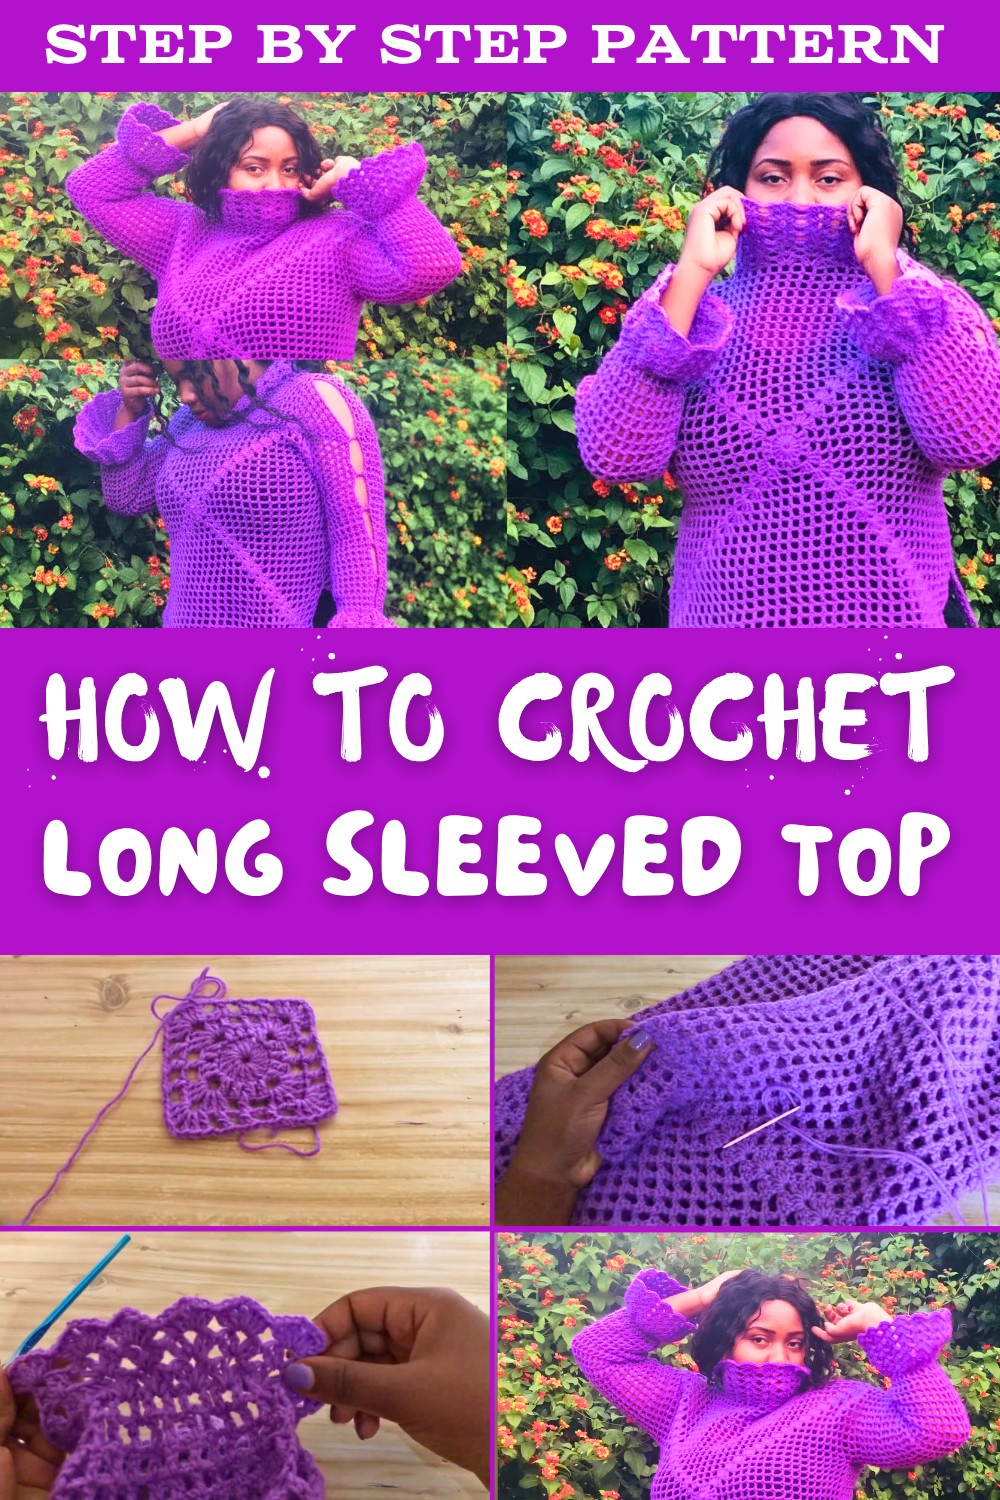
- Yarn: Winter King 4-ply yarn (Made in Kenya) or any 4-ply yarn of your choice. Ensure the yarn is soft and comfortable for wearable items.
- Hook: Crochet hook suitable for 4-ply yarn (recommended hook size: 4.0 mm).
- Darning needle: Used for sewing the top together and weaving in ends.
- Stitch markers: At least 4, useful for marking armholes and neck areas.
- Scissors
Gauge
Gauge is important for sizing. To maintain consistency:
- 10 x 10 cm swatch = 18 double crochets x 10 rows.
Adjust hook size if your tension is too loose or tight.
Finished Size
This pattern is designed for a shoulder-to-shoulder measurement of 18 inches with 2 extra inches for ease.
- Front panel width: 20 inches
- Sleeve length: 25 rows
- Neck circumference: Approximately 18 inches after shell pattern.
You can customize the size by measuring your body and adjusting the panel lengths and widths accordingly.
Tips for Customization
- Neck Opening: Mark a larger neck space if you prefer a wider neckline.
- Sleeve Length: Add more rows for longer sleeves or stop earlier for shorter ones.
- Yarn Colors: Mix colors for a striped or color-block design.
- Shell Pattern Size: Adjust shells by increasing or decreasing the number of double crochets for a chunkier or lighter look.
Special Techniques
- Magic Ring: Used to start the top panel. Creates a neat and adjustable center.
- Shell Pattern: Involves working multiple double crochets, chains, and double crochets into the same space to form decorative edges and corners.
- Slip Stitch Joining: Seamlessly joins rows or panels without visible seams.
Pattern Instructions
1. Front and Back Panels
Start with two identical panels that will form the front and back of the top.
Step 1:
Start with a magic ring.
- Make a magic ring by holding the long part of your yarn over the short one, inserting the hook, pulling up a loop, and chaining three.
Step 2:
Row 1 (Circle Base):
- Work 16 double crochets into the magic ring. The chain-3 counts as the first double crochet.
- Pull the short yarn strand to close the ring tightly. Slip stitch into the top of the chain-3 to finish the row.

Step 3:
Row 2-20 (Building Panel):
- Row 2: Chain 3, then double crochet into the next 3 stitches (count the chain-3 as the first stitch).
- Chain 2, double crochet in the next 4 stitches. Continue this pattern until the end of the row. Slip stitch to the chain-3 to join.

Repeat similar increases, marking out shell corners and gradually building rows until the panel measures 20 inches widthwise.
Note: The panel should lie flat (minor curling is fine). Add more rows if needed to fit your measurements.
2. Joining the Panels
Step 1: Mark Armholes and Neck Spaces
- Use stitch markers to leave space for the armholes and neck area.
- Shoulders: Mark 10 stitches from the shell corners.
- Sleeves: Mark 7 inches down on the sides.

Step 2: Sew the Shoulders
- Join the shoulder seams using a darning needle.
- Work through 4 stitches from the neck opening for each side.

Step 3: Sew the Sides
- Start at the marked armholes and sew downwards, leaving 5 stitches unsewn at the bottom for movement ease.
3. Sleeves
Step 1: Attach Yarn
- Attach yarn at the armhole using a slip knot.
Step 2: Begin Mesh Pattern
- Row 1: Chain 2 and double crochet around the armhole. Use chain-2 spaces between double crochets for the mesh texture.
- Row 2-25: Repeat the mesh pattern by chaining 2 and making double crochets until the sleeve reaches the desired length.

Step 3: Shell Pattern at the Wrist
- After completing the mesh rows, begin the shell pattern for a decorative cuff.
- Shell: Two double crochets, chain 2, two double crochets into the same space.
Complete 7 rows of shells for the sleeve cuffs for added texture and finish.
4. Neckline
Step 1: Attach Yarn
- Start at the back of the neckline and attach yarn using a slip knot.
Step 2: Shell Pattern
- Work shells around the neckline, skipping spaces evenly.
- Each shell consists of two double crochets, chain 2, two double crochets in the same space.

Step 3: Build Rows
- Continue working shells for 7 rows to create a lovely textured neckline.
Conclusion
Your crochet long sleeve top is now complete! The finished design is cozy, stylish, and versatile, ideal for winter or chilly days. The flowy sleeves and shell-pattern edges add a touch of elegance, while the neckline fits comfortably without being too tight.

Important Remarks
- Blocked Appearance: After finishing, block your top to even out stitches and improve drape.
- Sustain Your Tension: Keep consistent tension for neat stitches.
- Trial Fit: Try your top on before finalizing the neckline or sleeve lengths to ensure a perfect fit.