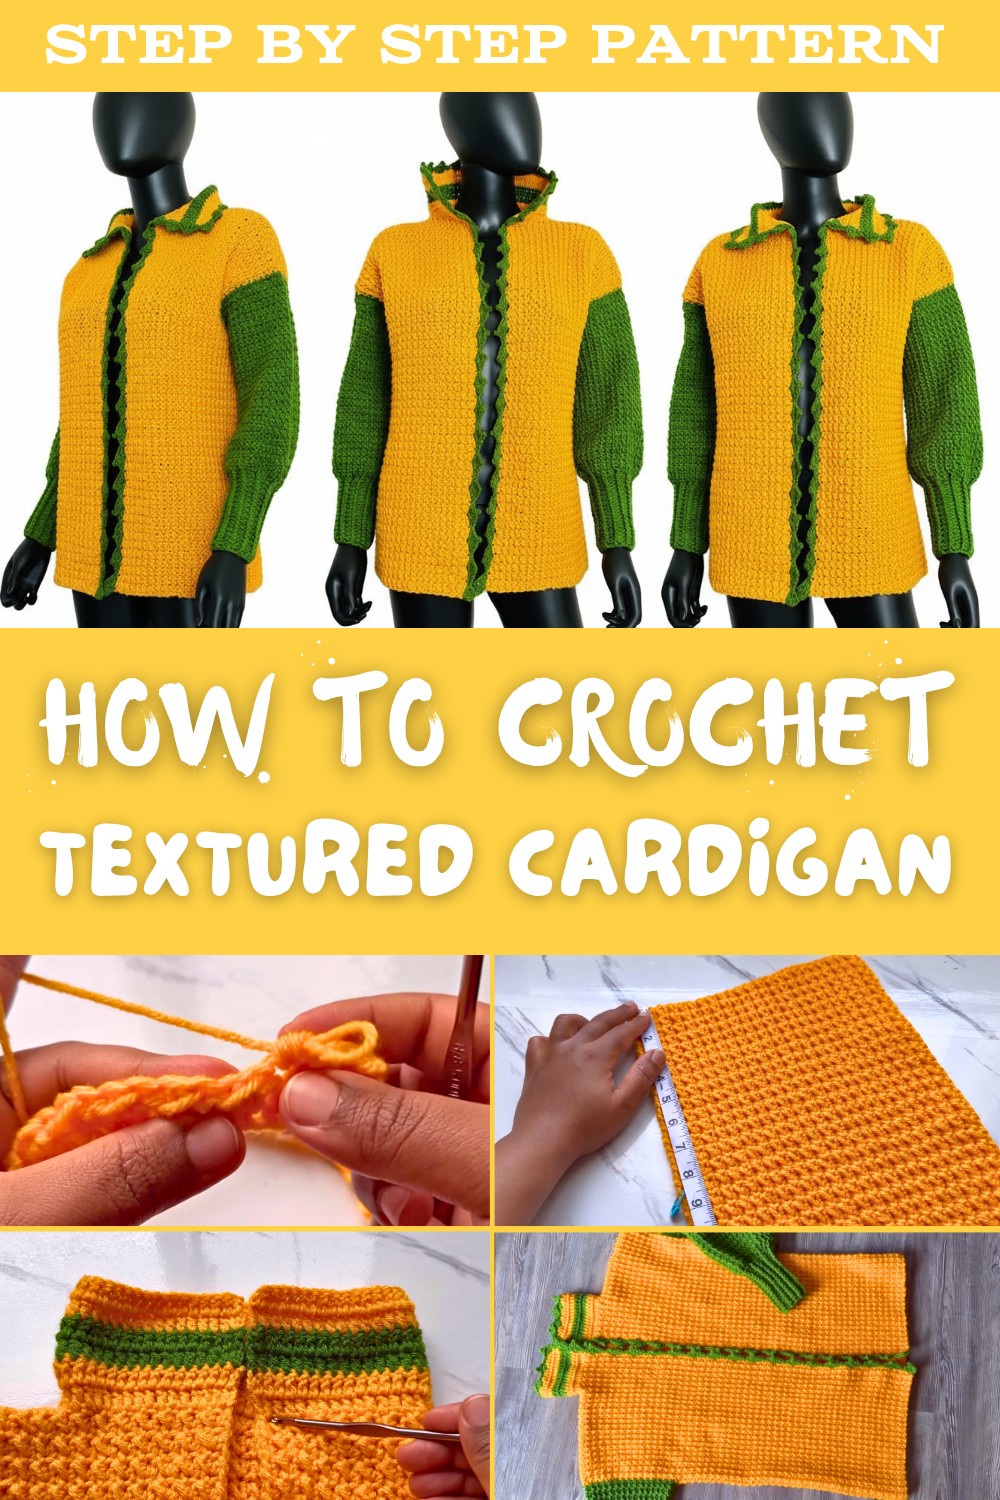
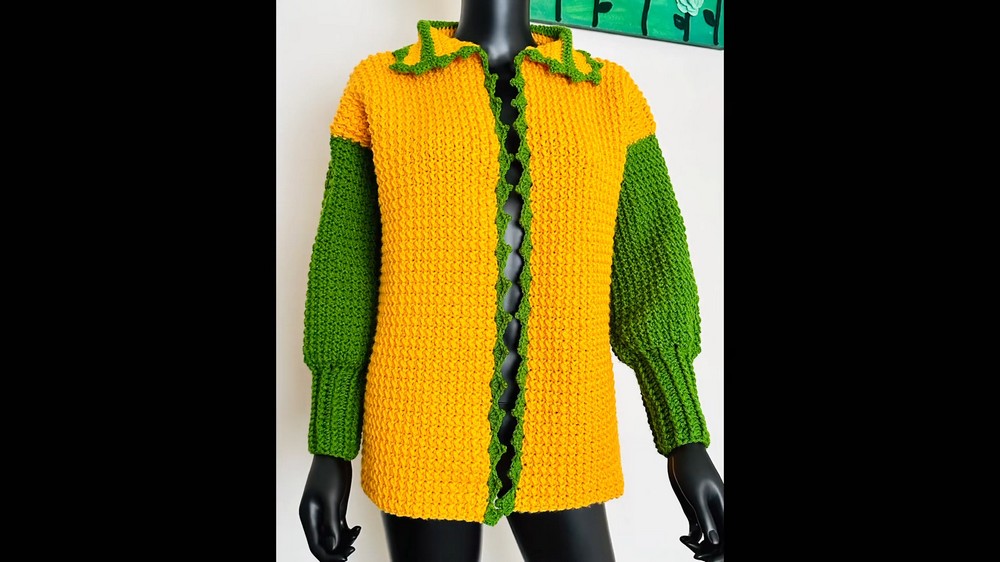
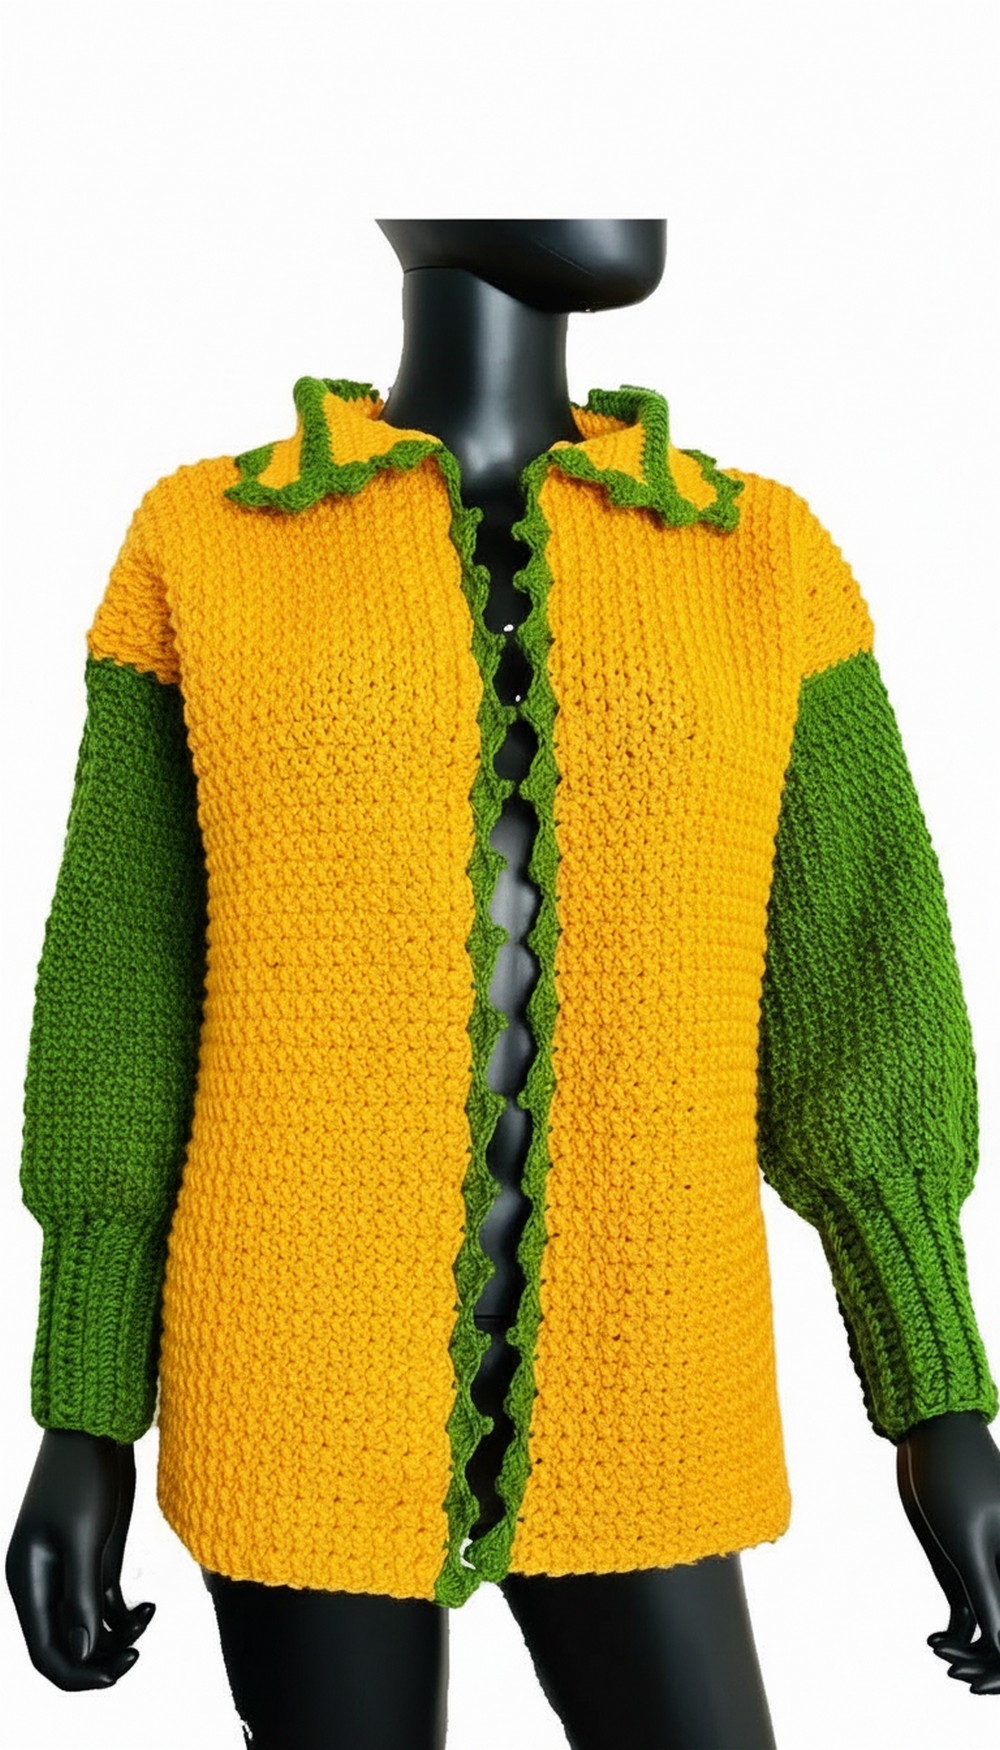
Modern Free Crochet Textured Cardigan Pattern That Feels Fresh
Turn your wardrobe with this Crochet Textured Cardigan Pattern, featuring cozy textures and unique details that make every outfit feel cheerful and stylish.
Bouncy textures and playful patterns transform simple yarn into a cozy, eye-catching cardigan that’s full of character. A Crochet Textured Cardigan Pattern uses raised designs, bobbles, and ridges to add depth and fun, making each row an enjoyable little adventure.
Quick Free Crochet Textured Cardigan Pattern for Cozy Vibes
It’s a satisfying project because the tactile details keep your hands busy while the finished piece is perfect for layering on chilly mornings, casual outings, or just showing off your handmade flair. You can add oversized sleeves, quirky pockets, or an open-front twist for extra charm, or mix bright, contrasting colors to make every detail pop. Even a single skein of variegated yarn can turn this cardigan into a unique, standout wardrobe favorite.
Crochet Easy Textured Cardigan Pattern
Materials
- Yarn:
- Worsted weight yarn (Size 4). The creator uses multiple colors (Yellow, Green, etc.).
- Estimated yardage: 900-1200 yards, depending on size.
- Suggested brands: Red Heart Super Saver, or any medium weight yarn.
- Crochet Hook:
- Main body and general stitching: 6.0mm (J-10) hook.
- Ribbing: 5.5mm or 3.75mm (optional smaller hook) to achieve desired grip for the ribbing.
- Measuring Tape: For accurate sizing.
- Darning Needle: To join panels, sleeves, and weave in ends.
- Scissors: For cutting yarn.
- Optional Stitch Markers: To mark shoulder seams and armholes.
Skill Level
Intermediate to Advanced.
Required skills:
- Basic stitches: slip stitch, half double crochet (hdc), double crochet (dc).
- Even Moss Stitch knowledge or ability to alternate slip stitches and half double crochet (hdc).
- Ability to seam panels using slip stitches or single crochet.
Key Abbreviations (US Terminology)
- Ch: Chain
- St: Stitch
- Sl st: Slip stitch
- Hdc: Half double crochet
- Dc: Double crochet
- Sc: Single crochet
- Rep: Repeat
- FPdc: Front post double crochet
- BPdc: Back post double crochet
Special Notes
- Customization: The cardigan is customizable for any size. Simply use your shoulder-to-shoulder measurement plus 2 inches, and adjust the overall length by modifying the starting chain length or row count.
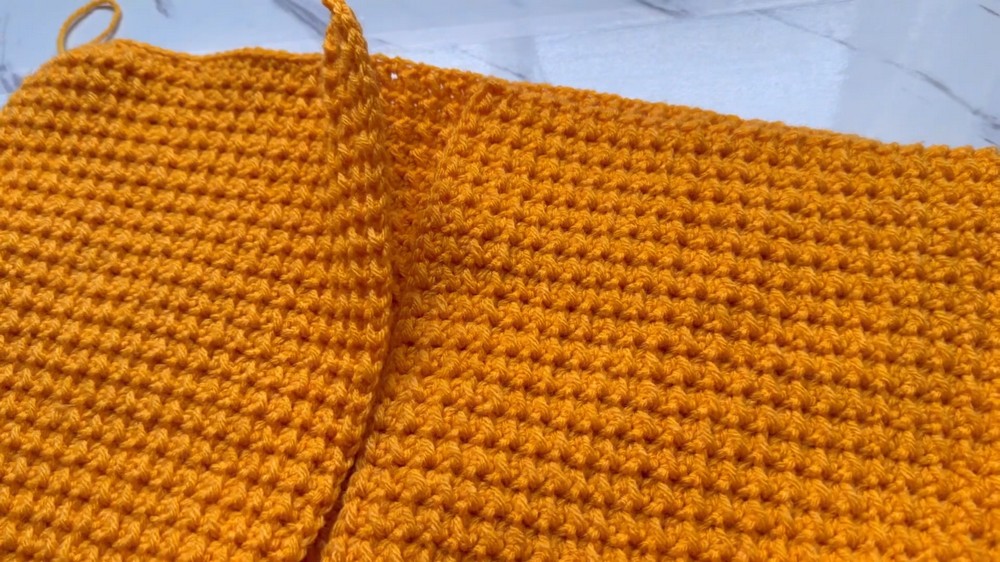
- Panels: The cardigan consists of 3 panels: the Back Panel and two Front Panels, sewn together and completed with sleeves, ribbing, and a collar edging.
- Tension Tip: Work the foundation chain with a slightly looser tension to ensure it is not tight.
- Yarn Management: Pay attention to yarn changes if using multiple colors; don’t pull too tight at color changes to avoid warping.
Step-by-Step Instructions
Panel Construction
Step 1: Front Panel (Work 2)
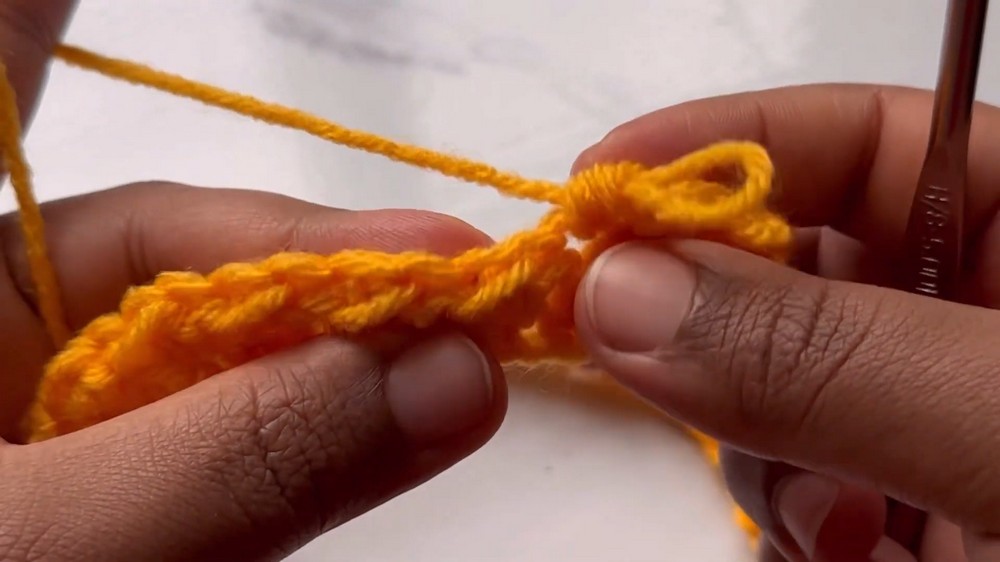
- Foundation Chain: Start with a slip knot and create a chain as long as your desired cardigan length (shoulder to desired hem length).
- E.g., for a cardigan 24½” long, ch 100 (or any even number).
- Row 1:
- Skip the first chain and turn your chain to work into the back bumps.
- Alternate stitches:
- Sl st into the 2nd ch.
- Hdc into the next ch.
- Alternate sl st, hdc until the end of the row.
- End the row with a sl st.
- Rows 2+:
- Ch 1, turn.
- Start the row with a sl st into the first st.
- Continue the Even Moss Stitch: Alternate sl st, hdc, ensuring each slip stitch corresponds to the slip stitches, and each hdc corresponds to hdc from the previous row.
- End every row with a sl st. This keeps edges straight.
- Rep Rows 2 until your panel measures half your shoulder-to-shoulder width (e.g., 10 inches for a 20-inch total measurement).
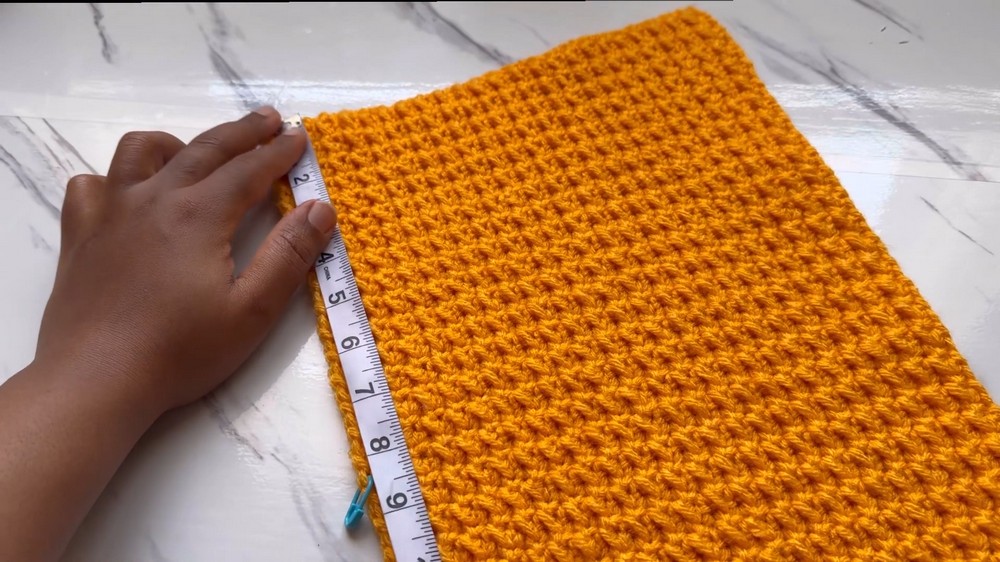
Number of Rows for Medium/Large: Approximately 25 rows for 10 inches wide front panels.
Step 2: Back Panel
- Attach yarn to the last row of the first front panel to begin the back.
- Work the Armholes: Continue the same Even Moss Stitch. To create the armhole gaps:
- Measure the armhole size. For example, skip 8 inches (or 30 stitches) for the armhole.
- Ch 30, or the same number of stitches skipped, ensuring the chain remains loose.
- Attach the chain to the opposite end by continuing the row in Even Moss Stitch, working into the skipped stitches.
- Continue to rep the Even Moss Stitch pattern across the rows.
- Work until the back panel matches the row count (e.g., 50 rows for Medium/Large).
- Width of Back Panel: Should measure the combined width of both front panels (e.g., 20 inches for Medium/Large).


Step 3: Second Front Panel
- Repeat the instructions for the First Front Panel, including the armholes, attaching yarn at the appropriate point.
- Work Even Moss Stitch in rows until the row count matches the other panels (e.g., 25 rows).
Assembly
Joining Shoulder Seams
- Lay the front panels and back panel flat, aligning the edges.
- Use a darning needle or crochet hook to seam the shoulders, leaving neckline space (e.g., leave 6-7 inches open for the neckline).
- Seam with sl st or a sc join along the edges.
Sleeves
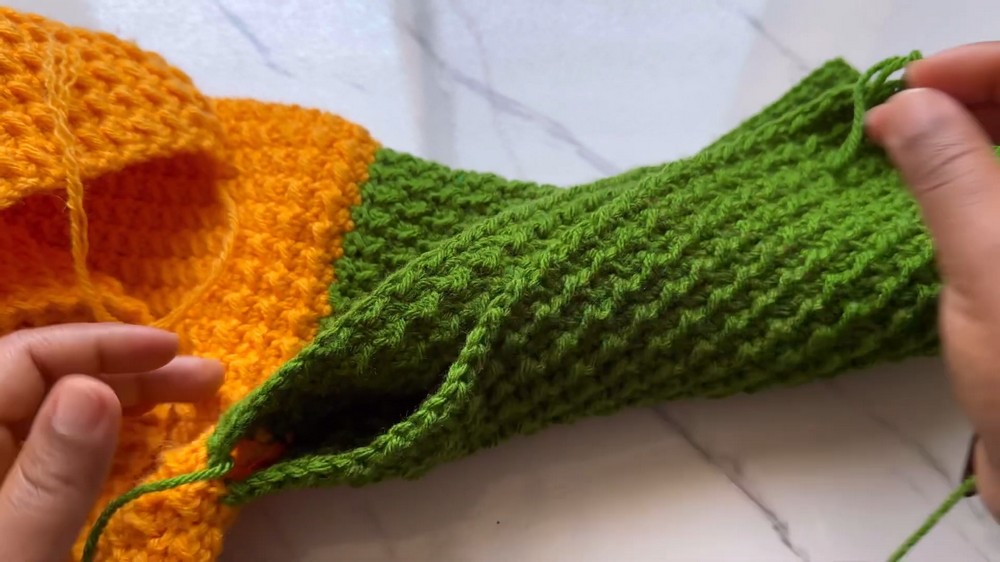
- Attach Yarn: Attach yarn at the bottom edge of the armhole.
- Foundation Chain:
- Create a chain as long as desired sleeve length, keeping in mind ribbing adjustments (e.g., 50 chains).
- Work Even Moss Stitch back and forth across the armhole, attaching rows with sl st to the armhole after every completed row.
- Continue Rows: Work the sleeve with Even Moss Stitch pattern, ensuring uniform tension.
- Join Sleeve Seam: Fold the sleeve lengthwise and join with sl st or sc along the edges.
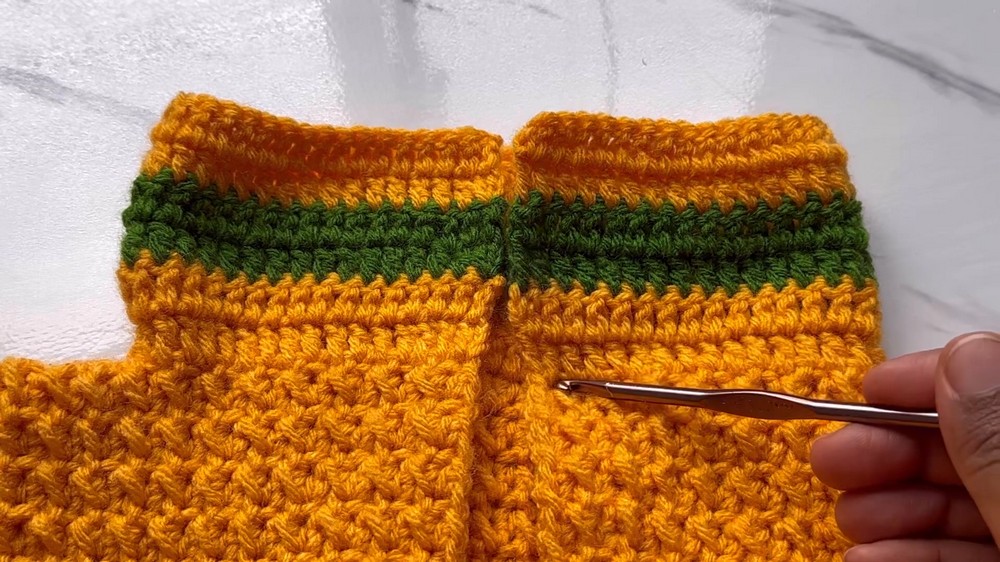
Ribbing
Ribbing for Sleeves
- Attach yarn to the wrist edge of the sleeve.
- Chain 2 and work FPdc and BPdc alternately around the sleeve.
- Rep FPdc/BPdc rows to form ribbing (e.g., 15 rows for Medium/Large).
Ribbing for Neckline and Edges
- Work dc rows around the neckline and front opening. Add optional collars for extra length.
- Continue to add FPdc/BPdc ribbing rows around the edges until your desired textured finish is achieved.
Edging (Optional)
Add Shell Stitch Edging around the neckline and bottom hem for a decorative finish:
- Work 3 dc, ch 4, sl st, 2 dc into the same space to form shells.
- Skip 2 sts and repeat along the desired edges.
Finishing
- Weave in all loose ends using a darning needle.
- Block the cardigan to align edges and open up the texture.
- Trim fringe or loose threads. Ensure ribbing and panels are symmetrical.

Conclusion
This textured cardigan pattern offers warmth and style through its chic combination of the Even Moss Stitch and ribbing details. The cardigan is versatile, allowing customization for size, sleeve length, and colors. Whether worn as a cozy layer or a statement piece, this project is a fun and rewarding addition to your handmade wardrobe.
Pattern Corrections and Tips
- Slip Stitch Placement: Always ensure the slip stitch is worked into the designated stitch for even edges.
- Tension Consistency: For the sleeves, keep chaining loose to avoid puckering.
- Adjusting Sizes: Add/Remove rows for width or length to create additional sizing. For XL+, increase rows or foundation chain length.